In this article, we are going to learn how to build a corner closet, in an existing room, from start to finish. Note that this is not a large walk in closet but rather a small pocket closet with shelves to put items away neatly and keep everything organized. Contrary to what you might believe,…
Building a corner closet in an existing room requires careful planning so that you can design the closet and leave enough space for closet shelf, shelving and the rest of the items that you want to put into your closet.

How to build a corner closet
Building a corner closet in an existing room is not as difficult as it might seem. The key is to build your corner closet before the drywall goes up so that there is enough space for the framing lumber and electrical outlets.
The first step is to build your corner wall, which will be recessed into the existing wall. This means that you will need to build two walls: one on either end of your closet opening and one in the middle. The walls can be built using 2x4s or larger framing lumber, depending on how large your closet is going to be.
The easiest way to do this is by using the corner braces that come with your box of framing lumber. These are essentially two pieces of wood that connect together on one side and then slide into a T-shaped notch on the other side (or vice versa). Place these in place where you want them to go and use a hammer or mallet to push them together until they snap into place. This will ensure that your corners are square and will hold up well under load when you put shelves or other items on top of them later.
Next, use 2x4s or other framing lumber (depending on how large
A corner closet is a great way to maximize space in an existing room. In this video, you’ll learn how to build a corner closet in an existing room. You’ll see how to frame the back wall of the closet and install drywall. You’ll also learn how to frame around windows and doors, as well as install trim work around the door opening. Afterward, you can start building the interior walls of your new closet.
The first step in building a corner closet is to install the baseboard, which will be wrapped around all of the walls in the room. Next, attach drywall to the ceiling at corners using an L-shaped corner bracket. The drywall should extend beyond the bracket and be cut off so it’s flush with the drywall on adjacent walls.
Next, build a frame for your closet out of wood studs and spruce up this frame with 1/4-inch plywood panels. Use plywood instead of drywall because it can support more weight and won’t sag over time. Attach these panels to your wooden frame by screwing them into place with 2-inch screws.
After you’ve finished building your frame, apply joint compound (a type of plaster) onto the entire surface using a trowel or putty knife. This compound will fill any gaps between joints between wall panels and create a uniform appearance when painted over later on in the process. Wait until this compound has dried completely before applying paint or wallpaper to cover any seams or holes in your walls.

The first thing to do is measure the space and make sure it’s big enough for the closet you want. The next step is to decide whether you want to keep the existing door between the two rooms or build a new one. If you keep the existing door, you’ll have to remove it and reinstall it after the closet is built. If you decide to build a new door, do it now while everything is open so you can easily access it later on when it’s time to install your closet system.
Next, if there’s an adjacent wall and flooring around where your closet will go, you’ll need to add studs where needed so that they’re continuous from side-to-side and top-to-bottom. If there isn’t an adjacent wall or flooring, then just run your studs from side-to-side and top-to-bottom around where your closet will go.
Once all of your studs are up, attach them together with 2x4s every 16 inches on center as shown above left so that they become one strong unit that will be able to support all of your weight (and shoes). Then
If you have a corner closet and want to add shelves, this is a great way to do it. Start by measuring the length of the wall. Then measure the length of your shelf and cut it down to size. Next, measure the width of your closet and add 1/2 inch to each side to account for the thickness of your wood. Cut two pieces at this width out of your wood and then cut them down to size again so that they fit on top of each other.
Cut a hole in each piece where you will be attaching them together using a jigsaw or circular saw. You can also use an electric drill with a spade bit if you don’t have access to either tool. Attach one board to the back wall using a nail gun or construction adhesive and place another board on top as shown above. Fill in any holes with spackling paste and let dry overnight before painting or applying any type of finish like varnish.
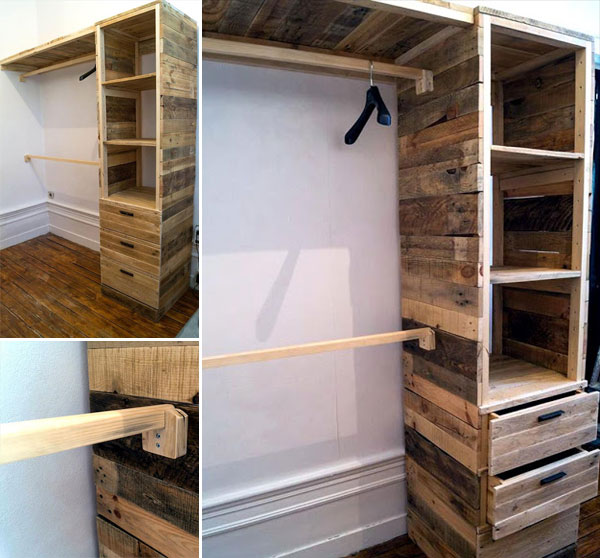
You can build a simple and sturdy corner closet shelf from 2x4s or 2x6s. The shelves are attached to the wall studs, so you don’t need to support the weight of clothing hanging on them.
In this article, we’ll show you how to build a corner closet in an existing room. We’ll talk about how to build a corner closet shelf for your clothes, how many shelves you need, and where to place them in the room.
You’ll want to make sure that the closet is well-ventilated by placing it near a window or opening into another room. You should also make sure that there’s plenty of space under the shelf so that air can circulate freely around your clothes.
There are several ways to build a corner closet shelf. You can build it in an existing room, or you can build it as part of a new room addition. If you want to add some space to your bedroom or office and don’t have the budget for a full addition, consider adding on a small bedroom or office instead.

The first step when building a corner closet shelf is to plan where you want to hang it. Measure the length and width of the wall where you want to put the shelf, then measure from the floor to the ceiling of that wall. This will give you an idea of how big your corner closet shelf will be and how much storage space it will provide.
If you’re building in an existing room, measure from each corner diagonally across from one another and mark where they intersect on the wall at each end of the room. These points will be where your corners will go for attaching your frame together with wood screws or nails.
Once you’ve marked out where your frame corners should go on the wall, use 4-inch wood screws or 16d finish nails at least 1 inch long to attach them together at each corner using a drill/driver or hammer and nail set (Image 1). Make sure each corner is sturdy
If you’re going to build a corner closet shelf in an existing room, you’ll need to know how to install a wall. There are two basic types of walls: concrete block and wood studs. For this project, we’ll use concrete blocks because they’re easy to work with and inexpensive.
In order for your corner closet shelf to be strong enough, the back wall must be made of solid concrete blocks. Concrete blocks come in different sizes and shapes, but the ones used here are called 8-inch by 8-inch by 16-inch (20 cm x 20 cm x 40 cm). These “standard” size blocks have larger openings than standard 4-inch by 8-inch by 16-inch (10 cm x 20 cm x 40 cm) blocks, making them easier to place in corners.
The wall can be built on top of the floor joists or on top of a ledger board (a piece of plywood that spans between the floor joists). The ledger board should be cut so that it fits tightly against the bottom plate at one end and extends about 1 inch beyond it at the other end.
How to Build a Corner Closet Shelf
In this article, we will learn how to build a corner closet shelf. A corner closet is one of the most efficient ways of using space because it can be used for storing things like winter clothes, blankets and other items that do not need much room. If you have an existing closet in your house or apartment that could use improvement, then building a corner shelf is one of the best ways to do so.
Building a corner shelf will not only help you save space but it can also add value to your property if you decide to sell it in the future.
If you want to build your own corner shelf, then follow these instructions:
1) Remove all furniture from the room where you want to install the new shelf. Remove any items from the walls as well so that there are no obstructions in front or behind where you want to place the new shelf.
2) Measure out where you want your new corner shelf to go on each wall where there will be an opening for it (make sure that there is enough room for people walking through). If there isn’t enough room for people walking through, then make sure that at least two feet of space is left between the edge of each wall and
Step 1: Mark the center of the closet. Measure the distance between the two walls and mark the center point with a pencil.
Step 2: Connect the mark to each wall with a straightedge. Use a level to make sure your lines are perfectly vertical. If they aren’t, adjust as needed until you have a perfect 90-degree angle between each wall.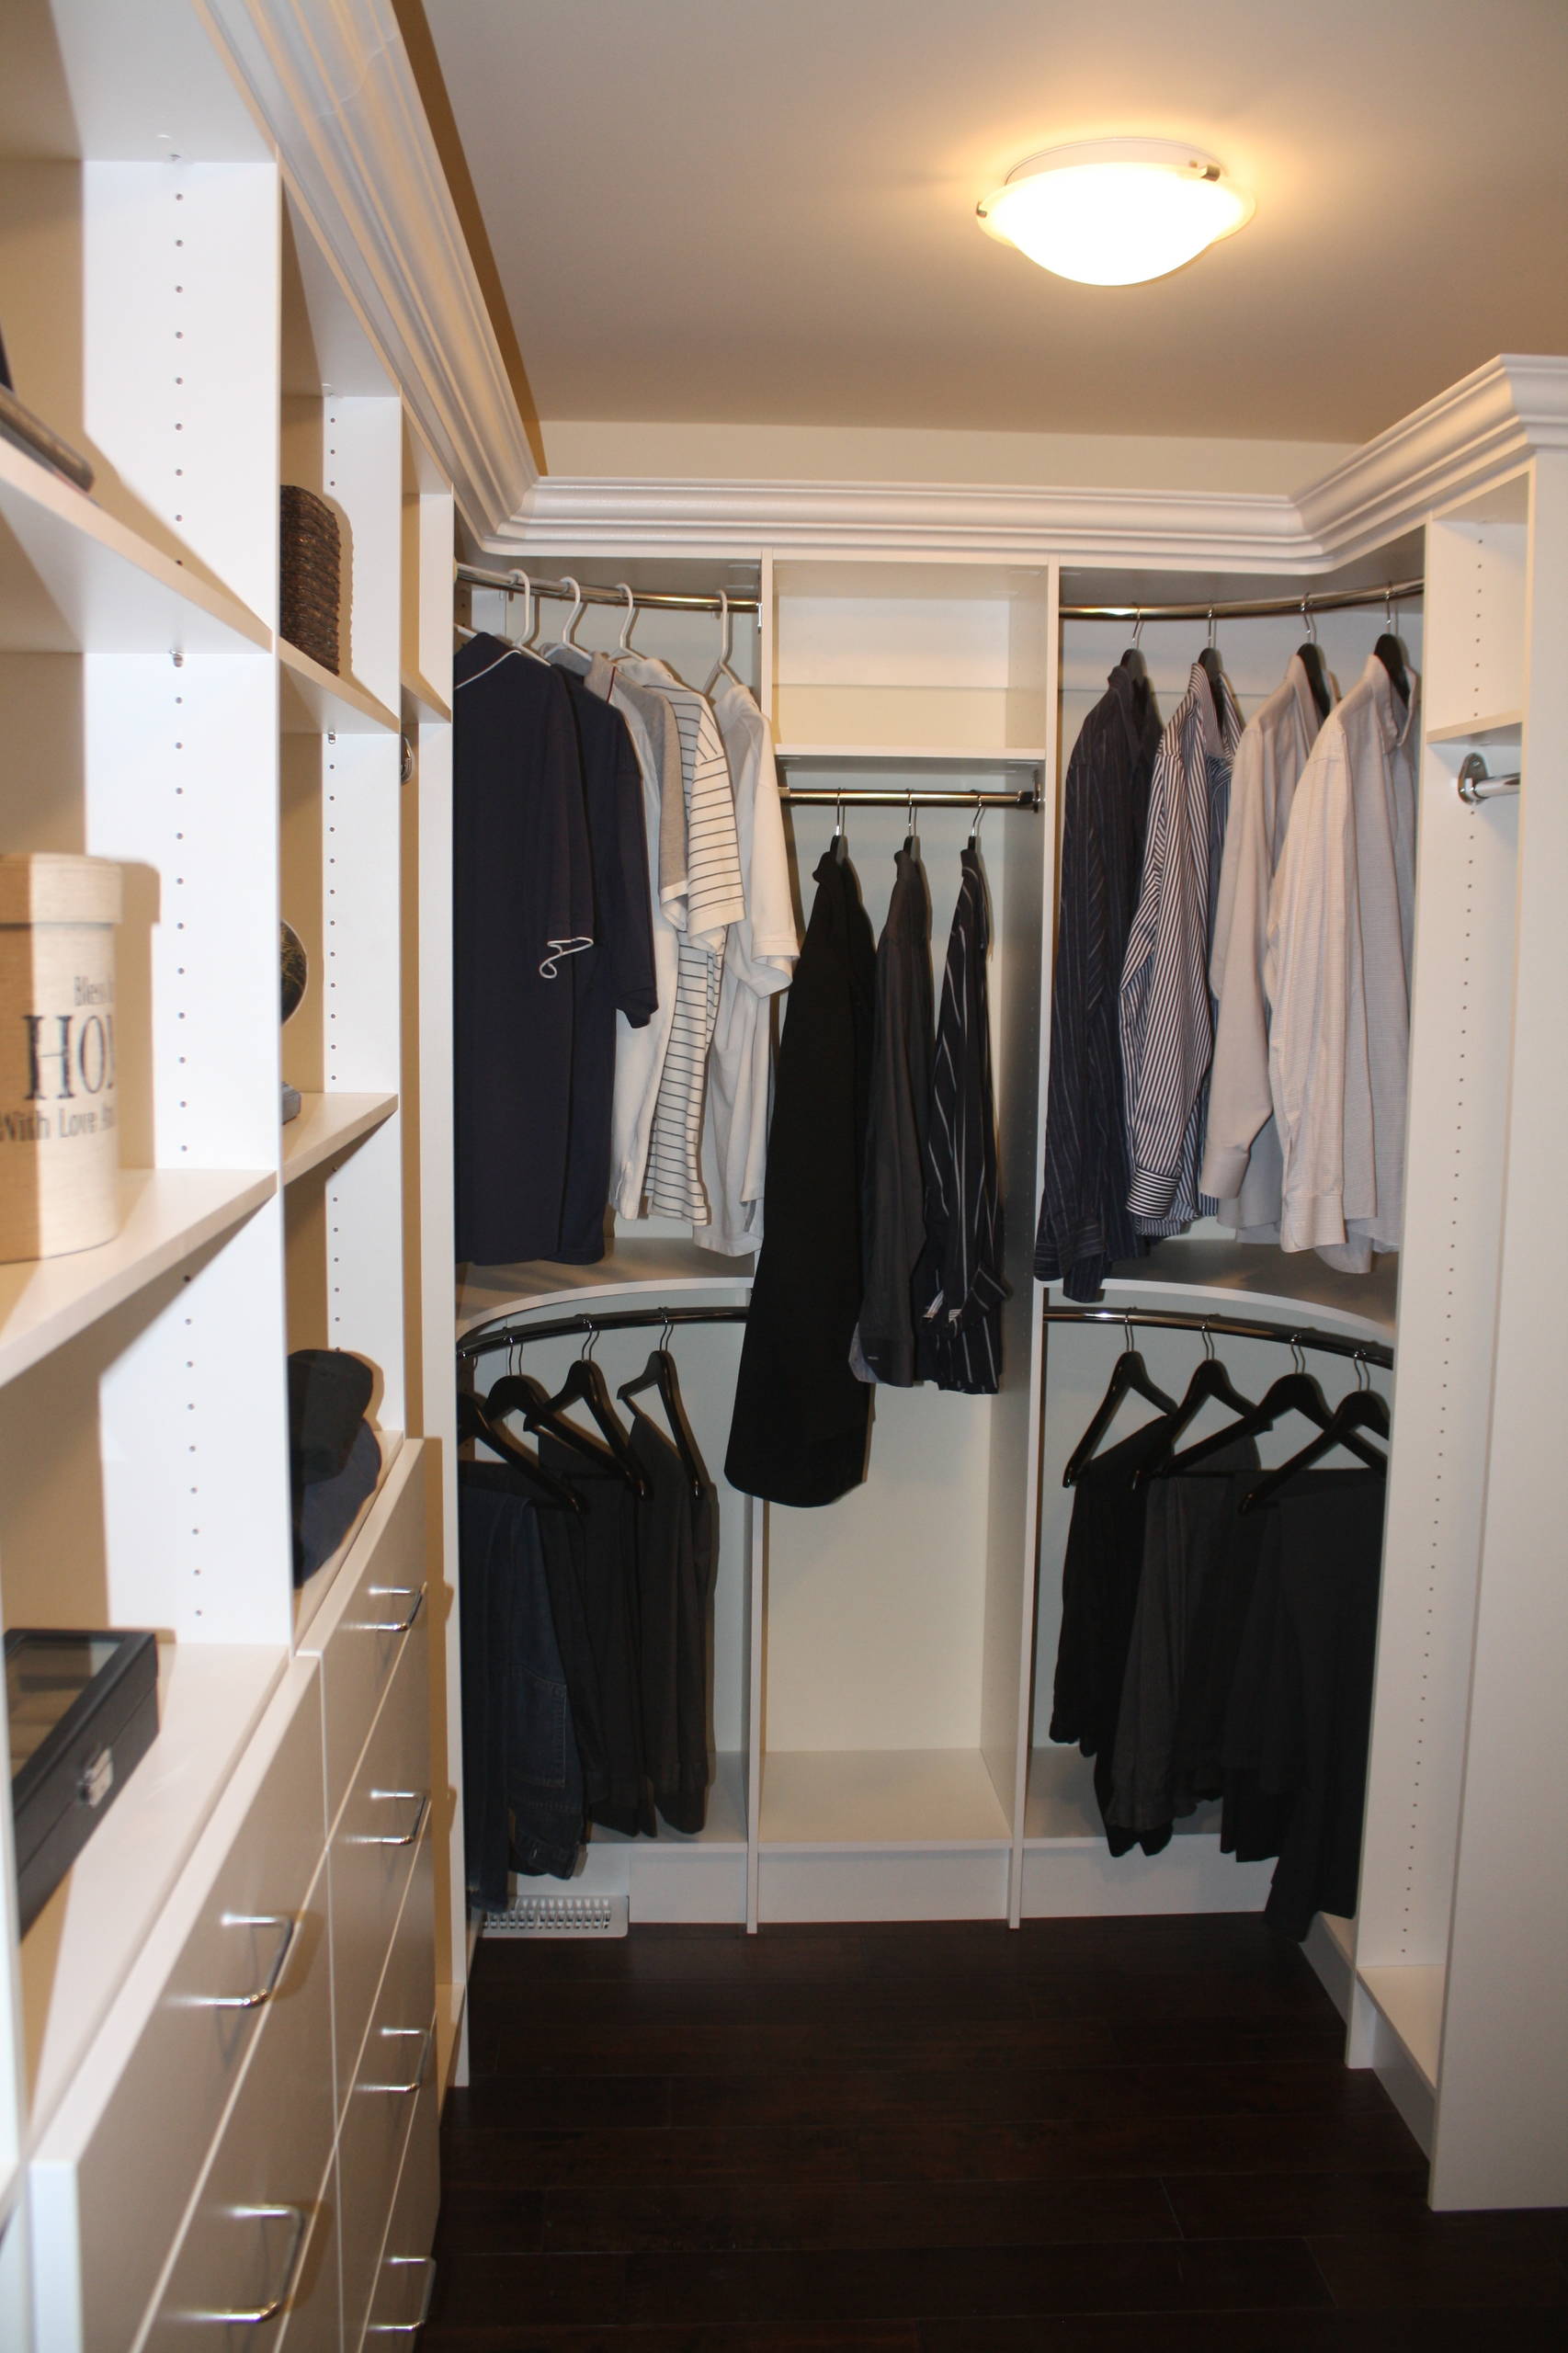
Step 3: Cut out the opening for your shelf using a jigsaw. Start by cutting along one line at a time, then connect those cuts together to make an opening large enough for your shelf. You’ll need to cut through both walls and into some of your studs, so be careful not to cut too deep or you could damage them or their electrical wiring!
Step 4: Build a simple ladder-style shelf by screwing boards together into pairs at right angles to each other, then connect those pairs into larger pieces by screwing them together at their ends. You can use any type of wood, but plywood works well because it’s inexpensive and easy to work with. Make sure your ladder is long enough so that when you stand on one end and reach out with both arms fully extended (like you’re pretending you’re Spider Man), there’s still enough room for someone else