This guide will cover how to build a concrete 3d printer step by step. I’m sharing my experience with this because it was very hard to find good instruction (many building guides are broken/outdated). Freely I give as requested.
You are looking to build a 3D printer so you can print stuff yourself…but what if you don’t have any clue about building? There are not many tutorials online which will guide you through the entire process. It might be overwhelming for you but it shouldn’t be. You just need to follow certain steps, at the end of this post we will link some websites with detailed tutorials on how to build a house with 3d printer step by step.
How to build a concrete 3d printer
3D printers are not new technologies. They have been around for decades, but only recently have become affordable for the masses. Nowadays, you can even buy one for your home!
If you’re interested in building a 3D printer yourself, here are some tips to help you get started.
What is 3d printing?
3D printing is a process of making three dimensional objects from a digital file on a computer. This file contains all of the information needed to create an object that has height, width, and depth. The printer then uses this information to produce the object by building layer upon layer of material until it forms an entire object.
Parts of a Printer
There are many different types of 3D printers and they all work differently but they all share certain parts:
Head – The head is where everything happens! It’s where your design gets turned into reality! It contains the heating elements that melt the plastic filament used in printing as well as any other moving parts such as fans or pistons used to push air through the nozzle during printing.
3D printing is fast becoming the go-to technology for manufacturing, but you don’t need to be a millionaire with a fully-equipped workshop to get started. All you need is an idea and the right tools.
Here we show you how to build a 3D printer from scratch – step by step.
A DIY 3D printer is an awesome project for any maker or tinkerer with a little time on their hands. It’s also one of the most cost effective ways of getting into 3D printing as it can be done for under £200 (US $250), depending on what parts you already have lying around.
Step 1: Find A Particle Board Printer Bed
Particleboard is made from compressed wood dust, which means that it’s cheap and easy to find at most DIY stores or online retailers such as Amazon. It also has good thermal conductivity properties so it won’t get too hot when your extruder head passes over it repeatedly
3D printing is an additive manufacturing technology that turns digital files into physical objects. It will change the way we live, work and play. With 3D printing, you can create a physical object from a digital file. This allows us to make virtually anything we can dream up – from jewelry to toys to clothing and even food!
The most common type of 3D printer is an FDM (Fused Deposition Modeling) printer that extrudes melted thermoplastic material through a nozzle. Steel wire or powder is used in some machines that use laser sintering or other methods of fabrication.
It’s not hard to build your own 3D printer at home. There are many designs available online, such as Makerbot’s Thingiverse where you can download plans for thousands of projects and products that have already been created by others with your new machine. Just print out the plans on paper, tape them together, cut them out and follow the instructions step-by-step to build your own 3D printer!
Here are some resources that will help you build your own: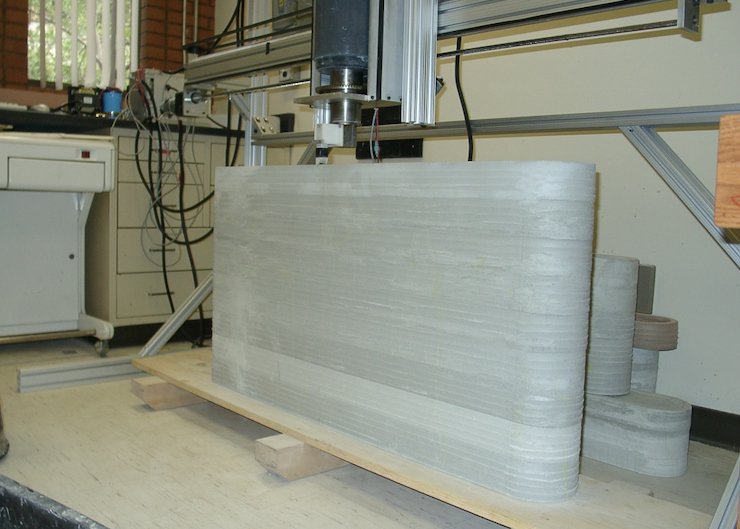
The first step of building a 3D printer is to design and build a frame that will hold all of the components in place. The frame should be sturdy and strong enough to support a solid build platform, so it can be made of wood or metal.
The next step is to attach the motors, belts, pulleys and other hardware needed to move the print head around the X, Y and Z axes. This can be done using simple hand tools like a drill and screwdriver, but an electric screwdriver makes things easier.
Once these parts are attached, you’ll need to connect them together with belts and pulleys. You’ll also want to make sure that each part is properly aligned so that it runs smoothly when you turn it on for the first time (this is called “calibrating” your printer).
To build your own 3D printer, you need the following items:
A computer with Linux OS and Internet access. The latest version of the open source software RepRap is available for download at www.reprap.org/wiki/Download_RepRap_Firmware_for_your_printer.
A USB-to-serial cable or converter (the one I used is a simple USB-to-serial converter that costs less than $10). This cable or converter is needed to connect the Arduino board to your computer so that you can upload the firmware to it.
A power supply rated 12V DC 1A or more (you can find one on eBay for under $5). This power supply will be used to provide power to both your Arduino board and 3D printer’s stepper motors (which require about 0.5A each).
How to Build a House with 3D Printer
3D printing has been around for over 30 years, but only in the last few years has it really become a thing. Nowadays, there are many different materials and methods used to print objects that range from simple toys to entire houses. This article will explain how 3D printing works and how you can use it to build your own house.
3D printing is the process of making three-dimensional solid objects from a digital file. The file contains information about the shape of the object and its exact dimensions, which can then be used by a printer to create a physical object based on this data.
There are many different types of 3D printers that work in different ways, but they all share common characteristics: they produce an object by depositing layers of material one at a time until it reaches its final form and then they repeat this process until the object is complete.
How to build a 3D printer step by step
Building a 3D printer is not an easy task. You need to take care of many things and make sure that you are doing everything right. However, if you follow the instructions below, you will be able to build your own 3D printer in no time!
Step 1: Get the Parts
You need to get all the parts required for building your own 3D printer. This includes motors and gears, controllers and sensors. You can find all these online from various websites or even from local stores in your area. It is recommended that you buy all these parts from one store so that they can be delivered together when needed.
Step 2: Assemble the Frame
The next thing that you need to do is assemble all the parts that you have bought into one frame so that it looks like a real 3D printer. This may seem difficult at first but once you get used to it, you will find it pretty easy to do this on your own without any help or guidance from anyone else around!
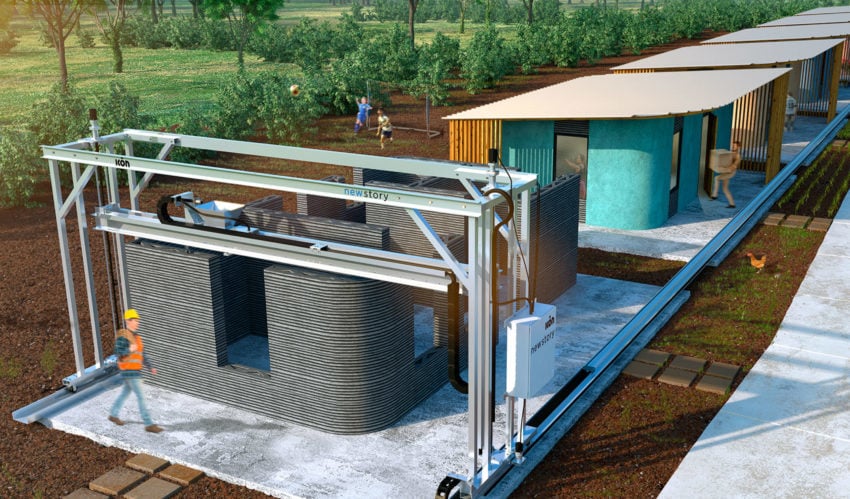
3D printers are a new technology that is constantly improving, and they can be used to create everything from toys to food. One of their most interesting uses is creating houses. It’s possible to build a house using 3D printing technology, but it’s not easy. In fact, it takes a lot of time and effort to get the job done. Here’s how you can build your own home with a 3D printer:
-Find a site for your new home. You’ll need plenty of room for the printer, so make sure you have enough space for it before you start building your house. This may seem obvious, but if you’re planning to live in your house after it’s built, then make sure there’s enough room for all your furniture too!
-Find an architect who knows how to use 3D printers. You’ll need someone who understands how the technology works in order to build the printer itself, as well as someone who understands how buildings are built so that they can design something suitable for 3D printing by hand. It may be best if you hire someone who has experience with both – someone who has built things using traditional methods before as well as using 3D printers today would ideally be best suited
A 3D printer is a machine that can create objects from a digital file. The technology has been around for decades, but it’s only recently become affordable enough to be used by hobbyists.
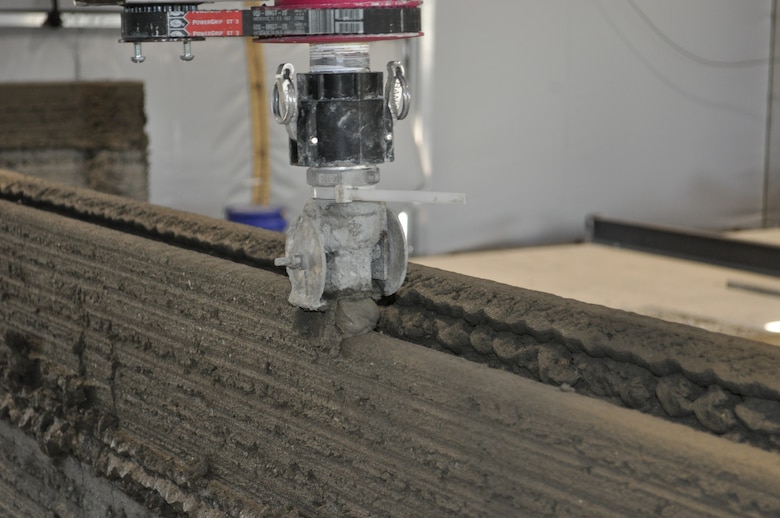
A 3D printer is basically an automated version of a hot glue gun: A filament is fed into the extruder, melted and pushed out through a nozzle onto a surface to form an object. The hot glue gun analogy isn’t perfect because 3D printers use plastics instead of glue, but it gives you an idea of how they work.
There are two main types of consumer-grade 3D printers: fused deposition modeling (FDM) and stereolithography (SLA). FDM printers use plastic filament that comes in spools like regular printer paper and are best suited for printing small objects, while SLA printers use liquid resins that cure after they’re exposed to UV light, making them better suited for printing large objects or ones with complex internal structures.
3D printing is a technology that has been around since the 1980’s. It uses a computer to control a machine that builds objects from layers of plastic or metal powder.
Today, there are many different types of 3D printers, including desktop printers and industrial machines that can print objects up to 30 feet long.
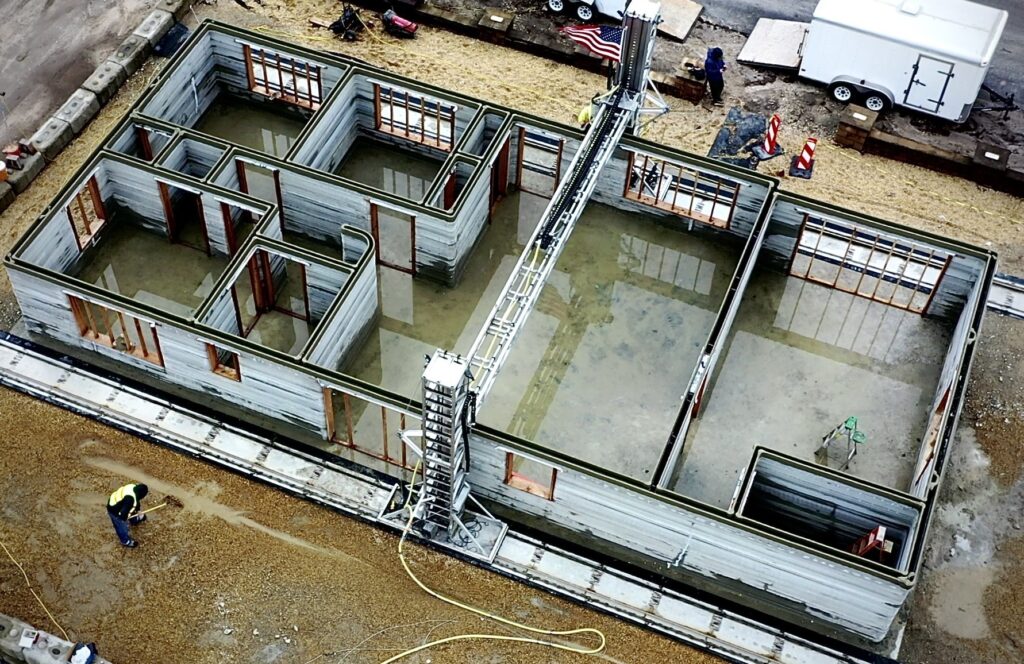
3D printing has many applications, including creating prototypes for new products, reproducing artifacts from museums, and even building houses!