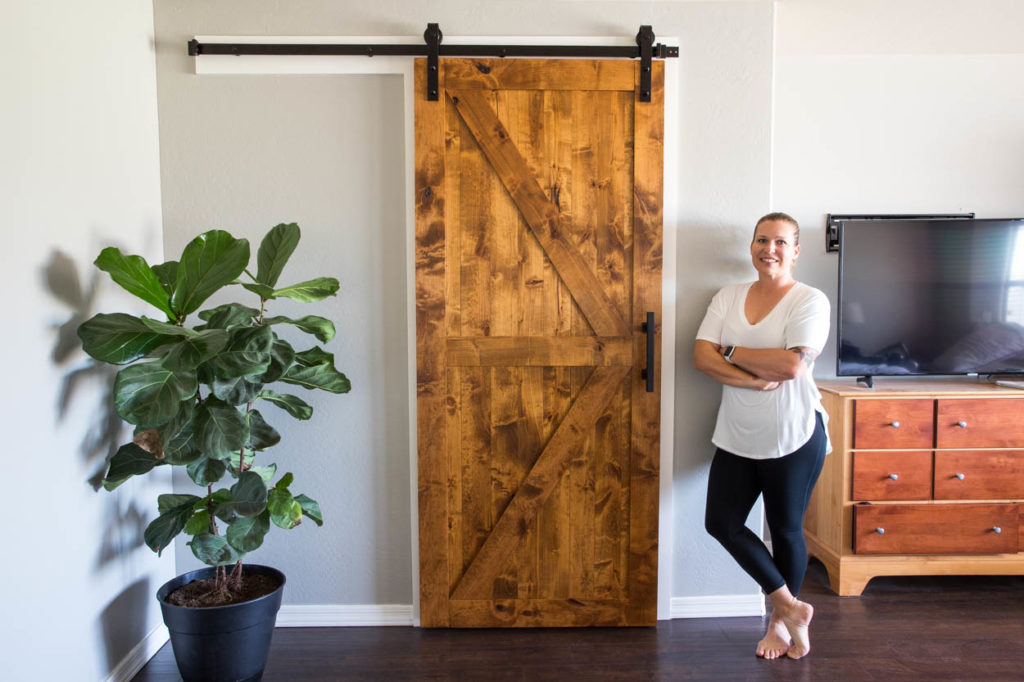
Barn doors, barn doors everywhere. As a trend, the popularity of this beautiful and distinctive door design has really taken off recently. And for good reason! A barn door adds such a unique touch to any room and if done properly, can completely change the look and feel of it.
Building a barn door is a straightforward and simple DIY project with clear instructions if you have a set of plans. A large amount of barn door plans online require advanced woodworking skills, some of which are not included in this guide, but I will try to make it as comprehensive as possible. On the long run, building an awesome barn door can save you money. You’ll always have a rustic but functional piece of furniture in the middle of your land. It lasts for a lifetime, having only basic repairs from time to time.

How to build a barn door
Barn doors are a stylish way to conceal clutter and provide a clean and modern look to your home. If you’re ready to build your own barn door, we have all the information you need here.
The first step in building a barn door is framing it. This is done using 2x4s covered with 1/2-inch thick plywood on each side. The size of the frame will depend on the size of your doorway, but an average width for an interior door is about 32 inches. For exterior doors, use 2×6 lumber with 1/2-inch plywood on each side. The height should be around 6 feet tall for either type of door.
Once you have your lumber cut to size, sand them down with 80 grit sandpaper so that all surfaces are smooth and free from splinters or rough spots that could catch on clothing or skin when opening or closing your door.
In order to attach the frame together, you’ll need to drill pilot holes through the top rails into each post at least every 12 inches using an electric drill fitted with a paddle bit (or use a cordless drill). Then drive 2-inch screws through these pilot holes so they go into the posts just enough so
Barn doors are a great way to hide clutter and create a focal point in any room. They are also very easy to make, especially if you have access to a table saw.
I used pine boards for this project because they’re inexpensive and readily available at home centers. You could also use cedar or other woods if you prefer them. The design is fairly simple, but it looks great when finished!
This article will show you how to build your own barn doors with step-by-step instructions and photos. If you want more information on building with wood, check out our Build Basic Cabinets article here: https://www.popularwoodworking.com/diy/how-to-build-basic-cabinets
A door that swings out or in is known as a barn door. You can use them to hide clutter or add an industrial look to your home.
Barn doors are great for hiding clutter or adding an industrial look to your home. They are also easy to build and install, provided you have the right tools and materials.
The following steps will help you build your own DIY barn door:
Measure and mark the length of your door on a piece of plywood using a tape measure and pencil. The width of the door should be about 2” wider than the opening it will be covering up. Cut this piece using a circular saw or jigsaw with blade set at 90 degrees.
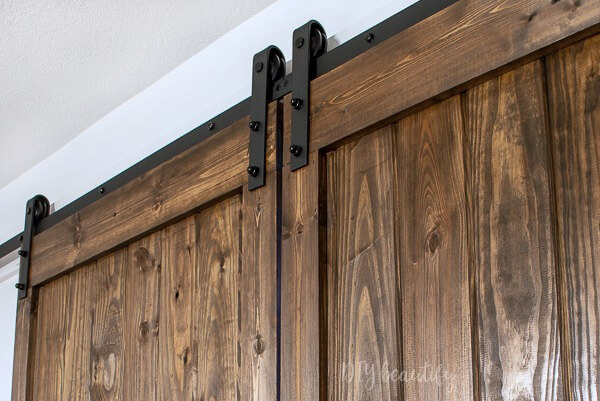
Assemble the hinges according to manufacturer’s instructions for mounting them to your plywood panel using screws or nails (if desired). If you’re using hinges with screws, predrill holes in the wood before attaching them so that they don’t split when driven into place.
Mount the hinges onto the panel by screwing through pre-drilled holes in each mounting point with #8 or #10 pan head screws (long enough so they go through both pieces) with two per hinge pin (or longer if necessary). The number of screws required will vary depending on how much weight
Barn doors are a great way to add character and style to any room. They’re easy to make and customize, so you can create them for your home in no time.
Here’s how you can build a barn door for your home:
Measure and cut your lumber. The first step is to figure out what size you want your door to be. Then, measure the height and length of the opening where you want it to go. Add 1″ on each side of your measurements because these are the dimensions of the frame. Finally, cut all four pieces of wood with a miter saw or table saw (make sure they’re even).
Assemble the frame. The next step is assembling the frame with pocket holes along each edge (using an electric drill/driver and pocket hole jig). This will make it easier when attaching it to your wall later on (see below).
Attach the hinges. Once all four pieces have been assembled into one unit, attach two hinges per side using screws (use 5/16″ flat head wood screws). For example, if you have three hinges total then attach two on one side and one on the other side (this will allow you to open up both sides equally). You’ll need plenty
Barn doors are a great way to add character, personality and style to any room in your home. They’re also very easy to make, as long as you have a little bit of carpentry experience.
Here are some tips on how to build a barn door:
1. Measure and cut the frame pieces. You’ll need two 2x4s for the sides of your frame and two 2x2s for each end piece. Cut them all to length with a miter saw or circular saw. Draw lines across them so they’re exactly even with each other at 1-inch intervals. These will be your reference marks while assembling the frame.
2. Assemble the frame pieces by screwing them together with 3-inch deck screws driven into predrilled pilot holes every 12 inches or so (Photo 1). Use a framing square as a guide when drilling pilot holes so they’re perfectly perpendicular to the edge of each board (Photo 2). If you don’t have one, try using an old piece of wood clamped next to your drill bit as a guide instead (Photo 3).
3. Build up the top rail by adding one 2×4 between each side panel (Photo 4). Make sure all four corners are flush by checking them.
:max_bytes(150000):strip_icc()/kleinworth-346582ad5de047e7a3e0e4faa0fb7fd5.jpg)
Free DIY Barn Door Plans
The barn door is a functional and decorative piece of hardware that can be used in the home or in commercial settings. The doors are often made of wood, but they can also be constructed from other materials. When building your own barn door, there are several things to consider.
In this article I will show you how to make your own DIY barn doors using my free plans:
Framing the Door
The most important part of any project is making sure it’s properly framed. This is especially true when it comes to building your own barn door. You’ll want to start by attaching two 2x4s together at right angles and then screwing them into place with 2 1/2″ screws. This will form the base of your frame and provide a sturdy foundation for attaching the rest of your components onto it later on.
You’ll want to make sure that the crossbar of this frame is at least 36″ long so that you can use it as a guide for hanging your door when installing it on your wall or ceiling later on. Once you have this piece built, lay out all of your other components on top of it so that they’re positioned where they need to go before proceeding with any further
DIY Barn Door Plans
As the name suggests, a barn door is a large door that can be used in a barn or other building. It’s also used in homes and other structures as an alternative to traditional doors. They’re often made of wood, but they can also be made of metal or even plastic. They’re typically hung on hinges, but they may also slide along tracks or roll up like a window shade.
A DIY barn door is easy to build and install yourself. The only tools you’ll need are a tape measure, pencil, circular saw and drill (or screwdriver). You’ll also need some wood screws and nails to attach the pieces together.
You can use any type of wood for your DIY barn door project — from cedar, pine or oak to poplar or plywood — as long as it’s at least 1-3/4″ thick for strength and durability. The door needs two sides that are exactly the same size so that both swing out evenly when opened and closed. If you’re using plywood for the sides, make sure it’s not warped before cutting it down into strips with your circular saw (see “Step 2”). If you’re using solid lumber instead, then measure each
How to build a barn door. If you want to add a touch of rustic charm to your home, then building a barn door is the way to go. It’s actually quite simple and easy to do with just a few tools and materials.
The barn door is one of those things that make this whole process easier because it allows for better access when working on the kitchen cabinets and countertops. The frame is made from 2x4s and plywood, then covered with 4-foot-wide pine siding.
It’s important to measure carefully before cutting the pieces for your frame so that everything fits perfectly together when you screw it together. The bottom rail should be cut at 45 degrees into two pieces so that you have two triangles (called miters). Once this step is done, all the other cuts should be easy enough with a handsaw or circular saw depending on what type of wood you are using (pine or cedar).
Building a barn door is a great way to add style and interest to your home. It can be made from a variety of materials, including wood, metal and even plastic. The process is fairly simple and involves cutting the material to size, drilling holes in the frame and attaching it to the wall.
The first step in building your own barn door is finding the right material for the job. You can use any type of wood or metal that you like, but it’s important to make sure that it’s strong enough to withstand regular use.
Once you’ve chosen your material, you’ll need to cut it down into pieces that will form your door frame. Your measurements should be based on the width of your door opening as well as how much clearance you want between the bottom of the opening and floor. This will give you an idea of how thick your frame needs to be so that it doesn’t stick out too far from either side of the wall when opened or closed (see Resources below).
How to frame a barn door
This is one of the easiest ways to frame your own barn door. The materials needed are:
8-ft. 2x4s
Three hinges
One latch (optional)
Step 1: Cut the 2x4s into four pieces at 48-in., 24-in., 18-in., and 12-in. long. Cut two of each size, so you have six boards total.
Step 2: Attach the shorter pieces of wood to the longer ones with 3″ screws, starting at the top and working your way down until they’re all connected together. Make sure that the joints are tight and everything lines up properly before moving on to step 3.