Everyone dreams of having an outdoor area to enjoy the perfect warm weather. However, what do you do if you have a limited budget or just doing it yourself. This tutorial will cover all the steps on how to build backyard deck with out any professional help or hiring a contractor. You’ll learn how to get the right materials, tools and much more!
Building a deck on your home will be cheaper and easier than you think. First of all, let’s get one thing clear: I do not recommend that you build a deck by yourself (unless you have years of experience). To keep yourself and others safe, it’s better to hire a professional who can ensure compliance with local building codes. A licensed contractor should also ensure that your deck is built properly.

How to build a back deck
Building a deck is a great way to add valuable square footage to your home. The project can be completed by a do-it-yourselfer with the right tools and materials.
Building a Deck: Get Ready for Winter
Building a raised deck attached to house, how to build a deck step by step with pictures, how to build a deck for dummies, how to build a small deck are just some of the options that are available for you when it comes to building your own deck. For example, if you want something that is simple but will still look good then you should consider building one from pressure treated timber. On the other hand if you have more time on your hands and would like something more elaborate then you could choose cedar wood instead as it looks amazing when stained dark brown or green. In addition, there are many different designs available so it is important that you choose one that suits your needs and taste perfectly! You may also want to consider buying pre-made kits which can save you some time in the long run!
How to build a raised deck attached to your house. In this article, we will discuss how to build a raised deck attached to your house.
First things first, you need to decide if you want a detached or attached deck. If you want a detached deck, then it’s very simple as long as you have enough space in your yard and budget for it. However, if you want an attached one then there are some things that you need to consider before starting the project.
If you want an attached deck, then the first thing that you have to do is make sure it is safe for everyone using it. Also, make sure that it matches the design of your house so it doesn’t look out of place or ruin the aesthetic value of your home.
Now let’s talk about how much does it cost:
The average cost of building a small-sized deck is $1,500-$2,000 and for large ones it can reach up to $10,000!
A deck is an excellent addition to any home. It can provide valuable extra space for entertaining and relaxing, as well as a place to store outdoor tools and garden equipment. Building your own deck is a rewarding project that you can complete in just a few weekends.

3 Simple Steps for Building Your Own Deck
Building your own deck doesn’t have to be complicated or expensive. Here are the basic steps you’ll need to follow:
1. Draw up your plans. Decks come in all shapes and sizes, so make sure you know what size and shape will work best for your space and budget before getting started on any construction work. You should also consider the materials you want to use for deck building materials including wood, composite wood or vinyl.
2. Lay out the deck frame posts in the ground according to your plan specifications, then attach them together with joist hangers securely into each post at 16-inch intervals on center (OC). The spacing between joists is determined by how much weight they need to support — it’s usually 22 inches apart on center (OC), but check with local building codes before making any decisions about this aspect of
How to Build a Deck
Building a deck can be a fun, creative project. You get the satisfaction of building something yourself, and you’ll never again have to worry about having an ugly, rotting deck.
Build Your Deck with This Step-by-Step Guide
A deck is one of the best ways to enjoy your yard. It’s like having an extra room in your home that’s open to the outdoors and lets you entertain friends and family during every season. But before you start building your deck, it’s important that you know what it takes to build a safe and attractive structure that will last for years.
Building a deck requires planning, preparation, patience and attention to detail — but most importantly, it requires knowing how much time it will take for each step.
Use this guide as your blueprint for building a new deck or replacing an old one:
Check with local building inspectors about permits and regulations
Measure the area where you want to build your deck
Determine how much lumber you’ll need based on the size and shape of your project
Purchase materials at home improvement stores or online retailers such as Lowe’s and Home Depot
This guide will teach you how to build a deck. It will walk you through the basic steps of building a deck, including planning, materials, and construction. It also covers more advanced topics such as framing and finishing your deck.
Building a deck is not too difficult with the right plan and materials. Follow these simple steps to build a deck:
1. Plan where your deck is going to go before purchasing materials or starting construction. Make sure there is enough room for your family and friends to enjoy the space without stepping on top of each other. Also keep in mind that you will probably want access to your backyard from inside your home, so make sure that you leave enough space for a doorway or window leading outside
2. Decide how high off the ground you want your decking material (i.e., the surface that you walk on). Most decks are between 24″ and 30″ high off the ground but if you have young children or elderly family members who won’t be able to step on this height then consider lowering it down
3. Decide how wide your deck will be by measuring out its length and width; remember that once.
How to build a raised deck attached to house
First, you have to decide on the type of deck you want. If you are going for a simple design, then it is best to build a simple deck. However, if you want something more complex, then you can go for that as well.
Once you have decided on the type of deck that you want, start measuring the area where it will be built. You will also need to figure out how much material you need and how much time it will take to build your deck.
You will also have to think about what kind of material you want to use in building your deck. There are various materials available in the market today; however, cedar wood is still considered as one of the best choices when it comes to building a deck.
After selecting the type of material that will be used in building your deck, make sure that all the materials are ready before starting work on it. Also, make sure that all tools needed for building such as saws and hammers etc are also available at hand before starting work on your project
A deck is a great addition to any home, providing a place for entertaining, relaxing and enjoying the outdoors. You can build a deck yourself, but it’s important to know how to build a deck the right way.
The first thing you need to do is determine what type of deck you want. You can choose from two basic types of decks: freestanding or attached. A freestanding deck sits on top of your house or other structure and has no connection to the building. It’s an independent structure that uses its own foundation. An attached deck connects directly to your house or another structure such as a garage or shed. This type of deck needs to be designed so that it doesn’t compromise the integrity of your house or other building by adding too much weight or stress on it.
Once you’ve decided on your style and size, start by laying out all of the materials needed for your project onto the ground where they will be used so you can get an idea of how much space they’ll take up when they’re in place, advises Lowe’s Home Improvement Blog contributor “The Handyman.” A framing square can help with this step because it allows you to mark right angles on lumber without having to measure each piece individually before cutting it down with
The building process for a small deck is not that different from that of a large deck. It is important to choose the right materials, equipment and tools to get the job done safely and efficiently.
Step 1: Choose the best location for your deck
A good place for a small deck is one that has plenty of sunlight and shade. It should be near an outlet so you can plug in power tools, but far away from trees or other structures that could fall on it during storms.
Step 2: Install support posts
Use treated lumber or pressure-treated wood posts to support your deck floor joists. You want the posts to extend at least 2 feet into the ground, so use a posthole digger or auger to dig down at least 4 feet around each post location before you drive them in. Add gravel to help prevent rot in contact with the soil, then drive each post in at least 12 inches (30 cm) before installing metal pedestal bases and concrete footings for extra stability.
Step 3: Install ledger boards
The ledger board (also called a rim joist) is made from pressure-treated lumber that supports the weight of your deck’s overhang as well as any lighting fixtures or other accessories you may install later on.
:max_bytes(150000):strip_icc()/lowes-free-deck-plans-5852ee393df78ce2c317a714.jpg)
Building a deck is a great weekend project. Here are the step-by-step instructions.
Step 1: Mark the location of your new deck on the ground using stakes and strings.
Step 2: Excavate the area to be used for footings and pour them with concrete.
Step 3: Lay out the decking onto joists and secure with screws or nails.
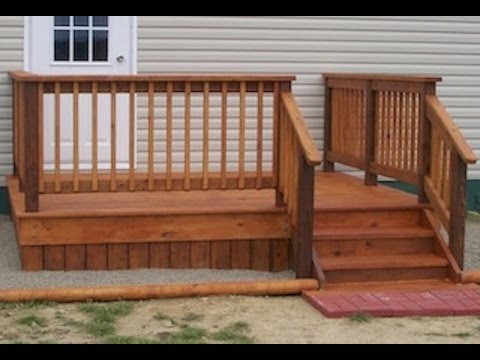
Step 4: Install railings around the edges of your deck if desired, then add stairs or steps if necessary.
1. Determine the layout of your deck.
2. Dig the post holes, using a post hole digger or hand shovel where necessary.
3. Pour concrete for the footings and set them in place. Use your level to ensure that they are level and solid.
4. Lay out and cut 2x4s for joists and attach them to the posts with lag screws or carriage bolts and washers (make sure you use long enough screws). You can also use beam clamps to connect them if you have them available but they are not always necessary unless there is a lot of movement in the ground (i.e., during spring thaw). If you are working on a hillside, be sure to slope the ground away from the house so water doesn’t pool up under your deck in rainy weather.