If you’ve got a pole barn and need a new garage door, or even just a new building to house your vehicles, there are two main options: You can build it yourself with kits or materials you can buy at your local home improvement store. Or, you can hire someone who specializes in pole barn construction to do it for you. That’s where we come in. We’re here to help, whether you’re looking for garage doors for your pole barn, building materials such as garage door openers and springs, or any other part of the system that makes the whole thing work.
There are three types of pole barns, metal pole barns , wood pole barns, and the steel and fiber glass pole barn. You can either buy a pole barn kit for your openings or professionally installed one for you. Metal pole barns are light weight compared to other types of garage doors and are easy to carry. They also offer considerable savings in property taxes if they appeal as residential property.

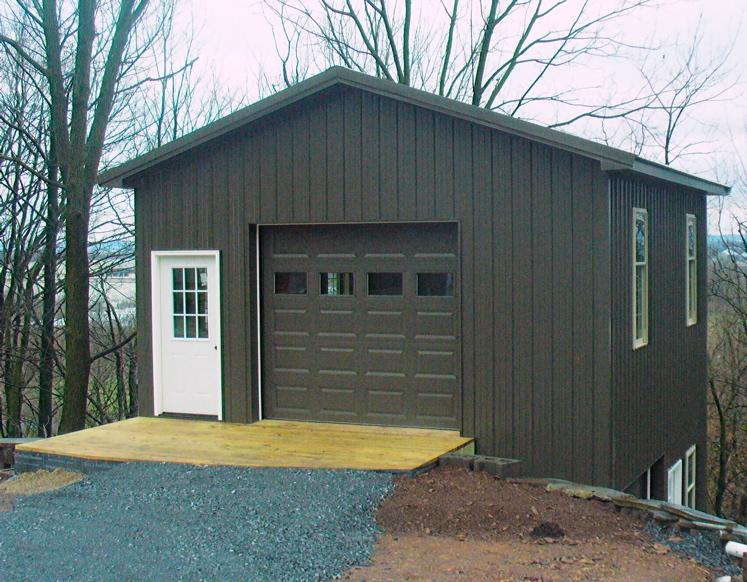
Garage doors for pole barns
Building a barn door for garage is an easy and affordable way to create your own customized garage. The barn door can be installed on either side of the garage or on both sides. If you are planning on installing it on both sides make sure that they are balanced and level so that they close easily.
The first step is to measure the opening of your existing garage door, then decide how big you want your new door to be. The bigger the better, because it will look better when it’s all done. As for height go with at least 7 feet tall if possible. You can always trim it down later if necessary but once its trimmed down there’s no going back!
The next step is to buy your materials from a lumber yard or home improvement store like Home Depot or Lowes. You will need: 1 – 2x4x8 (this will be used as an inner frame behind the door), 2 – 2x4x12 (these will be used as outer frames), 1 piece of 1/2 inch plywood cut into two pieces each measuring 50 inches by 24 inches long (this will be used as an insert on each side of the opening), and 4 hinges with screws that are long
You can frame a garage door opening in a pole barn with 2-by-4s and plywood or OSB. The door will be heavy, so use as many supports as you can. If you’re building a double door, you may need to add additional posts to support the weight.

Use 2-by-4s to frame around the door opening (Photo 1). You don’t have to grade these boards flat and square; just make sure they’re level on top and that each end is flush with its adjacent board. Set them in place and attach with 16d nails or screws.
Assemble two frames for the top and bottom of your door opening, each consisting of four pieces of plywood or OSB attached with 1-1/2 in. screws (Photo 2). Use a straightedge as a guide when attaching these frames together. The sides of these frames should be flush with the side edges of your 2×4 frames, while the tops should be flush with the top edges and extend 1/16 in. over them (Photo 3).
The first step to building a garage door for your pole barn is to frame the opening. This can be done in several ways, depending on the specific needs of your project.
The simplest method is to use 2x4s as the header and sill for the garage door opening. You can attach these pieces using construction adhesive and screws. Cut them at an angle so that they sit flush against each other.
If you want a more permanent solution, you can use pressure-treated lumber or concrete blocks as the header and sill for your garage door opening.
Now that you have framed your garage door opening, you need to install posts on either side of it. These should be set at least 1 foot away from each side of the door opening so that they don’t interfere with its operation.
You’ll also need to install brackets on either side of each post so that they can support the weight of your garage door. These brackets should be installed higher than where they intersect with the posts so that they don’t interfere with their operation either (this will depend on the height of your posts).
Building a garage door for a pole barn is easy using these simple steps.
1. Measure and mark the size of the opening for your new garage door. Use pieces of 1×4 lumber to mark the top and bottom tracks. Cut out the holes with a jigsaw, then remove the waste wood with a reciprocating saw or handsaw.
2. Cut two pieces of 5/4 pressure-treated plywood that are each 1 inch shorter than the width of your garage door track, and one piece that’s 1 inch shorter than its height (the height). Attach these three boards together, creating a box around your opening, as shown in Figure A below. This will be your header track.
3. Set the header track on top of your opening so that it hangs over both sides by 3 inches or so (Figure B). Mark where it meets each side wall and drill pilot holes through all three layers at those points so you can drive lag screws into them to secure them together tightly (Figure C).
4. Cut two 3/8-inch-thick strips of plywood long enough to span between the header track and each side wall when you’re done installing it (Figure D). Attach one end of each strip to
Pole barn garage doors can be a great choice for any type of pole building, but they are especially useful for garages and workshops. Pole barns are typically constructed with a wood-framed roof and rafters, which can make it difficult to install the type of overhead garage door that you might find on a typical residential home.
– You can choose from standard colors or match your barn’s existing color scheme. Door styles – There is an array of different styles to choose from, including single-pivot, double-pivot and rolling steel doors. These styles will all work for pole buildings but may require some customization to fit correctly in your space. Double pivot doors are especially popular because they require very little space above the opening itself, leaving plenty of room for other features such as windows or skylights.
– There is an array of different styles to choose from, including single-pivot, double-pivot and rolling steel doors. These styles will all work for pole buildings but may require some customization to fit correctly in your space. Double pivot doors are
If you’re building a pole barn and want to frame your garage door opening, here’s how to do it.
1) Cut the header. The header is the bottom part of your garage door opening that spans from one side wall to the other. It needs to be cut so it goes all the way across the opening before you can install it.
2) Cut two 2x4s for each end of your header. These are called jack studs because they support the header above them. If you have an electric opener on your door, these 2x4s will also act as stops for your track. The jack studs should be as long as needed to span from one side wall (not including any insulation) to the other side wall (also not including any insulation). It’s a good idea to cut them a little long so when we install them in Step 4, we can trim them down if necessary.
3) Lay out the jack studs on either side of your header using 16d galvanized nails or 16d common nails (the same size that’s used on common plywood sheathing). Make sure they’re level with each other; if they’re not, use shims to level them until you’re happy with their position
You’re building a pole barn and you want to install a barn door. The framing of the door opening is pretty straightforward, but there are some things that you need to consider.
Here’s how to frame it out:
1. Install the header first. The header is the piece that spans across the top of the opening. It’s usually made from 2x12s or 2x10s depending on what size you need for your door.
2. Install headers in each corner as well if you want to go with a paneled look on either side of the opening. These headers should be placed about 16 inches from each side of the opening so that they’re centered over each post when viewed from inside the garage.
3. Install posts in each corner of the garage opening so that they’re centered over each header when viewed from inside the garage. This will ensure that your door swings open easily without hitting anything when it goes back and forth (especially if you have a large vehicle).
Building a barn door for your garage is a great way to add style and value to your home. A garage door is one of the most expensive features of your home, so it’s important that you choose a high-quality material and design.
When designing a new barn door, remember that you must have enough space to open and close it without hitting other objects in the opening. You also need to keep in mind the weight of the door when choosing the material.
Before starting construction, measure the opening at least twice and cut once. The measurements should include not only the width but also the height and length of each panel as well as any trim you want on top or bottom of each panel.
You will need:
A tape measure
Pencil
Sketch paper
Tape (optional)
A barn door is a free-swinging hinged door with a horizontal crossbar. The horizontal bar allows the door to fold up and down like a blade, hence the name.
The original barn doors were made of wood, and they were very easy to make. They are still used today in some cases. However, there are many more options for material and style that you can choose from when building your own barn door for your garage or other area of your home.
The most common use of a barn door is as a decorative element in residential homes. They are often used as closet doors or even bathroom doors! They can also be used in commercial spaces, like restaurants or retail stores.
There are many different styles of doors available for sale at stores like Lowe’s or Home Depot, but if you really want something unique that no one else has, then why not build it yourself? This article will show you how to build a barn door yourself so that it fits perfectly into your home!
A garage door is one of the most important parts of your home. It protects your vehicles from the elements and keeps out unwanted visitors. However, if you live in an area that gets a lot of rain or snow, then you know how difficult it can be to open and close your garage door.
If you have ever tried to operate a garage door in wet conditions, then you know how frustrating it can be when the door doesn’t move smoothly or stops moving all together. This is due to the fact that water will collect on top of the tracks and freeze overnight. When this happens, it creates added friction between the wheels and track which makes it difficult for them to move freely during operation.
To prevent this type of problem from occurring, many people install rollers onto their garage doors so they can easily slide over any obstruction that may be in their way when opening or closing their doors. These rollers work great when they are installed properly but they do not solve all problems associated with operating a garage door in wet conditions.
So what can you do if you want to keep water off of your tracks? One solution would be to install weather stripping around each side of each track so that no water can get on top of them at all times! This works well