If you have any plans of going to an auto show in the next 10 years, then you should seriously consider buying a t-top roof by G-body. These roofs are not only going to save you money, but they are also going to provide the highest quality components to potential customers who might be interested in purchasing your product for their car.
Looking for T-top parts? We offer a wide selection of T top parts at great prices! Most orders ship within 24 hours, with next-day shipping available! Our parts are high quality and backed by our customer service team.

G-body t-top roof for sale
This video is a little different than normal but I was asked to put together a tutorial on how to install a top cap on a metal roof. The most common way people install these caps is with screws and the key thing you need to do when installing them is make sure they are level. If they’re not level it can cause leaks and damage to your roof.
I’m going to show you how easy it is to install a top cap, first we’ll get some supplies together like our hammer, our drill, some screws or nails depending on what kind of cap you have and also some shims just in case there’s any gaps in between the rafters or trusses so that we can get everything level just like this. We’ll take our shim here and place it in between two rafters or trusses, just like that and then we’ll take our screwdriver or drill bit depending on what kind of screw came with your top cap. Now we’ll come back over here with our hammer and just tap down lightly until it seats itself firmly into place like this so that there’s no gaps at all
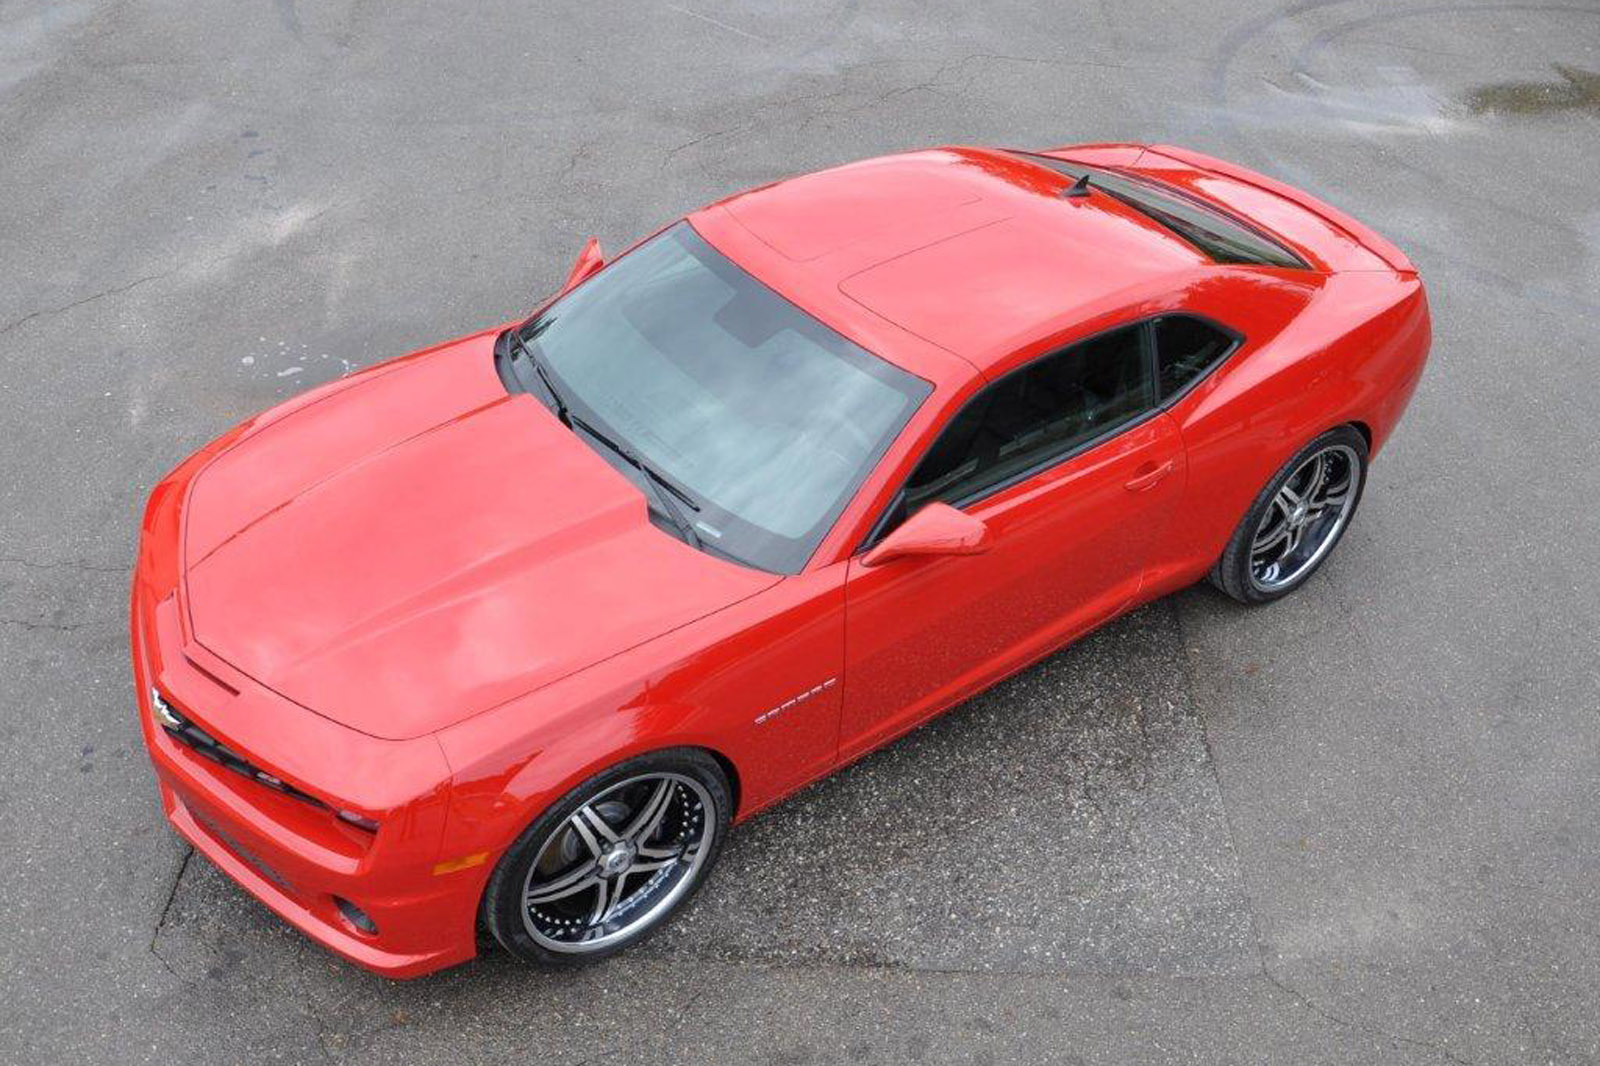
This is an all original 1979 Pontiac Grand Prix T-Top Roof. The top is in good condition and comes with the original window felts. The fiberglass top is in great shape and has no cracks or damage. It also has the original glass window felts. The rear window was replaced with a new one so it has no cracks or damage to it either. This would be a great restoration project or just something to use as is. This is a rare find to find one in this good of condition with all of the parts still intact!
The only thing missing on this car is the latch and catch on the front edge of the hatchback. Everything else on this car appears to be original including interior, dash pad and all trim pieces. The only other thing that needs to be done besides painting it white again would be installing new weather stripping around door openings where you open doors from inside as well as new seals around windshields where they meet body panels underneath when closed up against them which are often damaged due to age or due to not using them properly which causes them to wear out over time causing leaks when driving through heavy rains
A top cap is a metal or plastic piece that is attached to the top of the main body of a metal roof. It usually has a gutter system attached to it which collects water from rain and snow. The top cap is typically installed around the perimeter of the building, but it can also be placed in other areas such as on a flat-sloped roof.
Top caps are used to protect against leaks and moisture damage on metal roofs. They are also used as part of a ventilation system that helps move air throughout the attic space. Top caps can be made out of many different materials including aluminum, steel or vinyl.
Installing a top cap on a metal roof is fairly easy if you have experience working with this type of material. You will need some special tools and materials before beginning your project so make sure you have everything ready before starting work on your new top cap installation project. There are several different types of top caps available for sale online through retailers like eBay so make sure you choose one that fits your needs best before making your purchase decision!
How to Install a Top Cap on a Metal Roof
Installing a top cap on your metal roof is an important step to take in order to ensure your roof is properly sealed and will last for many years. A top cap is used on the top of your metal roof to keep water away from the seams in your metal panels. This gives you added protection from leaks and helps preserve the integrity of your home’s exterior.
When installing a top cap, there are several things you need to consider. First, make sure that the area around where you plan to install it is clear of debris like dirt or leaves. Second, be sure that all of the old caulk has been removed from around where the new cap will be placed. Third, make sure that you have all of the necessary supplies before beginning this project so it does not take longer than necessary!
A top cap is the metal strip at the bottom of your roof. The top cap connects the drip edge to the fascia board, and it helps keep water from running down the side of your house.
You can buy a pre-made top cap from your local home improvement store and install it yourself, or you can make one yourself out of sheet metal.
Step 1 – Measure for the Top Cap
Measure from the drip edge to where you want the top cap to be located on your fascia board. The best place for this is about 4 inches above the fascia board to give room for gutters and soffits. Mark this measurement with a pencil on both sides of your house where you want each top cap to go.
Step 2 – Cut Your Sheet Metal
Cut two pieces of sheet metal that are exactly as long as your measurement plus 1 inch extra on each end (for screws). You’ll also need two pieces that are exactly as wide as your measurement plus 1 inch extra on each side (so they overlap). These will become your “legs” that go under your gutter or soffit after installation.
Step 3 – Attach Top Cap Legs to Fascia Board
Drill pilot holes in both sides of where you want
If you’re looking for a unique way to convert your vehicle into an open-air cruiser, then installing a t-top roof may be the answer. While there are several models of t-tops available for many different vehicles, installing one on your G body may require some extra work.
Step 1: Remove the old top cap. Using your screwdriver and pliers, remove the screws from around the perimeter of the existing top cap. Once these screws have been removed, pry up on the top cap until it pops out of place.
Step 2: Measure and mark the side rails for drilling. Measure down from where the existing holes are located and make marks at 3/8 inch intervals along each side rail. Make sure that these markings are spaced evenly around each side rail so that you can drill holes in them later without having to worry about uneven spacing or alignment problems with your new t-top installation kit.
Step 3: Drill holes in each side rail using your drill and hole saw attachment (if necessary). If you don’t have a hole saw attachment on your drill, then use a regular screwdriver bit instead but make sure that it fits snugly into your drill so that you don’t
If you have a metal roof, then you may have noticed that the top of your roof is a bit different. There are usually several different types of caps available for your roof, but they all serve the same purpose: to keep water out and let air in.
In this article, we’ll discuss how to install a top cap on your metal roof.
Step 1 – Measurements
Before you can begin installing your top cap, you need to measure the size of the area where you want it installed. The measurements will help determine which type of cap is best suited for your needs. Some caps are designed specifically for certain types of roofs while others can be used on any type of metal roofing material.
Step 2 – Installation Process
Once you’ve determined what type of cap to use for your project, it’s time to begin installing it! You’ll want to lay down some tarps or drop cloths first so that any spills or drips don’t ruin your existing roofing material. Next, remove any screws or nails that are holding down existing shingles or other components in place before removing them from the roof with a crowbar or other prying tool such as pliers or a hammer and chisel which should be
Installing a new top cap on an existing metal roof is not difficult, but requires some patience and the right tools. The first step is to remove all of the old nails that are holding down the shingles. This will require a hammer and pry bar.
Once you have removed all of the old nails, it’s time to install the new top cap. This can be done by using a screw gun or power drill with a Phillips head bit. If you use a power drill, make sure that you take your time and do not over-tighten any screws.
The last step is to apply silicone caulk around each seam where two pieces of metal meet. This will prevent water from leaking through any cracks or gaps between seams.
How to Install a Metal Roof Cap
If you have a metal roof, there are different ways to install a top cap. These caps are used for many reasons and can be made of various materials. Some caps are used for aesthetic purposes, while others are designed to help keep the roof sealed and secure. There are also some that serve as insulation. If your roof needs a new top cap, here are some steps you can follow to install it properly:

1) Use a chalk line or tape measure to mark where the edge of the new top cap will be placed. This will ensure that all caps are installed in uniform locations on all sides of your home or business.
2) Mark off any existing flashing in place on the roof with a marker so that it can be removed before installing new flashing or other materials. You may want to use pliers or another tool to remove old flashing if it is stubbornly stuck in place; this will help prevent damage to either material or yourself during removal efforts.
3) Identify where each piece of flashing will go when installing new flashing over an existing one, using your chalk lines as guidelines for placement locations if desired. It may be possible for you to simply slip pieces over existing ones without removing them first; however
The top cap is the last piece that goes on the roof. It is made up of two pieces, one on top of the other. The lower piece is a rectangle with four holes in it. The upper piece has eight holes around its perimeter and a hole in the center for attaching to the lower piece.
The first step in assembling a top cap is to drill out all eight holes in each piece using a 3/4-inch bit. You need to use a drill press for this because you have to put pressure on the bit as it goes through each hole. If you don’t have access to a drill press, you can use vice grips or something similar to apply pressure while drilling.
Next, place the two pieces on top of each other so they line up properly. You should be able to see through both pieces at once when they’re aligned properly. Once they are lined up and positioned correctly, attach them together with 1/2-inch sheet metal screws through all eight holes in each piece (four per side).