The local server is a great tool for testing and debugging web applications locally before deploying them to a remote server. The remote server helps you test how your websites will work during production, as well as test scalability issues that may arise from using multiple servers in a Web farm (which is a collection of servers that load balance incoming requests).
Visual Studio Web Server Settings
Visual Studio 2019 comes with a built-in web server that you can use to preview your site in a browser. You can also use it to test your site locally before deploying it to the internet.
Enable development time iis support in visual studio 2019
To enable development time IIS support, click on the Tools menu and select Options. Then go to Projects and Solutions | Web Projects tab. Check Enable IIS Development Time Support. Click OK to save changes.
Visual studio run in iis
Now when you build your website, Visual Studio will run the compilation process on the local IIS webserver instead of just sending files out to a browser for rendering. If there are any errors, they will be displayed within Visual Studio just like any other compilation error – which is much easier than having to check for errors in the browser every time!
IIS Express is a lightweight version of Internet Information Services (IIS) that you install and use when creating web applications in Visual Studio. IIS Express is used to host websites and web applications on your local computer, instead of using the production version of IIS. When you develop ASP.NET web applications, IIS Express provides all the features that are available in the full version of IIS.
In this tutorial, we will show you how to enable development time iis support in visual studio 2019:
1. Open Visual Studio 2019, click on File > Options > Projects and Solutions > Web Server Settings, then select “Use Development Settings” as shown below:
The Visual Studio web server is used to run and debug ASP.NET applications. The default configuration uses IIS Express as the web server and has been optimized for running ASP.NET applications while they are being developed.
If you have an existing application that you want to start using with IIS Express, you can do so by changing the server type in your project properties to Custom. In this case, IIS Express will be used instead of the built-in Visual Studio web server.
The Visual Studio Web Server settings dialog is an interface that allows you to configure the server that hosts your application during development. The Visual Studio Web Server settings dialog also allows you to configure the port number and hostname of the web server, and to specify a domain name for the server. When you create a web project in Visual Studio, a default configuration is created for you. This default configuration can be used as is, or modified as needed.
If you choose not to use the default configuration and modify it manually, then use this topic to learn how to change the configuration settings.
Visual Studio also provides a way for you to easily switch back and forth between development mode (where IIS Express runs) and production mode (where IIS runs).
Visual Studio is a very powerful IDE for developers. It has many features like debugging, source code management, version control, etc. But it also has some limitations and one of them is the lack of support for running websites on localhost. In this article, we’ll see how you can run your website in Visual Studio without changing any settings.
First of all, let’s see what are the limitations of Visual Studio when it comes to localhost development:
You cannot use ASP.NET Core MVC or Razor Pages projects in Visual Studio. You can use them only when they are hosted in IIS Express.
You cannot run your website with Visual Studio if you have changed any default port numbers (80 or 443).
IIS Express is a Windows feature that provides a local web server for development purposes. IIS Express allows you to develop ASP.NET and web applications locally without the need to install IIS on your computer.
This article shows how you can enable development time IIS support in Visual Studio 2019, Visual Studio run in IIS, and IIS Express visual studio 2022.
Enable development time IIS support in Visual Studio 2019
Visual Studio 2019 comes with a built-in web server, but it’s disabled by default. To enable it, go to Tools > Options > Projects and Solutions > Web Server Settings. Select the Enable development time IIS support option and click OK.
Visual Studio run in IIS
You can also choose to run Visual Studio in IIS Express for testing your application locally. This option is available under Tools > Options > Projects and Solutions > Web Server Settings:
In the Select Local Web Server dialog box that opens, choose IIS Express from the dropdown list at the top of the dialog box:
IIS Express will be installed if it’s not already installed on your computer. Once the installation completes, you’ll see an entry for IIS Express in the dropdown list:
Click OK to save these settings.
1. Enable Development Time IIS Support in Visual Studio
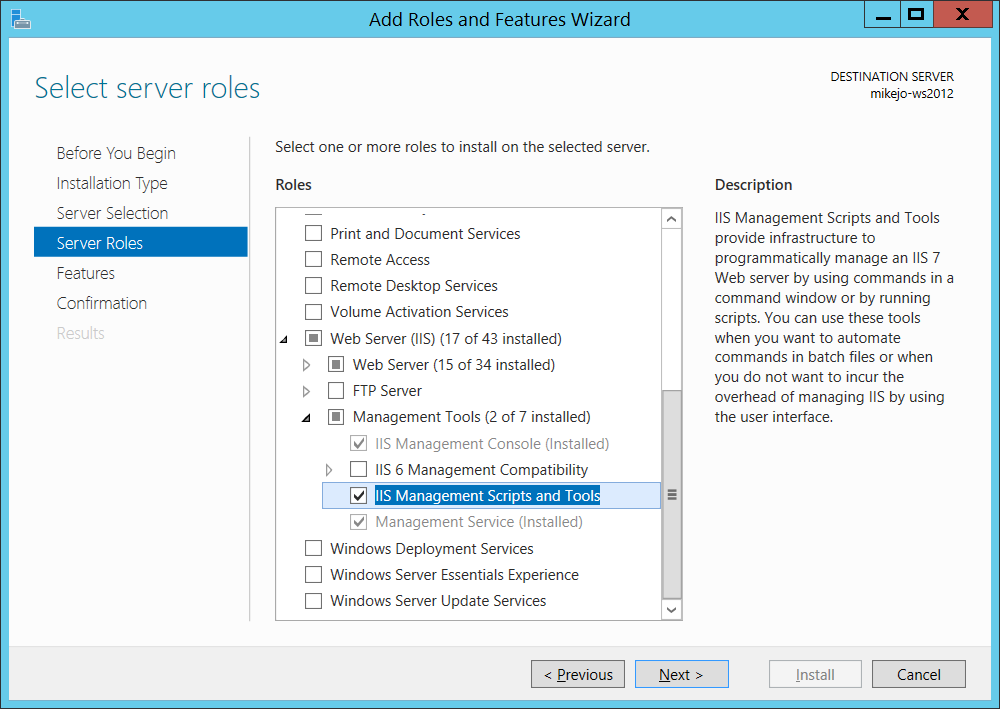
To enable development time IIS support, you must first install the Web Platform Installer (Web PI) on your machine. You can download the Web PI from here: https://www.microsoft.com/web/downloads/platform.aspx
Once downloaded and installed, run it and search for IIS Express, which should be listed under the “Components” section. If it’s not there, make sure to click on “Enable remote web site publishing” under “Advanced Options”.
Once enabled, you’ll see an icon appear in your taskbar tray which will allow you to open IIS Express whenever you need to test out a web application locally prior to pushing it up to Azure or another hosting provider.
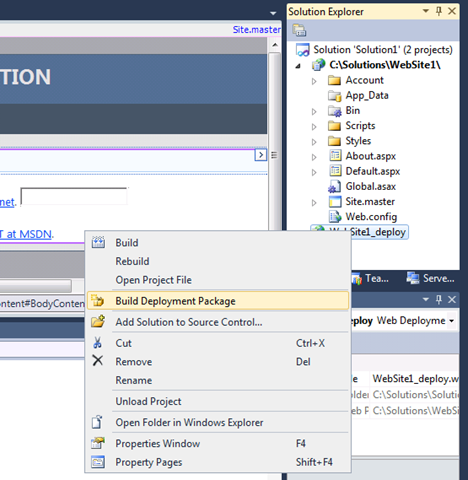
To run an ASP.NET application in Visual Studio using IIS Express, simply right-click on the project file (.csproj) and select “Open With.” This will bring up a list of options for how you want to open your project with Visual Studio. Simply select “IIS Express” from this list and click OK
To enable development time IIS support in Visual Studio 2019:
Open Visual Studio 2019. Click File > New Project . Select ASP.NET Core Web Application from the list of project templates and click Next . Name your project and pick a location to save it. Make sure that Create Directory For Solution is unchecked, then click OK .
In the New ASP.NET Core Web Application dialog box, select the ASP.NET Core 2.1 (or later) framework by clicking on the dropdown next to Web Application , then select Web Application (Model-View-Controller) :
Click Change Authentication and make sure Use Windows Authentication (Kerberos) is selected:
Click OK :
This adds using Microsoft.AspNetCore.All; as well as a configuration file called appsettings.json to your project’s root directory:
The main difference between running locally and running on AWS Lambda is that you have to run your code from within a web server when you’re working locally (either IIS Express or Kestrel).
Visual Studio 2019 has a new capability called Localhost. This is a new feature that allows you to run your application locally without having to configure a web server.
In Visual Studio 2019, you can set up the environment by using IIS Express, which is a lightweight web server that is built into Visual Studio. You can use this to test your website without needing to install and configure a full version of IIS.
In this tutorial, we will show you how to set up Localhost in Visual Studio 2019.