Tomcat Server for Eclipse is a lightweight, open-source and freely available software application that offers users a framework for quickly and easily setting up a server for Java applications. The biggest advantage of this program is that it allows you to run an Apache Tomcat server directly from Eclipse.
Tomcat Server For Eclipse
This is an article about how to add tomcat server in eclipse in windows.
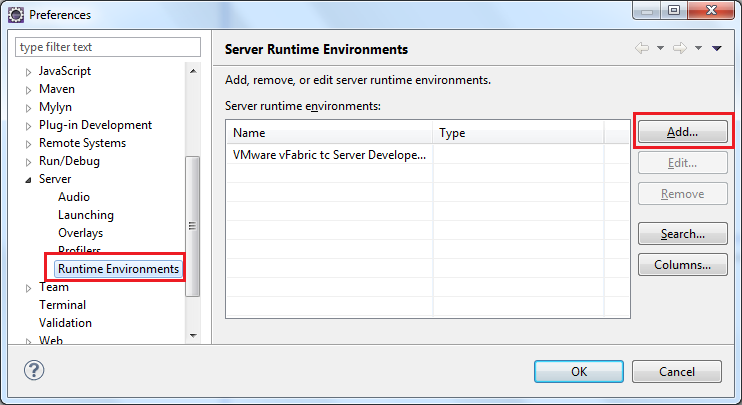
When you install eclipse, you might notice that there is no server tab available. The reason for this is that the default Eclipse installation does not come with any server runtime.
You can add your preferred server runtime by adding a feature to your Eclipse installation; however, this can be done in multiple ways:
If you only want to add the server runtime, but do not want to use it as a development environment, then you should go with option 1 or option 2.
If you also want to use your chosen server as a development environment, then option 3 is probably your best choice.
How to add tomcat server in eclipse in windows
The first step is to download and install the Eclipse IDE. The latest version of Eclipse can be downloaded from the official website. Once you have installed it, open your eclipse IDE and select “Help”->”Install New Software”.
Click on Add button and enter the following in the Name textbox of Install dialog box:
Name: Tomcat 8 Server
Location: http://mirror.symantec.com/tomcat/tomcat-8/v8.0.41/bin/.
Click OK button to install Tomcat server for Eclipse in Windows OS.
The first step is to install Eclipse. Head over to eclipse.org, click the download link and select the version you want. You can choose either a Java EE or a Java SE version of Eclipse. If you’re planning on developing Java web applications, then go for the Java EE version. The Java SE version is for developing standalone Java applications.
Once you have downloaded your installation file, run it and follow the wizard steps to install Eclipse on your machine. Once the installation is complete, open it up from your Windows Start menu or Desktop icon and you’ll be greeted with this screen:
This should look familiar if you’ve used an IDE before (Integrated Development Environment). It’s where all your project files will live within Eclipse so that you can work with them easily. You’ll notice there’s also a Servers tab at bottom but it’s currently empty because we haven’t installed any servers yet! Let’s get started by installing Tomcat Server into our workspace…
In Eclipse, click on Help > Install New Software.

In the Work with field, enter “http://download.eclipse.org/releases/kepler”.
Click Add.
Now you’ll see a list of projects in the Work With field. Make sure that you select the checkbox next to Apache Tomcat v8 Server and click Next> to continue.
You’ll be asked to accept the license agreement for Apache Tomcat v8 Server. Click Agree and then Next>.
You’ll be asked which components you want to install. Select only “Apache Tomcat v8 Server” and click Next>.
Click Finish when prompted to restart Eclipse so that the installation can complete properly.
How to Install Tomcat on Eclipse?
Install Tomcat 7 in Eclipse IDE
1. Open Eclipse and go to Help > Install New Software…
2. Click Add… button, and enter a name for the new site. For example, enter “Tomcat 7” as the name.
3. Now you need to enter the update site URL into the “Work with:” field. You can find this URL at http://www-01.ibm.com/software/awdtools/tutorials/userguide/updatesites_ws_enterzip.html . In our example we will use:
http://download.eclipse.org/tools/orbit/downloads/drops/R20100120200007-0800-win32-x86_64-feature_pack_updateSite-featurePackUpdateSiteSigned-site.xml
4. Click OK button and wait for about 5 minutes until all required components are downloaded and installed on your machine!