WordPress is an open source content management system (CMS) based on PHP and MySQL. It was originally created by programmer Matt Mullenweg for use on his blog, and then later sold to Automattic, a web development company owned by Mr. Mullenweg, in 2005. WordPress is now used by over 25% of the top 10 million websites as of May 2019. The software is licensed under the GPLv2 (or later) license.
WordPress also powers many of the web’s leading news publications including The New Yorker and The Economist.
Setup WordPress On Cpanel
Here is a brief guide on how to install WordPress on cPanel without softaculous.
If you want to install WordPress in your subdomain, then you can follow the following steps:
First of all, go to the File Manager section in the cPanel.
After that, click on Add New Domain.
You will be taken to the domain registration page where you will have to fill all the details according to your need.
Once done with that, click on Confirm Registration.
Now, after this step you have successfully registered your domain name and it will show up in the Manage Domains section as well as in your email address.
Next step is creating an A record for your domain name which you have just registered. You can do so by going over to DNS Zone Editor section under Advanced DNS tab or by clicking here and filling out all the required information like IP address etc., and then hit Save Changes button at bottom of page once done with everything else!
Installing WordPress on Cpanel is very easy. You will be able to install WordPress on your localhost or live server. In this article, I will show you how to install WordPress in Cpanel step by step.
Step 1: First of all, you need to log in to your Cpanel account.
Step 2: After logging into your Cpanel account, click on the Softaculous icon under the Software section.
Step 3: Now, click on WordPress icon from the Softaculous installation page. This will take you to the installation page for WordPress.
Step 4: On this page, fill up all the details carefully and click on Install button at the bottom of the page.
Step 5: Once you have clicked on install button, it will ask for FTP credentials of your hosting account and give you an option to change settings such as database name etc., if needed.
The WordPress Toolkit is a Cpanel plugin that allows you to install, configure and manage your WordPress website through the Cpanel interface.
Requirements:
You must have access to a cPanel server. You can use this tool with other hosting companies such as HostGator, Bluehost, Flywheel and many more.
Installing WordPress on cPanel:
To install WordPress using the Toolkit, follow these steps:
In your browser, navigate to https://cpanel.com/toolkits/install-wordpress-on-cpanel.html . Click Install Now.
Read through the Terms of Service and click Accept. Enter your domain name into the Domain field and then click Next Step.
Choose whether you want to install WordPress as an existing user or create a new user account for it; then click Next Step.

Enter information in the required fields; then click Next Step (or Begin Install).
WordPress is one of the most popular content management systems in the world. It has a lot of advantages over using a regular website to host your content.
WordPress is also very easy to install and use, so it’s no surprise that it’s one of the most common CMS platforms out there. One of the ways you can install WordPress is through Cpanel. Cpanel is a web hosting control panel that allows you to manage your account and install various programs on your server.
In this guide, we’ll show you how to install WordPress using Cpanel.
Download the latest version of WordPress from wordpress.org, and then upload it to your server using an FTP client like FileZilla.
Navigate to your domain name’s cPanel, and click on the Upload button.
Click on Choose File, and then select the file you just downloaded.
Click on Upload File & Complete Install.
How to Install WordPress in cPanel Without Softaculous
WordPress is the most popular content management system (CMS) on the Internet. It’s easy to install and use, but it requires a web host with a control panel that supports PHP and MySQL. In this tutorial, you’ll learn how to install WordPress on your remote cPanel server using an automated tool called Softaculous.
If you prefer, you can also manually install WordPress using the steps outlined in this tutorial: How To Install WordPress On Your Website. If you’re running into issues during the installation process or want more control over how it works, then this article will help you out.
Note: If your website is hosted on a shared hosting account that doesn’t have access to cPanel, then follow this guide instead: How To Install WordPress On A Hosting Account Without Cpanel Access.
What Is Softaculous?
Installing WordPress in cPanel is a very simple process. You can install it manually or use the Softaculous Installer. If you are not familiar with cPanel, I suggest you start with this guide: How to Manage Your Web Hosting Account in cPanel.
Go to Softaculous and select WordPress from the left menu. Click Install Now and follow the instructions.
If you want to install WordPress on a sub-domain, go to Subdomains in your cPanel and create a new sub-domain first. After that, return to Softaculous and select WordPress again but this time choose your subdomain from the dropdown menu named Website Domain.
Step 1: Sign in to your hosting account and go to the cPanel.
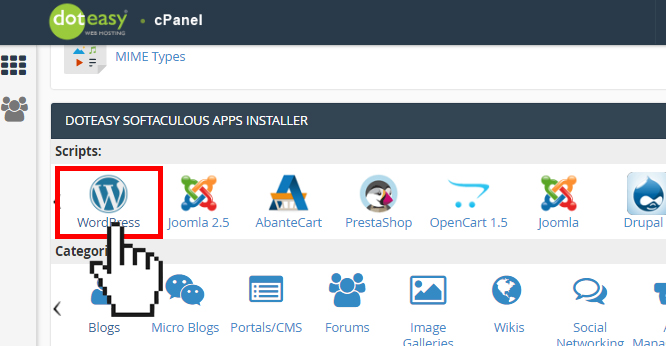
Step 2: In the left sidebar, click on Softaculous Apps Installer.
Step 3: In the Softaculous Apps Installer page, look for WordPress and click on Install button.
Step 4: A new page will open where you need to fill up all required details like Name of Application, User Name, Password, Admin Email and Site Title. Once done click on OK button.
WordPress is one of the most popular content management systems (CMS). It powers over 30% of all websites and is used by individuals, small businesses, large companies and even governments.
If you want to install WordPress on your web server, you can do so using Softaculous.
Softaculous is a script installer that makes it easy for users to install popular PHP scripts such as Joomla!, Drupal and WordPress with just a few clicks.
If you have an account with your hosting provider, then you can use Softaculous to install any of the scripts above. The application will take care of everything else like database configuration, file uploading etc. However if you are not familiar with the installation process or simply want to do it manually then follow these steps:
Step 1: Login to cPanel (https://{domain}/cpanel) with your username and password. If you don’t know how to log in click here
Step 2: Go to “Install Scripts” section under “Manage Software” tab. Click on “Add New Script” button and select “WordPress” from the list of available scripts.
How to Install WordPress in cPanel
If you have access to cPanel, you can install WordPress on your account with just a few clicks.
You can also use Softaculous to install WordPress, but this guide will cover the manual installation method using File Manager.
1. Log into your GoDaddy account and click the “File Manager” link in the upper-right corner of your screen.
2. Click the “Create New Directory” button in the upper-right corner of the File Manager window.
3. Type an appropriate directory name for your website, such as “mywebsite”, and then click “Create.”
4. Click on “mywebsite”. You should see a list of all files within that directory. Double-click on index.html to open it in a text editor window (this is where you’ll add code to create your website).
5. Scroll down, copy and paste this code into index.html:<!DOCTYPE html> <html> <head> <title>My Website</title> </head> <body><p>This is where my website goes.</p></body></html>.