One of the most popular blogging platforms is WordPress. It’s easy to use, fast and flexible and there are hundreds of themes and plugins available to help you create a beautiful website.
Today we’re going to show you how to setup WordPress on your Bluehost account so that you can start blogging!
Setting Up WordPress With Bluehost
When you sign up for a Bluehost account, you will be prompted to choose a domain name for your website. This is the name that people will see when they visit your website. If you already have a domain name, you can enter it in the “Domain” field and then click on “Next” to continue.
If you do not have a domain name yet, then click on “I’m ready to register a new domain.” This will take you to a page where you can purchase a domain name and then return to the cPanel dashboard.
Click on “WordPress” under the “Software” category on the left-hand side of cPanel, then click on “Install WordPress.”
You will now be taken to the WordPress installer where all of the necessary components will be installed automatically for you.
When installation has completed, scroll down to find your username and password (these are separate from your Bluehost login credentials). You can now log into WordPress at http://yourdomainname/wp-admin/.
If you want to set up WordPress on BlueHost, here’s how.
BlueHost is one of the most popular hosting providers for WordPress. You can get started with them for as little as $2.95 per month.
The first step is to sign up for your BlueHost account. Once you’ve done that, follow these steps:
1) Log into your BlueHost account, and click on the “cPanel” link at the top of the page. This will take you to your cPanel dashboard.
2) Click on the “File Manager” link in the left-hand menu under “Domains.”
3) Select which domain name you want to install WordPress on by clicking on its corresponding row in the table of files and folders that appears. If this is your first time using a File Manager like this one, look for a file called “index” or “index.html” (it may be hidden). This will be your home page once you’ve installed WordPress on it!
The following is a step-by-step guide to setting up WordPress with Bluehost.
Step 1: Sign Up with Bluehost
Head on over to Bluehost and create an account. If you already have an account, you can sign in to it here.
Once you’re logged in, select “Sign Up” from the top menu (or click here).
Choose your hosting package and sign up for it. The more expensive packages give you more features (such as domain privacy protection), but they aren’t absolutely necessary for this tutorial. The first option is fine for our purposes.
Once your account has been created, you’ll be taken to a page where you’ll enter some information about your site. Enter the name of your site (“My Site” in this example) and choose the plan that’s right for you (again, the first option is fine for our purposes). Then click “Next.”
On the next screen, enter your billing information and then click “Next.” You don’t need to purchase additional domains or SSL certificates at this time — we’ll do that later on when we’re ready to launch our site publicly. When everything looks good, click “Next” again and then
To install WordPress on Bluehost, you can follow the steps below:
1. Go to your cPanel and click the “Install WordPress” button.
2. Fill in the form with your details and click next.
3. Choose your domain from the dropdown list, then click next.
4. Enter the database name and username/password for your database, then click next. The username should be something like root and password should be something like root as well (you can change them later).
5. Choose a MySQL version that is current; 5.6 or 5.7 are recommended but not required (this will save you some time later). Click next when done with this step.
6. Choose where you want your blog to be located in your website directory tree by default and if you want to create an admin user account for yourself or not (recommended); then click install when done with this step (it may take a little bit for this process to complete).
You can set up WordPress with Bluehost manually or use one of the many one-click installers. You can also use a third party hosting service like WP Engine or Hostgator.
Here are the steps to take in order to set up your domain, install WordPress and get everything running:
1. Sign up for a new Bluehost account (use this link to get 2 months free).
2. Purchase a domain name from Namecheap or any other registrar (we recommend using Namecheap).
3. Use cPanel to point your domain name at Bluehost’s IP address (see below for instructions on how to do this).
The WordPress installation path is the location where the WordPress files are stored on your hosting server.
Bluehost automatically installs WordPress, but you can also install and configure it manually.
The login information for WordPress can be found in the cPanel interface or in a file called wp-config.php. You’ll need to know both of these pieces of information in order to access and edit your site’s content.
The process of installing WordPress on Bluehost is very similar to other forms of installation: You’ll need to create an account with WordPress, which includes providing an email address and password, then download the software from their website and upload it onto your server (there are many ways to do this).
If you are trying to install WordPress on Bluehost, you will probably run into problems. This is because Bluehost does not offer the option to install WordPress and the default web server it uses is Apache. To get around this, you have to install the LVE Manager, which can be downloaded from the Bluehost website. Once this has been installed, you can then proceed with installing wordpress.
Bluehost does not automatically install wordpress. This means that you will have to do it yourself manually. The first thing that needs to be done is to log in to your cPanel and go to ‘Software’. Then select ‘WordPress’ and click on ‘Install’.
You will then need to fill out all of the required information such as:
WordPress installation path (this should be /home/username/public_html/)
Database hostname (which should be localhost)
Database username (which should be root)
Database password (which should be your root password)
Bluehost does not automatically install WordPress, but you can use the one-click installer to do so. If you have installed a fresh copy of WordPress, then you need to log in to your Bluehost account and install it from the cPanel.
WordPress is a free open-source blogging tool and content management system (CMS) that you can use to create a website or blog. The software is easy to use, which is why it’s become so popular among people who want to set up their own website.
If you’re using Bluehost as your hosting service, you can use their one-click installation process for WordPress to get started quickly and easily.
Here’s how:
1. Log in to your Bluehost account by entering your login information into the top right corner of the page or logging in through your control panel.
2. Click on “Install” under the Software icon on the left side of the page (see screenshot below). This will take you to a new page where all available software packages are listed (including WordPress). The first field asks “What kind of software do you want?” Select “WordPress” and click “Continue”.
Bluehost is a popular web hosting provider, and it’s also the recommended host by WordPress.org. If you’ve recently signed up with Bluehost and want to install WordPress, here’s a step-by-step guide for setting up your new site.
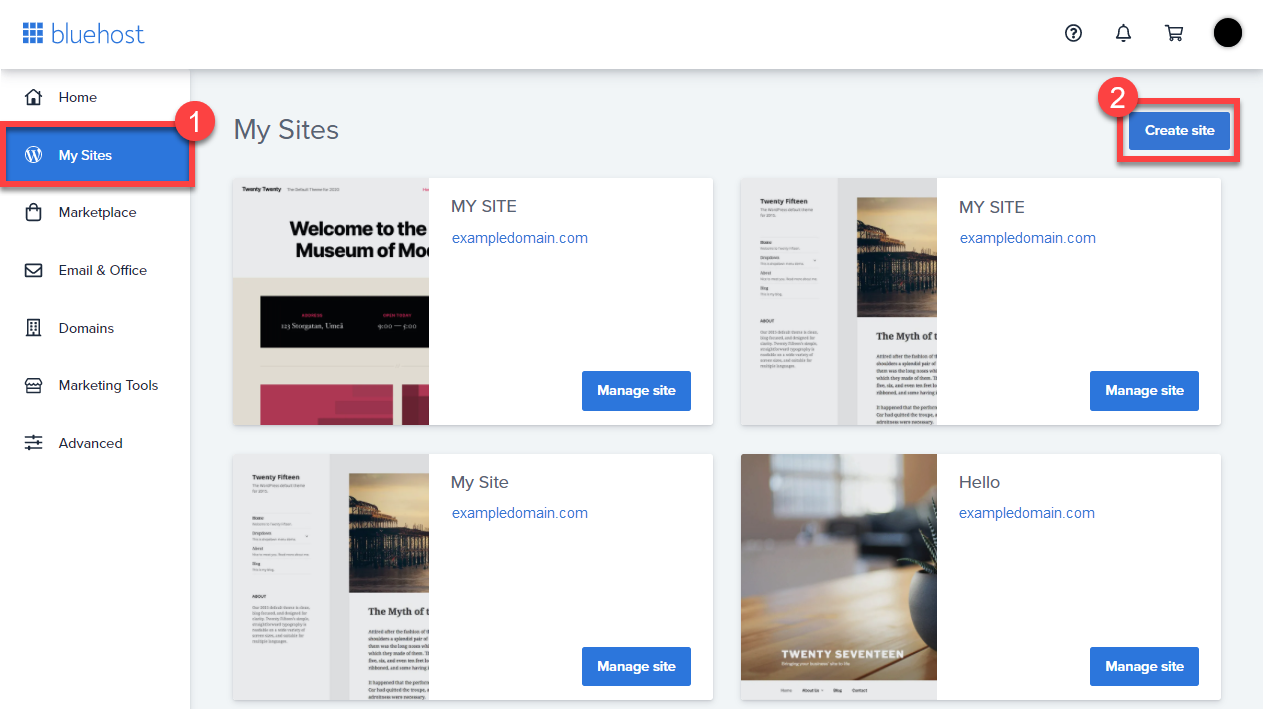
Step 1: Create a New Site with Bluehost
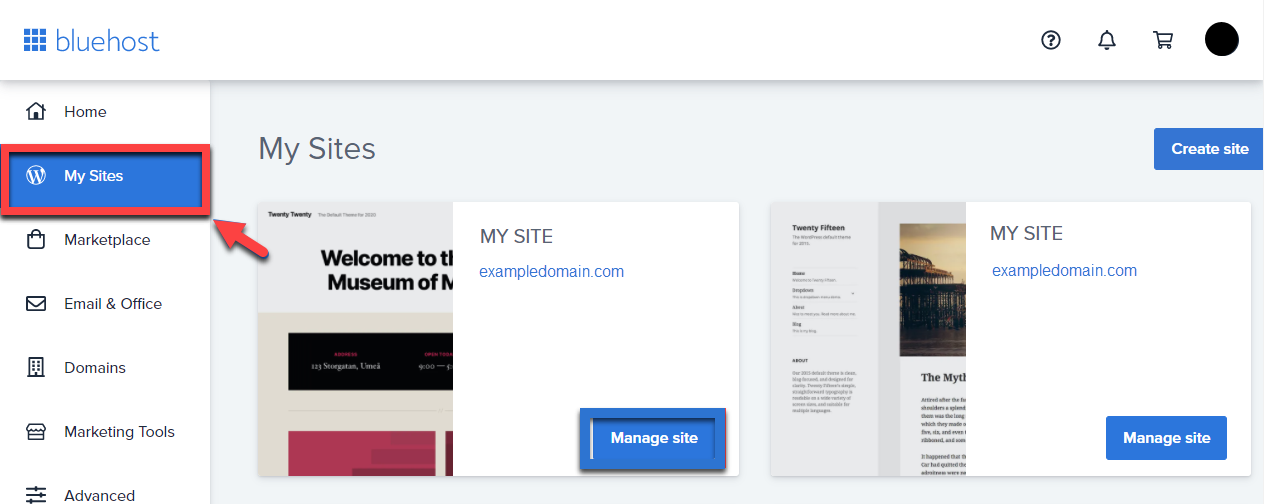
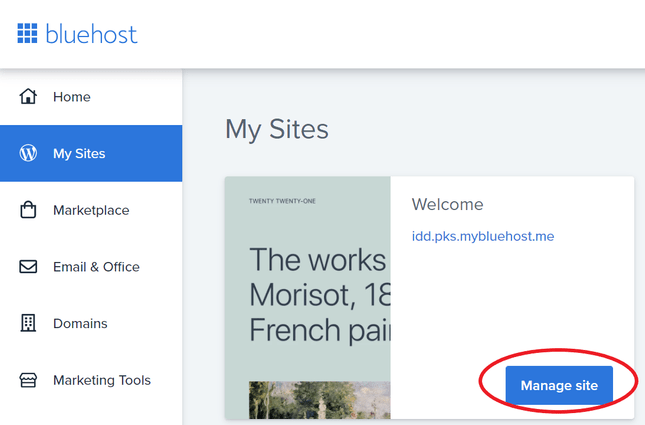
First, log in to your Bluehost account and click on the “Launch” button. You’ll be taken to a page where you can create a new website.
Next, choose the “WordPress” option from the dropdown menu under “Select Application,” then click on “Next.”
On the next page, enter your domain name in the box labeled “Enter Domain Name Here.” This is usually your website’s URL without “.com,” e.g. http://example.com/. If you want to use an existing domain name instead of using Bluehost’s free subdomain service (e.g., http://exampleblog), check off the box next to it before clicking on “Next.”
Finally, choose whether or not you want to install WordPress when prompted by clicking on either “Install Now” or “Skip It For Now.” If you opt for the latter choice, simply skip this step altogether
Bluehost is one of the most popular and easiest to use hosting providers in the world.
As a beginner, you might be wondering if Bluehost is right for you.
Bluehost is ideal for people who are just starting out with WordPress and want an easy, trouble-free experience. You can get started with Bluehost in under 10 minutes and have your first post up in no time!
Bluehost makes it very easy to start a blog, but what happens when you need help?
Here are a few tips to help you get started with Bluehost:
1) Choose a plan that meets your needs. Although all of Bluehost’s plans offer unlimited web storage and bandwidth, some of them have more features than others. For example, if you don’t have any plans to add eCommerce features or multiple domains on your site, then you don’t need to upgrade from their cheapest plan. Keep reading to find out more about each plan available from Bluehost and how much they cost per month!
2) Set up your website quickly by choosing one of their pre-made templates for free (or pay $4-$6/month for premium themes).