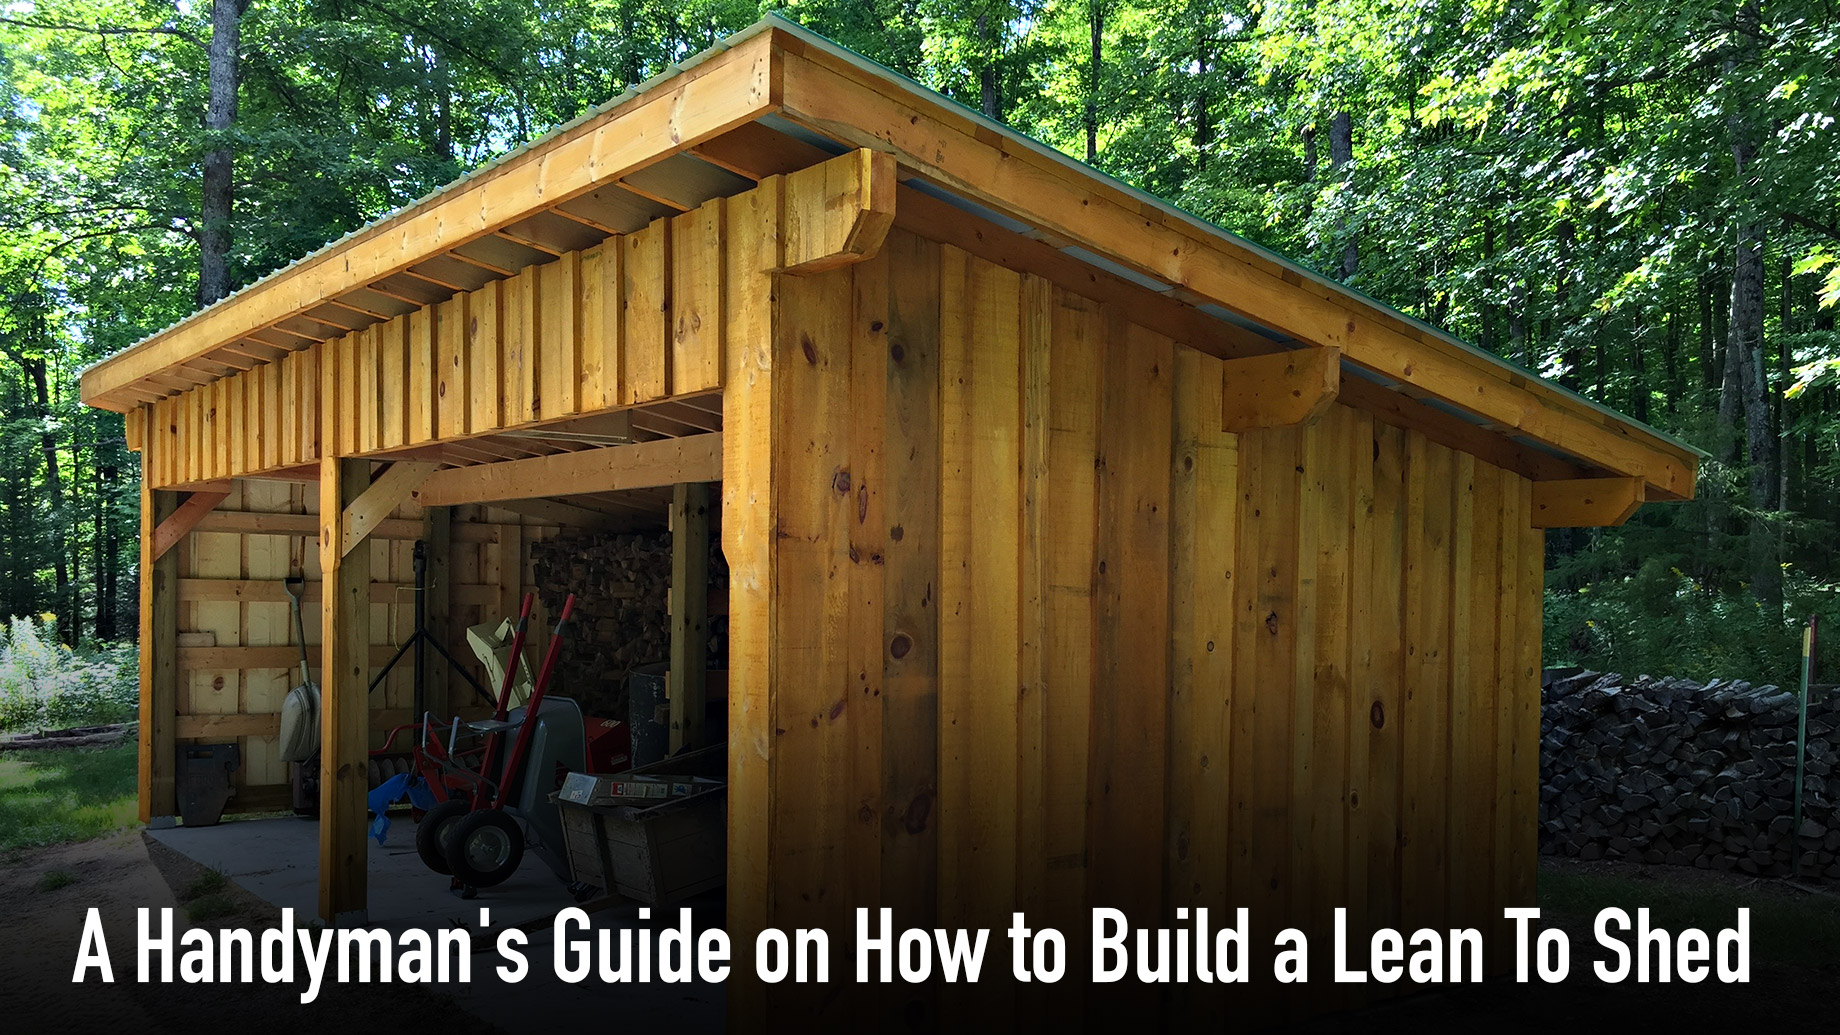
Building a lean to off a shed is something that many people do who have some carpentry skill, time, and just want to get it done. But you might have noticed there are many sites on the internet that claim that their way of building a lean to off a shed is the best.
Whether you have a modest backyard or a huge one, adding a bench or some type of seating area is a great way to transform it into your own personal space. Building this kind of structure is simple and relatively inexpensive to build. In addition, you will find that it’s very rewarding to build on your own, and you can customize the materials used as well. In fact, not only can you build a lean-to off of a shed but you can also construct them off of just about any sort of building as well.

Plans how to build a lean to off a shed
Building a lean to shed is a great way to expand your storage area. A lean to is basically just an addition to the side of your shed that has walls and a roof but no floor. You can use it as an additional storage space, a small workshop or even as an enclosed area for the kids to play in during bad weather.
If you have a large backyard and don’t mind putting in some work, you can build a free-standing lean-to shed that doesn’t rely on the shed itself for support. These types of projects are usually built from wood and have their own foundation and structure. They’re also more expensive than adding on to an existing structure because of all the materials needed and time spent building them.
You can build one by yourself if you’re handy with tools or hire someone else who is more experienced with this type of project than you are. Either way, here are some tips for building your own lean-to:
Choose the Right Location – The best location for a lean-to would be against your storage shed so that it’s out of direct sunlight and protected from windy conditions. You also want enough room between both structures so that they don’t interfere with each
DIY Lean To Shed Roof
Lean to shed roofs are a great addition to any shed. They can provide much needed extra storage space, as well as a shelter from the rain and sun.
In this article we will look at how you can build your own lean to shed roof. We’ll take you through the steps involved, from planning through to completion. This should give you enough information to get started on your own lean to shed project.
How To Build A Lean To Shed Roof
The first thing you need to do when planning how to build a lean to shed roof is decide what size it needs to be. If possible try and make sure that it has at least 4 feet of headroom inside so that tall items such as garden machinery or pots and pans won’t hit the ceiling when they are stored there (and also so that you don’t have to bend down too far).
You should also consider whether or not you want any windows in your lean-to shed before starting construction, as these will affect how large the roof needs to be (see below).
Once you know what size your new lean-to shed is going to be, then its time for some measurements! Measure out the width of where.
How to Build a Lean-to Shed
A lean-to shed is a small structure that’s built against the side of a larger building (such as your garage), and it can provide extra storage space for outdoor supplies. Here’s how to build a lean-to shed.
How to build a free standing lean to
1) Decide where you want the lean-to shed to go; this will depend on how much space you have available. Make sure there is enough room for the size of shed you want, as well as enough room for you to access it easily with tools, etc..
2) Dig out a foundation for the shed with a shovel or spade, depending on how hard the ground is; if it’s hard clay or concrete, then use an angle grinder fitted with a diamond blade instead. Make sure that you have enough depth so that the base of your shed will be level with ground level – this will make it easier for you later on when installing doors and windows etc.. You may also need drainage trenches if there are any slopes in your garden where water can collect after rainfall or snowmelt; these should be dug at least one foot deep, then filled back in with gravel or rocks so that they don’t
If you’re looking for the perfect place to store your gardening tools, lawn mower and more, then a lean-to shed is an ideal solution.
A lean-to shed is a small structure with a roof that is attached to your existing building. This design makes it easy to add storage space without having to expand your home.
If you’re planning on adding a lean-to shed to your backyard, there are several things to consider before you begin construction. This guide provides information on how to build a lean-to shed roof and how much it costs.
If you have an existing storage shed or garage and want to add more space, a lean-to is a simple way to do so. This shed extension will provide additional storage space and shelter from the elements. The lean-to design also keeps the weight of the roof off of your main building. A lean-to shed can be built on any existing structure, but consider these factors before starting construction:
Build your lean-to close enough to your main structure that you can reach it easily with tools and materials, but not so close that it limits movement in the rest of your yard or garden.
Use treated lumber for all framing members and plywood siding, but keep the overall height of the finished structure low enough that you can reach most of it without using a ladder or stepping stool.
Keep walls as simple as possible for maximum strength and ease of construction. Use 2x4s for framing members, with 2x6s for longer spans required by load-bearing walls (see “Building Load Bearing Walls” below). If you plan to use plywood siding, make sure it’s rated for exterior use; if possible, choose “exterior,” “marine” or “marine/exterior” ply
Walk through lean to shed – a walk through lean to shed is a great way to house your tools, lawn and garden equipment, or even as a place for the kids to play. It is also a great space for storing your firewood or woodworking supplies.
Here is an example of how to build a simple walk through lean to shed.
Step 1: The first step is to build your foundation. You can use concrete blocks, cinder blocks or even bricks as long as they are level and level with one another. You will also need 2×6 lumber cut into 4 foot lengths that are spaced 12 inches apart on center in order to support the floor joists. The ends of these joists will overhang into the ground by about 18 inches each end so that they don’t rot from moisture in the soil beneath them.
Step 2: Once you have laid out your foundation, it’s time to frame up the walls. For this project we used 2x4s for our framing material but you could also use 2x6s if you wanted something sturdier or look better when painted (you would also need more lumber). You can use tongue-and-groove plywood that has been covered with exterior grade
The walk-through lean to shed is a great project for anyone looking to add extra storage space. It’s also a great way to get started with building your own shed.
The walk-through lean to shed is the perfect addition to your property if you need extra storage space and want something that looks good in the yard.
This type of structure comes in many different shapes, sizes and designs, but they all have a few things in common:
The roof is pitched at an angle so that water runs off easily
They have open sides for easy access
They have doors for entry/exit.

How to build a lean to shed:
The lean-to shed is a great way to add additional space to your home. This type of structure provides shelter and storage for bicycles, gardening tools and other items. The lean-to shed can be attached to the back of your home or it can be freestanding.
Step 1: Build the Base
The base should be made up of pressure-treated wood or concrete blocks. You can also use cinder blocks or bricks as long as they are stable enough to support the weight of the roof material. The size of the base will depend on how large you want your lean-to shed to be.
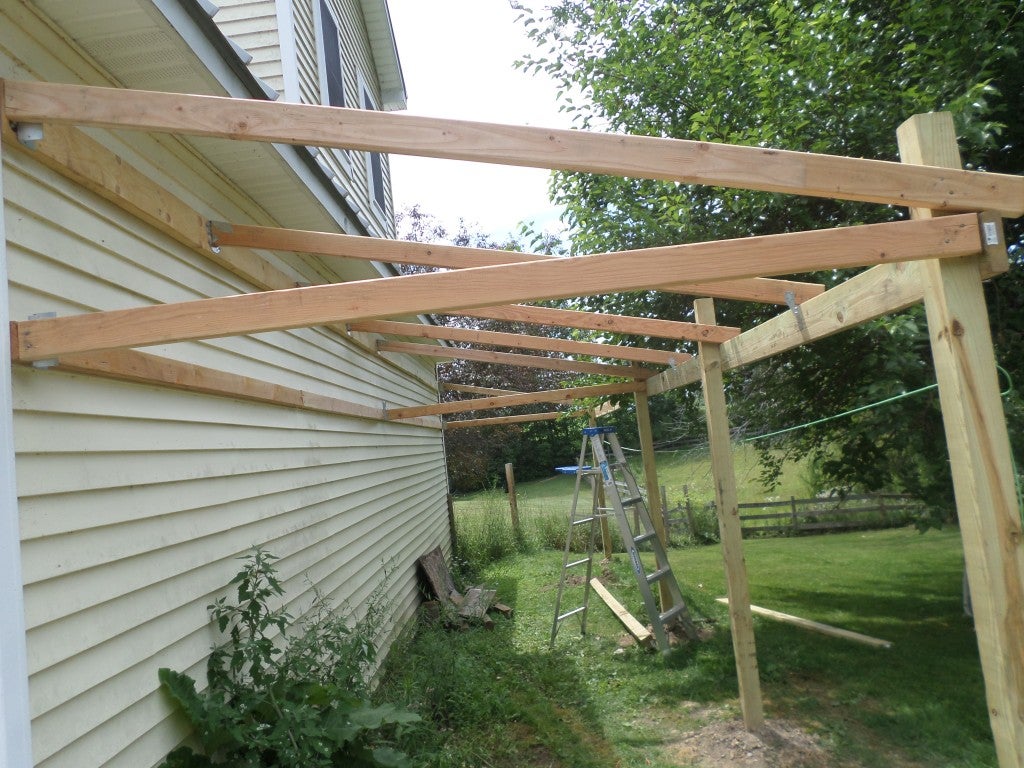
Step 2: Build the Roof Frame
Use 2x4s and plywood for this step. You will need two 8′ 2x4s for each side of the roof frame and one 10′ 2×4 for each end piece. Cut them into thirds so that they fit into place easily. Attach each piece with screws or nails every 12 inches on all four sides of the frame so that it is secure when you erect it later on in steps 4 through 6 below).
Lean-to shed plans are easy to follow and can be constructed in a weekend. If you’re looking for a simple, economical way to add storage space or a workspace to your property, this is the project for you.
A lean-to shed is an effective way to create additional storage space in an outbuilding or garage. The structure is attached at one end of the building and extends out over part of the ground, providing shelter for gardening tools, bicycles and other items.
Lean-to shed plans vary widely depending on how much room you want to devote to storage versus workspace. Some lean-to sheds are up against an existing wall of the building so that they take up only one side of the structure (as opposed to two). You can also choose whether or not you want the lean-to attached at an angle or straight across from where it connects with its base building.
A lean-to shed is a roof structure that extends from a house, attached to the wall. It is commonly used as a storage shed or for parking a vehicle. The building is erected using materials that are readily available at home and can be built by anyone with some basic carpentry skills.
To build a lean-to shed, start by measuring the length of the space where you want to install it. The height should be equal to the length of the wall that holds it up and add an extra foot for each side. This will give you an idea of how much lumber you need for construction.
Cut two pieces of 2X4 lumber at least 48 inches long, one piece for each side of your lean-to shed, using a circular saw or power miter saw. If you do not have these tools, use a hand saw but make sure that you cut all pieces accurately so they fit together perfectly when assembling them later on.
Use wood screws to attach the sides together at an angle of 45 degrees in order to create two triangles and then secure them together with two more 2X4s across the top, forming an A-frame shape. If necessary, use additional 2X4s to reinforce the corners before placing them inside.