I’ve seen a few blogs now on how to tarp a roof with plastic, but I’m going to talk about something different — sandbags. Sandbags actually have some advantages over plastic that I think could make it a better option for a number of homes.
You have a leaky roof, can’t afford to get a specialist out to fix it there are tons of tutorials online about fixing your roof sound complicated? Sounds pretty simple to me. Building a sandbag roof is something I have never done before until a few months back. I live in Pueblo, Colorado, which is where you will be able to find sand and bags. Your local hardware store will carry the bags that you need for this.

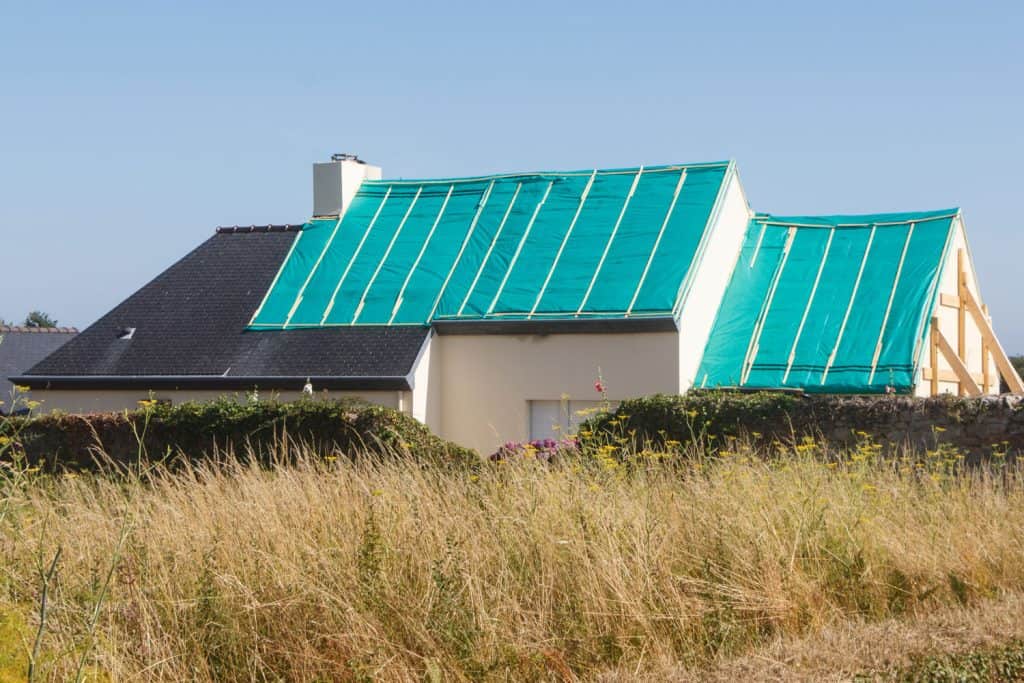
How to tarp a roof with sandbags
How to Tarp a Roof With Sandbags
Tarping a roof is a common practice in the construction industry. It’s often used to protect against weather damage and leaks. A tarp on your roof can also prevent debris from flying into the house when you’re working around it. Tarping a roof requires some basic tools and materials, but it isn’t terribly difficult to do.
What You’ll Need
Tarp material – You can buy tarps at hardware stores or home improvement stores. The size of your tarp should be determined by how much area you need to cover and how big your sandbags are going to be. Keep in mind that if you’re using rubber tires or plastic drums as part of your system, they will take up more space than bags filled with sand or other materials that can be stacked together easily.
Bag holders – Bag holders are available at local hardware stores in many different sizes and shapes to accommodate any type of bag you choose. They attach easily to wooden beams or masonry walls so you don’t have to worry about drilling holes into your home’s structure for support purposes.
Cement blocks – Cement blocks are used for holding bags upright on the ground without having
When you’re tarping a roof with sandbags, you have to make sure that the sandbags are piled up evenly and securely. It’s easy to underestimate how much weight your roof can support, and if you don’t use enough sandbags, your roof could cave in.
On the other hand, if there’s too much weight on the roof, it can cause serious damage that may require expensive repairs.
Step 1: Find out how many sandbags are needed
The easiest way to find out how many sandbags are needed is to ask someone who’s done it before — preferably someone who has experience putting up tarps on roofs with steep angles.
To figure out how much weight a particular area can support, divide the total square footage of your roof by 100 pounds per square foot (0.16 g/cm²). For example, if your house has an area of 10 feet by 20 feet (200 square feet), it can support at least 2 tons of weight (2 x 2000 lbs = 4000 lbs).
If you want to be safe rather than sorry, try to put up a few more bags than this value suggests — maybe three or four times as many in order
Tarping a roof is important if you want to keep the interior of your property dry during a storm. It’s important to note that tarps do not seal the entire roof, but they can provide protection against minor water leaks and damage.
Tarping a Roof With Sandbags
The first step to tarping a roof with sandbags is to clear out any debris that may have accumulated during the build process. This includes nails, staples and other scraps of wood. Use a vacuum cleaner to remove all dust and debris from the area you plan to cover.
Next, place some heavy objects such as cinder blocks or bags of dirt on top of the tarp in order to weigh it down and prevent it from blowing away during high winds or storms. You’ll also need to secure the tarp with rope or even duct tape in order to keep it from sliding off during strong winds or rainstorms.
If possible, try not to use nails when attaching your tarp as this will increase the chances of leaks occurring due to punctures in the material. Instead, try using rope or even duct tape instead since both are much less likely than nails are at causing holes in your roofing materials (and thus leading
Tarping a roof is a process that can be completed in a few hours. The first step is to make sure the roof is clean and free of debris. If there are any nails or screws protruding from the roof, they should be removed with a hammer and nail puller. Then, use a ladder to reach the top of your house and lay out tarps on the surface of the roof.
Next, place sandbags around the perimeter of each tarp to weigh it down so it doesn’t blow away during rainstorms. Afterward, place more tarps over these sandbags so that water does not leak through to your home’s interior.
If you have a steep roof, you’ll need to use more than one tarp in order for them to remain secure during high winds or heavy rains.
In a professional tone:
Step 1: Prepare the Roof
Before you can tarp a roof, you need to prepare it. Remove any debris from the roof, such as leaves, twigs and branches. If there are any loose shingles, nail them back down so they don’t blow away in the wind.
Step 2: Place Sandbags on the Roof
When you’re ready to start tarping the roof, place sandbags at the corners of your house to weigh down the tarp. This will help keep it in place during high winds or storms.
Step 3: Stretch Tarp Across Roof
Once you’ve placed sandbags at each corner of the house and weighted them down with rocks or bricks, stretch out your tarp over top of everything else on your property that needs protecting. Secure one end of the tarp to something sturdy near one corner of your home (such as a tree or shed), then pull tightly across the surface of your roof until it reaches another point near another corner of your home where it can be secured again. Repeat this process until you’ve completely covered your entire roof with tarps or plywood sheets (depending on what type of material
A tarp is a great way to protect your roof during a storm. It will keep the rain from coming in, and it can also help prevent leaks from forming. Tarping a roof with sandbags is an easy way to cover up your roof and keep water from ruining it. The following steps will show you how to properly tarp your roof with sandbags:
1) Prepare the area around your house by removing any debris that could get caught under the tarp.
2) Lay down tarps on top of each other until you have enough to cover the entire area of your house. Make sure that all edges are covered so no water can get through. You may want to use more than one layer if there are certain areas that have higher risk of damage, such as overhangs or eaves.
3) Fill up as many sandbags as you can fit into one trip outside of your house, then place them on top of the tarps so they are covering up any openings or holes in them (e.g., doors). This will ensure that no rain gets inside while it is raining heavily outside!
Sandbags are a great way to protect your home from flooding. They’re durable, cost-effective and can be used in a variety of applications.
The best way to use sandbags is to cover the entire roof with them. This is called “tarping.” This method is more secure than using only a few sandbags around the house because it keeps water from getting into your house.
To tarp your roof:
1- Get enough sandbags for each side of your house. If you have any trees nearby, place extra bags under them so they don’t fall on the house if the winds pick up during a storm.
2- Place two layers of bags on each side of your house, overlapping them slightly at the top and bottom so they don’t come loose during high winds or heavy rainstorms. The first layer should be placed over the fascia boards (the wood trim around the edges of your roof) and second layer should go as far down as possible without touching any windows or doors on the ground floor of your home, according to Ready America Inc., an organization that provides information about disaster preparedness and emergency response throughout the United States. You may want to place some extra bags in front of doors or
Tarping a roof is not as simple as it may seem. It takes some skill, and the right tools to get the job done right.
There are many ways to tarp a roof, but here are three of the most common methods:
1. Use tarps, which are fabric sheets that can be placed over the holes in your roof. They are lightweight and easy to install, but they aren’t very durable or long-lasting. If there is any wind at all, these tarps will blow away from your house. Tarps also don’t protect your roof from rain very well because they don’t have any grommets or fasteners that would help them stay in place during inclement weather conditions.
2. Use sandbags filled with soil or clay, which will weigh down the tarp and keep it from blowing away in high winds or heavy rains. This method works well for flat roofs because it doesn’t require any extra hardware or tools for installation — all you need is soil for filling the bags with! You can also use other types of bags such as plastic garbage bags or large paper bags instead of sandbags if you don’t have access to soil in your area; these will work just
Tarping a roof is one of the easiest, most effective ways to prevent damage in the event of an unexpected storm. A tarp can be used as a temporary solution while you wait for roof repairs to be completed, or it can provide protection for years if you need it in this area.
If you’re considering tarping your home, we recommend getting some professional advice before proceeding. You may want to speak with a local contractor who specializes in tarping roofs or someone from the National Roofing Contractors Association (NRCA).
The Right Tarp Can Make All the Difference
There are many factors that affect how well a tarp will work on your roof: material, size and quality are just some of them. The right material will protect against wind speeds up to 110 mph without tearing or ripping apart. If you live in an area prone to hurricanes, tornadoes or other severe weather events, look for tarps made out of woven polyester fabric with reinforced grommets for easy attachment points.
If you have a flat roof, it’s not difficult to cover it with a tarp. If you have a pitched roof, it can be more challenging.
To cover a flat roof:
1. Cover the entire roof with a tarp by pulling it from the bottom and up as high as possible.
2. Fold the edges over and secure them with nails or staples in the center of each fold and along the perimeter of the tarp.
3. Cut off any excess material at the corners and fold these over as well so that they overlap about 6 inches (15 cm) on each side of where they meet in the middle of each wall or corner.
4. Secure each folded edge with nails or staples at 2-foot intervals (60 cm). You’ll probably have to use longer nails or screws if you’re using a heavier grade of plastic rather than lightweight UV-resistant material such as canvas or vinyl.[2]