Have you ever wanted to make shelves on a slanted wall? Maybe you have a great idea in the back of your head that required the angle to be perfect. Well, I am here to show you a few ideas that will allow you to create a DIY bookshelf onto a wall.
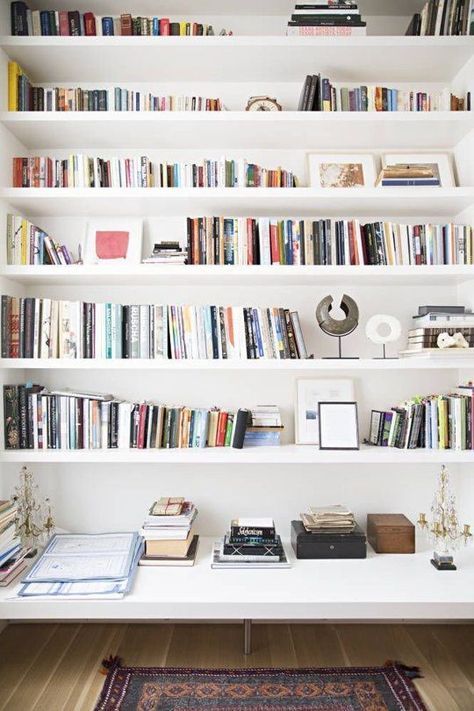
Lets talk shelves. Those wall-mounted, space-saving units we use to show off our favorite collectibles, knick-knacks, or even books. These are some makeup products that i found on Etsy that really inspired my shelf layout ideas.

How to build shelves on a slanted wall
If you’re looking to add some extra storage in your home, consider building a shelf wall.
Build a wall shelf with these easy to follow DIY instructions. You will need basic carpentry skills and a few materials for building this project. The shelf is perfect for displaying books or other items.
If you have sloped ceilings, adding some shelves can be the perfect solution to make the most of the space and create a custom look in your home.
In this article we will show you how to build shelves on a slanted wall step by step with detailed instructions and photographs. The project requires basic carpentry skills and a few tools like saws, drills etc. You may also need some additional materials like screws, nails etc which are not included in this article but can be easily bought at any hardware store in your area.
How to Build Shelves on a Slanted Wall
If you’ve ever had to build shelves in a slanted wall, you know how tricky it can be. Whether the wall is sloped or bowed, you can still build sturdy shelves that don’t need to be anchored into the wall studs. You’ll need some basic tools and materials, such as wood for the frames, screws and nails for attaching them to your slanted walls, and brackets for attaching the shelves themselves.
Step 1: Measure Your Walls
The first step in building your own custom shelving unit is measuring up your walls. Take note of any curves or dips in the surface that will require extra attention when building your unit. You should also measure how high up from the floor that you want to place your shelf; this will affect how far apart your brackets go on each side.
Step 2: Build Your Frame
Once you have your measurements, it’s time to start building! Start by cutting all of your wood pieces according to their respective dimensions in inches (for example, if one piece must be 3 inches wide and another 7 inches long, mark those dimensions on each piece of wood).
After deciding which side of each piece should face outwards once assembled (this
How to Build Shelves on a Slanted Wall
Building shelves on a slanted wall is one of the most common DIY projects. You can build shelves of any size and shape, in any room of your home.
To build shelves on a slanted wall, you will need:
The materials needed to construct your shelf. This includes wood, brackets and nails or screws.
A stud finder to locate the studs in your wall. You can also use a hammer and nail to locate them if you don’t have a stud finder.
How to Build Shelves on a Slanted Wall
Building shelves on a slanted wall is a great way to add extra storage space without the expense of building an entire room. You can use this technique to make a bookshelf or any other type of shelf with multiple levels.
This method works best if you’re using solid wood for your shelves, but you should be able to adapt it for use with metal as well. The steps below will show you how to build shelves on a slanted wall so that they’re straight and level.
1) Measure the height of the wall from top to bottom at several points along its length. Make sure that these measurements are taken from the same point on each side of the wall so that you can accurately compare them later on. If there are any large gaps between studs, measure those separately as well.
2) Count how many studs are in each section of wall that you measured and divide by two; this will give you an average distance between studs in feet (see step 1). Then multiply this number by 3/8″ (0.375″) to get how long each side of your shelf should be if it’s going
Shelving is a great way to add storage space in any room. Whether you want to create a home office, display collectibles or create a display kitchen, shelves can be built in any shape and size. Building shelves is not as hard as you might think. You just need the right tools and materials.
Before You Start Building Shelves
Before you start building shelves, there are a few things that need to be done first. First, make sure that your wall can support the weight of the shelves and that the studs are strong enough for the job. Second, check the levelness of your wall by using a level trowel or spirit level. Lastly, if you plan on painting your shelves at all, make sure that they are completely dry before starting this project or else they may crack while drying out or during assembly due to humidity levels changing too much too quickly.
These projects can be as simple or as complicated as you want them to be, depending on the space and your level of experience.
Here are some examples of shelves walls that we think are worth checking out!
This full wall is made up of two built-in shelves. The shelves are attached directly to the studs on one side and then built-in to the drywall on the other side. The result is a seamless look that creates plenty of extra storage space.
If you’re looking for an easy DIY project that only requires basic tools, this might be it! This half wall with built-in shelves has an industrial vibe that would look great in any room of your house.
This curved wall features two different types of shelving: floating shelving on one side and built-in shelving on the other side (which can be tricky if you don’t know what you’re doing). We love how clean and modern this design looks!
How to build a wall with built-in shelves
A simple wall with built-in shelves can be a great way to add storage in your home. Adding shelves to a wall is one of the easiest ways to achieve more storage space. The best part about this project is that it only requires basic carpentry skills and tools. Depending on the size of your room, you may also need additional materials such as lumber and plywood boards.
Step 1: Measure the height of your wall from top to bottom. Then measure the width from left to right. This will help you determine how many studs are needed for each shelf and where they should be placed on the wall.
Step 2: Use chalk or masking tape to mark out where each shelf will go along the length of your wall. Make sure that there is at least an inch between each board so that it doesn’t interfere with any electrical outlets or plumbing lines that may be located behind them (you can always cut out small holes if necessary). Also make sure that each board is spaced out evenly so they don’t look crooked when finished (try using a leveler tool).
Step 3: Install one set of studs along the top portion of each section
The half wall with built-in shelves is a great idea for an entryway, kitchen, bathroom or bedroom. This project is very simple and will take you no more than a few hours.
Build a Half Wall With Built-In Shelves
1. Build the Stud Wall
Start by building the stud wall using 2x4s or 2x6s. The height of this wall should be the same as the height of your half wall. Next, attach the studs to each other using 2 1/2″ screws so that they form one solid piece of woodwork. Then attach a 2×4 plate to both ends of the stud frame using 2 1/2″ screws so that they extend beyond both sides of the stud frame by about 1″. This will serve as a base for attaching your shelf supports later on in this project.
2. Build Your Shelves
Next, cut plywood sheets into lengths that are equal to the height of your half wall (plus about 4″). Run these sheets through a table saw so that they are all at least 3/4″ thick and make sure to include some extra length (about 6″) at each end so that you can secure them later on in this project.
3. Attach Your She
Let’s get started!
Building a half wall with built-in shelves is an easy way to add storage and style to your home. If you’re looking for a quick project, this is it!
1. Measure the wall where you want to install the shelf unit. The width should be two studs plus an inch. The height should be at least one foot higher than what you want your final shelf to be; this will allow room for the support brackets.
2. On the wall, mark where studs are located and where they intersect with other walls or ceiling joists. For example, if there are two studs 16 inches apart from each other, then the middle of that 16-inch span would be where your first support bracket goes (see photo below). Measure and mark every 16 inches around your wall until all brackets have been marked.
3. Use a stud finder to locate each stud along the length of each bracket line marked on your wall (see photo below). If you plan on installing more than one shelf unit in this same location, make sure to measure and mark where each stud falls between brackets because they may not align with existing ones or
Building shelves is a great way to add storage and display space to your home. Choosing the right type of shelf for your project, then building it, will make all the difference in how much use you get out of it, and how long it lasts. The following guide will help you choose the best shelf material and design for your needs.
1) Be sure to use the right materials
2) Build on solid foundations
3) Build with ease of maintenance in mind
A wall shelf is an easy and affordable way to add extra storage in your home. You can make one from wood, metal or even cardboard, but if you have a wall that’s made of concrete block or cinder blocks, then building shelves on a concrete wall is the easiest option.
Step 1: Measure the Wall
Measure the length and width of your wall to determine how many shelves you need and how big they should be. If you’re adding a half-wall with built-in shelves, measure the height of the half-wall as well.
Step 2: Cut Boards for Shelves
Cut boards to fit between each block on the wall. Use a power saw to cut straight lines, or use a circular saw with a guide attached to get straight cuts on longer boards. If you’re making a half-wall with built-in shelves, cut boards to fit between each course of blocks above your chosen height.
Step 3: Screw Board Into Block Walls
Use a drill/driver and masonry bit set at its lowest speed setting to drill pilot holes into each block where you’ll be attaching the board (or boards) with screws (don’t use masonry bits in metal stud walls). Use two screws per board — one at
In this article, we will help you learn how to build shelves on a concrete wall. There are many different types of half walls that you can build in your home. A half wall is a wall that does not go all the way to the floor and is typically used as a divider between rooms or as a room divider. The type of materials that you use can vary and depend on what look or style you are trying to achieve.
The easiest way to build shelves on a concrete wall is by using L-brackets or corner brackets. These brackets come in different sizes, so you will want to make sure that they fit well with your shelf size. You can also use any type of wood for your shelves, but if you want them to blend in with the rest of your interior design, try using plywood so that it matches the color of your walls and ceiling.
Building shelves on a concrete wall is not a difficult process, but there are some things you need to take into consideration beforehand. For example, the size of the shelves and the weight of the items that will be placed on them. You should also consider how much space you want between each shelf and whether you need to support the weight of any heavy items that will be placed on them.
Shelves can be built in any room in your home if there is a suitable space for them, including kitchens and bathrooms. If you want to build shelves in these areas, it is best to use lightweight materials like wood or plastic so they don’t damage any surfaces when they are moved around while cleaning or decorating.
Building Shelves on a Concrete Wall: Materials Needed
Materials Required:
*Screws
*Wall anchors (if desired)
How to Build Shelves on a Concrete Wall
1. Measure the space where you want to install your shelves. This can be anywhere in your home, but it’s usually best if they’re installed near the floor or ceiling so they don’t take up too much room on the wall.
2. Check the studs in the wall with a stud finder. You want to make sure there are at least two studs that are 16 inches apart from each other (the standard spacing for a wall). If there are not enough studs for your shelf, use a hammer drill and masonry bit to make holes in the concrete where you want to install your shelf brackets.
3. Cut 2×4 lumber into pieces that will fit between the two studs and screw them into place using an impact driver or cordless drill/screwdriver — one piece for every bracket position (so four pieces total). The wood should fit snugly between the studs so that you don’t have gaps between them when you’re finished installing these shelves later on down the road.