A window box will transform your home into a true haven. Not only does it add another dimension to your home, converting awkward and negative space into pretty, welcoming décor, but it draws in the lovely light from outside for all the plants within to bask in.
I’ve searched the net and DVD collection, but there is no video that shows how to build a window box. Some sites show how to make a box out of wood and attach it to your house with screws, but how do you make an actual window box, how to build a window box heater, how to build a window box out of woods?

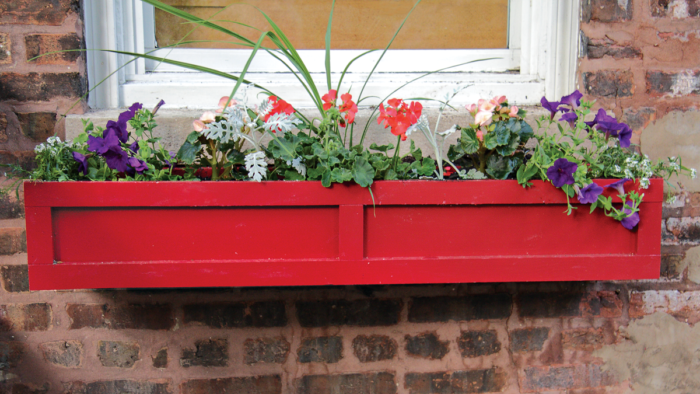
How to build a window box
If you want to save some money on your energy bills, you can make your own window box heater. This project is simple and inexpensive, but it will make a big difference in your heating costs. A window box heater is basically just a wood box that sits on the outside of your window. It’s covered with a piece of glass or plastic so that you can see through it. The wood absorbs heat from the sun during the day and releases it at night, providing extra warmth for your home.
In this article, we’ll show you how to build one yourself using simple tools and materials. The project will only take you about an hour if you have all the materials on hand, so go ahead and build one today!
Materials needed:
Wooden frame – For this project, we used 2x4s because they’re easy to find at most hardware stores. However, any similar size wood will work just fine as long as it’s sturdy enough to support the weight of the frame and glass coverings. You should also make sure that any exposed edges are smooth so they don’t splinter or scratch anyone who touches them (or anything else).
With the use of a few tools and materials, you can build this DIY window box heater in an afternoon. This project is great for anyone who wants to add some warmth to their home without using electricity or gas.
The genius behind this design is that it uses a heat sink to store heat from the sun and then slowly releases it throughout the night. The heat sink is basically just a big chunk of concrete with a small hole in the center — which makes up most of your cost for materials. You’ll also need some wood to build the box itself and some silicone caulking to seal everything together.
How to build a window box
If you want to make your house look beautiful and appealing, the best way is to beautify it with the help of window boxes. The window boxes can be used in any season of the year. The only thing that you need is to make sure that you plan properly and make use of the right tools. You can also use some old materials that might be lying around in your house. You can use them along with some new ones to get the perfect one for your home.
Window boxes are great for decorating your home and they also add up to its beauty. There are many designs and styles available for you in order to choose from. You can go for a simple design or go for something more complicated depending upon your budget and needs.

Here are some tips that will help you out in building a window box:
1) Choose the right place: Before starting on any project, it is important that you identify where exactly should this be placed at? This will help you decide on what size should be made so as to fit into its designated place easily without a hassle. Also, keep in mind that once it is fixed into place, it cannot be moved again unless there is some major problem
1. To build a window box heater, you will need:
a. A window box with a drain hole at the bottom. It should be wide enough to fit your hand through easily.
b. A heat source such as a light bulb or heating pad. Make sure it is safe for use around plants, and the temperature is appropriate for your climate (for example, if you live in an area that gets cold in the winter, you may want to use an aquarium heater instead of a light bulb).
c. Some water-resistant tape or silicone sealant. There are many different types available at hardware stores, but they all serve the same purpose: keeping water out of electrical devices while still allowing them to work properly.
A window box is a great way to add some color and life to your home. It can also be used as a way to grow your own food or herbs. If you have an empty space on your windowsill, then you should consider building one for yourself.
You can make it yourself easily with just a few tools and materials. Here are some instructions for how to build a window box:
Choose Your Material
The first thing you need to do when building a window box is choose the material that will be used for the box itself. You can purchase any number of different materials at home improvement stores or lumber yards. They include:
Wooden planks: Wood is generally regarded as being the best material for making window boxes because it is strong and durable, but it can also be expensive if you want something that looks good and lasts long-term. You will need screws, nails or glue to secure the planks together, but they shouldn’t be too difficult to find at your local hardware store.
Metal sheets: Metal sheets are another option for making window boxes. They are usually cheaper than wooden ones, but they aren’t quite as durable or attractive looking either
How to build a window box heater
The first step is to build your window box. The largest and most important part of the project is deciding on what type of wood to use for it. The best choice for this is cedar, since it lasts longer than most other types of wood, but you could also use pine, redwood or even oak. If you are going to choose cedar as your material, then you should also be prepared to seal it with some kind of water repellent spray.
You will need a saw (preferably a circular saw), some nails and screws, and some packing tape. For the bottom board of your window box, cut two pieces that are each 12 inches wide and 24 inches long. Then nail them together at one end with three nails per side, leaving the other end open so that there will be room for insulation later on in this process.
Then measure out how much insulation you want to use and cut it into squares that are about 6 inches across on all sides. Place these squares inside on top of each other until there are enough layers for however thick you want your final product to be (this depends on how much insulation is available).
How to Build a Window Box Heater
Window box heaters are a great way to add heat to your home, but they can be expensive to buy. You can make your own window box heater for much less money and still provide plenty of warmth. If you need to heat only one room, a window box is the most efficient way to go since it doesn’t take up any floor space or require ventilation.
Step 1: Cut the Wood
Cut the wooden panels into 16 x 24 inch rectangles. Use two 8-foot 1/2-inch thick plywood pieces for each panel.
Step 2: Drill Holes
Use a drill with a 3/8-inch drill bit to drill holes in the corners of each panel except for one corner on each panel that will be opposite from where the cord exits the unit. These holes will allow air flow through the unit when it’s operating. The holes must be large enough so that they don’t restrict airflow when plugged in.

DIY Window Box Heater
I’ve been trying to figure out how to build a window box heater for the past few weeks. After doing some research and reading other people’s posts, I decided to make one of my own.
Here’s what I did:
First, I bought a wooden window box from Home Depot for $10. It was about 2 feet long and about 12 inches wide. The purpose of this was to help insulate the wood so it would be able to last longer in the cold weather.
I then took out my drill and drill bit set and drilled holes in each corner of the bottom side of the wooden box. This is where we are going to place our heating pad so that it can heat up quickly when turned on!
Second, I bought a heating pad from Walmart for $15. This heating pad is meant for back pain but will work just as well as any other heating pad! It comes with an electrical cord so it can be plugged into any outlet in your house! The size of this particular heating pad is about 1 foot by 1 foot by 3 inches thick.
of course, the most economical way to heat a room is with a window box heater. You can build one yourself for about $20.
A window box heater is like an electric blanket that hangs in front of your window. It’s made from foam board, which you can buy at any craft store. The foam board is covered in fabric and then attached to four wooden sides. If you want more details on how to sew, check out our article on making a quilt.
Using Foam Board as a Heating Source
Foam board comes in two different types: Styrofoam and polystyrene. Styrofoam is usually used for insulation and polystyrene is used for packaging materials (it’s what they put around stuff that needs protection). Both types work well as heating sources but polystyrene tends to be more expensive. If you’re going to use polystyrene, check out our article on how to insulate windows without spending money on expensive materials first!
Step 1 – Measure Your Window Box Sizes
Measure your window frame (the space between the glass) and add 2 inches all around for seam allowance and extra room for stuffing insulation into the gaps between foam boards (if you’re using
Window box heaters are a great way to heat your home during the winter months. They are easy to install and work by simply plugging in to an outlet. They can be placed anywhere in the window and will provide you with a nice warm stream of air.
Window boxes are made from many different materials: plastic, metal and wood. The type of material that you choose will depend on what type of look you want in your room.
A window box heater made out of wood makes it easier for you to customize the size and shape of the unit to fit any window in your home. This makes them a popular choice among homeowners who want something unique that they can put their own personal touch on.
Wooden window boxes can be painted or stained any color that you like, which gives them more versatility than other types of boxes on the market today. If you have old paint lying around your house then this is a great way for you to use it up before throwing it away!