The main objective of building a box is to make it waterproof. The water in the box can be rainwater, sea water, river or pool water etc. The work should be done carefully so that the box doesn’t leak. The boxes are used for storing the things which may get damaged if they get wet.
Have you ever considered building a wood waterproof box for your camera or valuables, how to build a box out of wood, how to build a large box out of plywood? You might have been thinking about it, but then realized how complicated that construction would be.

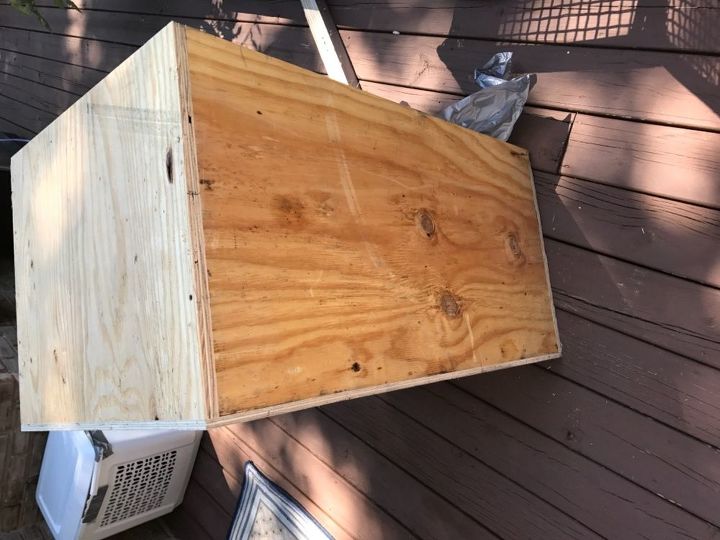
How to build a waterproof box out of wood
Making a wooden box is not as difficult as you might think. You can make one in your garage or backyard with just a few tools and some basic skills. The first thing to do is measure the size of the box you want to make, then cut the plywood to fit the space. If you don’t have a table saw, you can use a circular saw and miter saw to cut the plywood pieces on both ends and then fasten them together with screws. Next, cut out any pieces needed for the bottom of your boxes with your circular saw or jigsaw.
Once all of your pieces are cut out, lay everything out on your workbench so that it’s easy to see how everything will fit together and how much material you’ll need for each step of building your boxes. The next step is to glue all of the pieces together using construction adhesive and clamps until they’re secure enough to hold together without falling apart when lifted off of your workbench or table top. After this has dried thoroughly, screw each piece together using galvanized screws that are long enough so that they penetrate through both sides of each piece being screwed together by at least an inch or two (2 cm).
This article will show you how to build a waterproof box out of wood. The technique is very easy, and it will take only a few hours.
First, you need to buy a piece of plywood for the base of the box. Plywood is made from several layers of thin wood glued together. This makes it very strong and durable.
If you don’t have any plywood at home, there are plenty of places where you can buy it at reasonable prices. For example, I found some good deals on eBay.
Next, you should draw a cross on one side of your plywood sheet. This will allow us to cut out an opening for our box later on. You should draw two lines that intersect each other in the center of your plywood board.
Now we will cut out this opening using a jigsaw or circular saw (they’re both electric tools that cut materials like wood). You can use any other type of electric tool such as an angle grinder or drill press but these two tools seem to be the most popular among do-it-yourselfers because they’re cheap and easy to use!
How to build a box out of wood
It’s not difficult to make a wooden box by hand. The only tools you need are a saw, a hammer and nails. The key to success is building the box in parts and then joining them together in the end. Here’s how:
1 Get the wood ready
Select your wood carefully. It should be dry because wet wood is liable to warp and shrink once it dries out. It should also be free from knots and splits that may weaken the structure of your box.
2 Draw out your designs on paper or cardboard, then transfer them onto the timber using templates for each part of the design (see right). You can use anything from offcuts or scrap pieces of plywood; just make sure they’re long enough when measured flat against the grain so they will be strong enough later on when assembled into one piece. Cut out your template pieces using a jigsaw or scroll saw with a fine blade or an electric drill with a small bit attached – whichever allows you to cut easily without damaging the material being used (it’s best not to use power tools if they’re not necessary).

How to build a waterproof box out of wood
A waterproof box is an essential part of any garden. It can be used to store your tools, seeds and even plants. However, the most important thing about this box is that it has to be watertight. If it’s not, then all your hard work will go down the drain.
In this article, we’re going to show you how to build a waterproof box out of wood by using simple tools and materials that you probably already have at home.
Materials needed for building a waterproof box out of wood:
Wooden boards – You’ll need 6 pieces that measure 100 x 50 cm each (4 pieces for the base and 4 pieces for the top). You can use plywood instead if you want but make sure that it’s not too thin as we don’t want our box to break down easily.
Nails – Use galvanized nails as they are more resistant than steel ones when they come into contact with water or moisture. Make sure that they’re long enough so that they penetrate both sides of your boards (you’re going to hammer them in so make sure they reach all the way through).
So you want to build a box. Whether you need to store items or hide something, a box can be the perfect choice. It’s not hard to make a box, but there are some things to consider before you get started.
1. What will the box be used for?
2. What type of wood should I use?
3. How big should the box be?
4. How much do I want to spend on this project?
5. Do I need any special tools or materials?
How to build a box out of wood
The best way to build a box out of wood is to use plywood. Plywood is made up of thin sheets of wood veneer glued together. It’s very strong, durable and can be cut into many different shapes and sizes.
You can buy plywood at most hardware stores and lumber yards. The best place to buy it is at a home improvement store, because they often have different types of plywood in stock. For example, you may be able to find a thicker type of plywood that’s better suited for your project than the standard 3/4-inch (2 cm) thickness used for most boxes.
The first step in building your box is to measure the sides of your box or container. Then divide each side by two so you know how wide each piece needs to be cut (half the width).
Once you have all four pieces cut, lay them out on a flat surface with their grain running parallel with each other (parallel means they have the same direction). This way all four pieces will be compatible with each other when they’re put together later on in the project.
Next, drill holes through all four sides at once using an electric drill fitted with a 3/16-inch bit (5 mm).
The first step in building a box out of wood is to create the sides. The length and width of your box will depend on the size that you need for your project, but it’s best to start with a large piece of plywood so that you don’t have to cut it down later.
Once you’ve chosen your plywood, cut it down using a circular saw. You’ll want to make sure that all four sides are exactly the same size so that they will fit together perfectly. Once you have all four sides cut, sand them down so that they’re smooth and flat.
Next, measure off the height of each side and cut them down until they’re all the same height. Again, this is important because it ensures that all four sides will fit together properly when you put them together later on in the project.
Now it’s time to assemble your box! If possible use clamps to hold everything together while you drill holes through each joint and screw pieces together with screws from above or below (depending on which way is easiest). If clamps aren’t available then use some sort of goo like Gorilla Glue or Liquid Nails to help hold everything together until it dries (which could take several hours).
How to build a box out of wood. This is a step by step guide on how to build a box out of wood. The box can be used for storage, a planter or whatever you want!
Materials:
1 sheet of plywood (3/4″ thick)
2x4s (2×4’s)
Nails (50 count)
Wood Glue
Tools:
Hammer
Nail Gun
How to Build a Box Out of Wood
Building a box out of wood is a useful skill. You can use it to create boxes for storage, display or other purposes. The type of wood you select depends on your needs and budget. You will want to use a hardwood like oak or mahogany if you want the box to last longer. These woods are heavier than softwoods, but they also provide more strength and durability.
For smaller boxes, particleboard or MDF (medium-density fiberboard) may be better because they’re less expensive and easier to work with than solid wood. However, these materials don’t provide as much strength as solid wood does.

To build a box with wood, start by choosing the type of wood that works best for your project size and requirements. Then cut the pieces so they fit together properly during assembly. Sand any rough edges until the surfaces are smooth enough not to scratch other surfaces when handled or moved around frequently during use. Paint or stain your box if desired; this will make it look nicer while adding protection from moisture damage caused by dampness in the air inside homes during cold weather months.
A box is a common term for an enclosure or container. Boxes can be made out of many different materials, including cardboard, metal, plastic and wood. A wooden box can be built as a decorative piece for a room or as a tool chest for storing tools and other items.
A large wooden box will require several pieces of lumber cut to specific sizes and shapes. This can be done using the miter saw at home centers. The pieces will need to be sanded and then glued together with waterproof glue such as polyurethane glue. The corners should also be reinforced with metal corner braces that are available from any hardware store.
After the glue has dried, you will need to sand all sides of the box by hand until they are smooth and flat. You should use a belt sander for larger areas, but for smaller areas you can use sandpaper on its own or with a hand-held sander device called an orbital sander if you have one available in your shop or garage area.