As a homeowner, you might be wondering why adding a cabinet would make your home sell quickly. Now, chances are that you’re not planning to put your home on the market anytime soon. What if there was a guide that told you how to add cabinets to your kitchen? It could save you money and time while also making your kitchen look amazing.
How to build a vertical pull out cabinet sounds fairly straight forward but these projects are much harder than you would imagine. In this article we’re going to talk about how you can build a vertical pull out cabinet and to be frank, how to make a cabinet pull out,how to turn a cabinet into a pull out, it’s not that hard if you approach the process step by step and break it down into basic instructions.

How to build a vertical pull out cabinet
It’s a very common question, “how to make a cabinet pull out.” The answer is simple, but there are a few things to consider before you get started.
Pull out cabinets are great because they allow you to store items that would normally take up counter space and have them hidden away when not in use. This can help you save space in your kitchen and make it look more organized.
The first thing to consider is what type of pull out cabinet you want. There are two main types:
Vertical Pull Out Cabinets: These cabinets are designed so that when they are fully extended they form an L shape with your countertop. They usually have doors on both sides so you can access all the items inside easily.
Horizontal Pull Out Cabinets: These cabinets have one door and slide straight out from the wall when opened. They don’t take up as much room as vertical pull outs because they don’t stick out as far when opened all the way. Horizontal cabinets aren’t as common as vertical ones but they’re still great for storing pots and pans or anything else that needs to be pulled out every time you use it!
Building a pull out cabinet is a great way to add extra storage space to your kitchen. The best part is that it’s quite easy and affordable!
What you’ll need:
2x4s (the length will depend on the size of your cabinets)
Flathead screws and wood glue
Power drill with screwdriver bit
Cabinet pulls (for the front door)
1. Measure out where you want to place your pull-out cabinet and mark it with a pencil. Then measure the inside dimensions of the cabinet opening, including any trim or molding around it. This will give you an idea of how much room you have for installing the pull-out mechanism inside the cabinet. 2. Cut 2x4s into 24″ lengths (or another length that fits in your cabinet). You’ll need two pieces per shelf plus one piece for each side panel of the cabinet (if your shelves aren’t already built in). 3. Place one 2×4 at each end of each shelf and secure with wood glue and nails or screws. 4. Place one more 2×4 across all three shelves at their centers and secure with glue and nails or screws again
How to build a vertical pull out cabinet
A lot of people are looking for ways to make their kitchens more efficient, and adding a pull-out cabinet is one great way to do this. Pull-out cabinets are great for storing large items like pots and pans, and they make it easy to access them when you need them. If you’re interested in adding one of these cabinets to your kitchen but aren’t sure where to start, here’s what you’ll need:
1. Plan Your Pull-Out Cabinet
Before you can begin building a pull-out cabinet, you’ll need to plan out exactly what kind of cabinet you want. You have several options when it comes to choosing the type of cabinet that will work best for your needs. You can choose from three different types of shelves: roll-out shelves, slide-out shelves or pull-out shelves. Each type has its own advantages and disadvantages, so make sure that you consider all three before deciding which one is right for your home.
2. Measure the Space
If you want your new cabinet to fit in an existing spot in your kitchen, measure out the space carefully before making any cuts or holes in the wall around it.
The vertical pull out cabinet is a great storage solution for any room. It’s a good way to get around the problem of limited space, as well as making it easy to get things out of the way when they’re not in use.
How To Build A Vertical Pull Out Cabinet
The first step is to decide what you want to put in your pull out cabinet. If you have enough room for one large drawer, that’s a great option, but if you only have enough room for one small drawer, you can use it for other things such as silverware or paper products.
Once you’ve decided on what items will go into your cabinet, you’ll need to create a plan for how it will be built. You should measure your available space and determine where exactly you want the cabinet to go. Measure again so that everything fits snugly into place; otherwise, you’ll have wasted time and money building something that doesn’t fit properly into place.
Once you have all of these measurements taken care of and know where everything will go, it’s time to start building! There are several ways that this can be done:
Pull out cabinets are a great way to add extra storage and counter space to your kitchen. They take up less space than a traditional cabinet, but still offer a lot of storage. You can even use them to store things that wouldn’t fit in other cabinets.
The first thing you need to decide is whether you want a free-standing cabinet or one that attaches to an existing wall. Free standing cabinets are easier to install, but they won’t fit in as many spaces as wall mounted ones.
Pull out cabinets come in three basic designs:
1) The simplest design uses two tracks with rollers on the bottom that slide along the track. The top of the cabinet has a piece of wood attached to it with hinges so it can be folded down when not in use. This design is simple and cheap, but it doesn’t last very long because there’s nothing holding the rollers on the bottom of the cabinet in place except gravity.
2) Another common type uses wheels instead of rollers on the bottom of each shelf so that each shelf has its own set of wheels instead of sharing one set between all three shelves like some other models do.

How to Make a Cabinet Pull Out
Pull-out cabinets are a great way to add more storage space in your kitchen or bathroom. A pull-out cabinet is a cabinet with a set of drawers on the side or back that allow you to easily access items that are stored on the bottom and top shelves of the cabinet. Pull out cabinets have been around for decades, but they have recently become popular again due to their convenience and efficiency.
There are many different types of pull-out cabinets available, such as those with sliding doors or drawers, but they all work the same way. You simply slide open the drawer or door, reach inside and grab what you need. Here’s how to make one:
Measure your base cabinets and mark where your new pull-out will go on both sides of each cabinet. Measure from the bottom of the cabinet up 3 inches, then mark it with a pencil at each corner (i.e., if you want your pull out to be 12 inches deep, measure up 24 inches from the floor). This will ensure that your new cabinet fits perfectly inside without any gaps between it and other cabinets.
How to Make a Cabinet Pull Out
A cabinet pull out is a great way to add storage and organization to your kitchen. It can be very expensive to buy a premade cabinet like this, though, so here’s how to make your own!
Cabinet Pull Out
The first step is to measure the inside of your cabinet. Measure the opening width and height, as well as the depth of the shelf that you want to use. Then, cut some plywood into pieces that are slightly smaller than these measurements by at least an inch on all sides.

Once you have your plywood cut, attach them to each other using wood glue and nails or screws (depending on what type of plywood you have). For added support and strength, use pocket holes or Kreg jig holes in each piece of plywood so that they’ll connect together easily without screws visible from the outside. Also, make sure that all of your pieces are flush with each other so that none of them protrude past where they should go when finished!
Once you’ve glued and nailed all of your pieces together, it’s time for staining! Stain the entire piece of furniture with one coat of stain (or paint if desired). Let this dry completely before moving on
A pull-out is a cabinet with doors that open outwards or drop down to reveal the contents. Pull-outs are often used in kitchens and bathrooms, but they can also be used in other areas of the home. A pull-out can be great for storing cleaning supplies, linens and other items that you need to access frequently.
Step 1 – Choose Your Hardware
The first step in building your own pull out is to choose the hardware you want to use. You can choose from many different types of hardware including drawer slides and slide brackets. Drawer slides are used to make drawers that work like a normal drawer while slide brackets are used to create a pull out section on an existing cabinet door. If you’re going with slide brackets, then you’ll need brackets to attach them to the cabinet door as well as hinges for attaching them together.
Step 2 – Measure Your Cabinet Opening
Before purchasing any materials or assembling your pull out, you’ll need to measure your opening where you want it installed. Make sure that there is enough room for both the hardware and whatever items you plan on storing inside the pull out so that nothing gets stuck behind or underneath anything else when it’s closed up again after use
You can create a pull-out cabinet or drawer by adding a track and hardware to your existing cabinets. If you have the tools and materials, this project should take about an hour.
If you want to add a pull-out cabinet or drawer to your existing kitchen cabinets, you’ll need to do some basic carpentry work. You’ll also need to buy a few items from the hardware store: a track, rollers and mounting hardware. The amount of work required depends on the type of cabinet you have. If your cabinets have solid-wood sides and backs, for example, it may be easier than if they have veneer sides and backs (which will require more sanding). If you’re not sure which type of cabinet you have, check with a carpenter before starting this project.
After measuring the distance between your two adjacent cabinets — which is where the track will be installed — measure the length of the track needed for each side of your cabinet. Then cut each piece with a hacksaw or circular saw so that one end is slightly longer than necessary (this will allow room for adjustment).
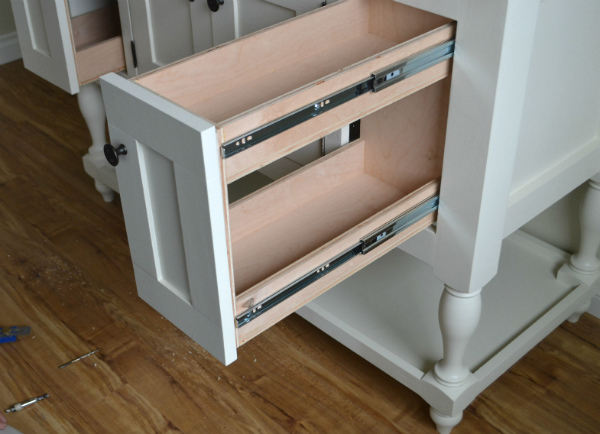
The pullout system is a great option for your kitchen. It makes it much easier to reach items that are stored in the back of a cabinet or pantry. The system consists of two tracks, one on each side of the cabinet door and two slides that can be adjusted to meet the needs of your specific application. The slides are attached to each track with screws, allowing them to be removed when necessary.
Step 1 – Measure Your Cabinet
Step 2 – Purchase Your Hardware
Step 3 – Cut Your Tracks and Slides
Step 4 – Attach the Tracks and Slides
Step 5 – Install Your Pull Out System