A tufting frame is a sturdy and simple solution for seating. It consists of a series of vertical wooden bars that can hold multiple rows of tacks. The end result is a felt surface that can be used as seating or to cover any other flat surface. Building a tufting frame is relatively straightforward, but it does require some fabric and nails.
Here’s a complete guide on how to build a tufting frame. Tufting frames are getting popular these days. These frames can be used for displaying finished products, how to build a rug tufting frame, making a tufting frame or even to showcase unfinished works in progress.

How to build a tufting frame
The first step in building a rug tufting frame is to determine the size of your rug. If you have a design in mind, you can use graph paper to sketch out your design and then measure the space that it will take up.
If you do not have a specific design in mind, consider using a stencil as an alternative. Stencils are easy to use and come in many sizes and styles, so they are perfect for any project.
Once you know how big your rug needs to be, draw out the pattern on cardboard or wood. Use a ruler and pencil to make sure all of your lines are straight and even. Once you have completed this step, cut out your shape with scissors or an X-Acto knife.
Next, attach two pieces of wood together at one end with nails or screws. This will form the base of your frame with a hole where tufts can be inserted through later on in the process. Place this piece directly under where you want tufts to appear on your rug and mark where each hole should go with a pencil or marker. Make sure that each hole is spaced evenly apart from one another so that no two look alike when finished!
To build a tufting frame, you need:
– A rug. (The size and shape of the rug will determine how big your frame needs to be.)
– A piece of plywood at least as wide and long as your rug.
– Four pieces of lumber that are two inches wider than your plywood and as long as your plywood plus four feet.
– Two hinges.
Step 1: Attach the hinges to one side of the plywood so they’re facing each other at an angle. (The distance between the hinges should be equal to the width of your lumber.)
Step 2: Place one end of one piece of lumber on top of the hinge so that it’s perpendicular to the plywood, then screw it down into place with two screws that are about an inch away from each other on either side of where the hinges are attached to the wood.
Step 3: Repeat Step 2 until all four pieces are attached and flush with each other on both sides, creating a rectangular box shape out of wood.
Step 4: Attach one end of another piece of lumber onto one side of your tufting frame so that it’s perpendicular to the wood already attached there, then repeat Step 3 for this second
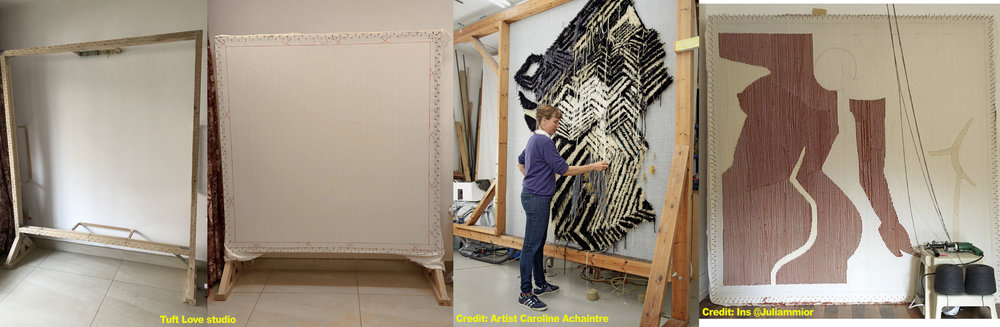
Tufting is the process of adding tufts, or small balls of yarn to a surface. Tufting can be done by hand, however for large projects, it is usually done with a machine. These machines use needles to punch the wool through the backing material and into the sublayer.
Once you have decided on a design and have all of your materials ready, it is time to start working on the frame. The first step is to create the baseboard for your rug. This will provide stability and support for your rug as well as give it a nice finished edge. You will want to cut two pieces of wood that are 12 inches (30 cm) long by 2 inches (5 cm) wide by 1 inch (2.5 cm). Place these two pieces together so that they form an L shape with an opening at one end of each piece of wood. Align these pieces so that there is about an inch (2.5 cm) gap between them where they meet at the top; this will allow you to slide them together later on when it comes time to put in your screws.
Making a tufting frame is an easy and inexpensive project. You can build one in a few hours and this project will last for years to come.
Here’s how to do it:
Materials:
1/4″ plywood (4’x4′)
3/4″ plywood (2’x2′)
MDF (2’x2′)
1-1/4″ brad nails (24)
Wood glue
Tufting is a fabric manipulation technique that uses needle and thread to lock yarns into fabric. It’s the same way carpets are made.
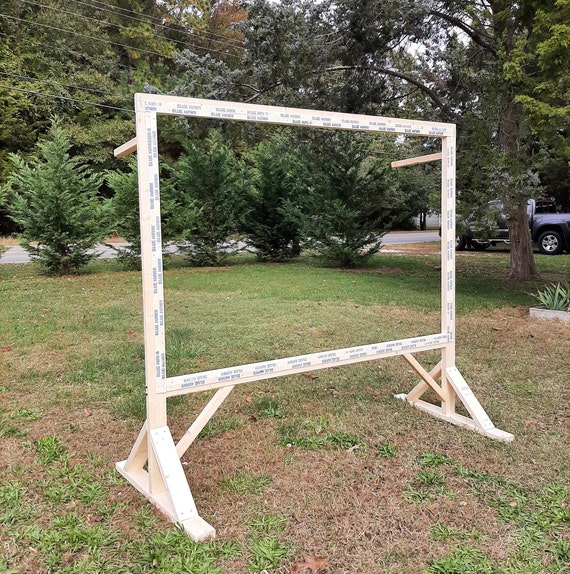
A tufting frame is a piece of equipment used to hold up the fabric and make sure it’s taut while you’re sewing it.
You can build your own frame out of wood or purchase one online. I chose to build my own because they’re easy to customize and I had the materials on hand.
Materials needed:
2x4s
plywood
How to build a rug tufting frame
The tufting frame is the foundation that supports the rug. You can purchase a ready-made rug frame or build your own. Building a frame is a project in itself and requires some carpentry skills. If you are not comfortable with carpentry, you may want to hire someone to build the frame for you.
To make your own tufting frame, start by cutting two 2x4s at 24 inches long and two at 32 inches long. Make sure the wood is straight and cut them with a table saw or circular saw. The wood should be about ¾ inch thick so that it is sturdy enough to support the weight of the rug without bowing or buckling under pressure from the tassels. Cut four pieces of 1×2 wood at 36 inches long and sand them down so they are smooth on all sides without splinters or rough edges. These will serve as cleats that fasten to the underside of the 2x4s in order to secure them together.
Nail four 1×2 cleats onto each side of one of your 24-inch boards, two on each end and one in between each end where it meets up with another board on either side (see image).
The frame is the backbone of any tufted carpet. The frame keeps the tufts from sliding around, which gives your rug a chance to last through years of wear and tear. It also helps keep the edges of your rug flat and prevents it from curling up.
If you’re planning on making your own rug, you need a good frame. The easiest way to make one is with wood or metal pipe. You can find metal pipe at any hardware store and wood at any lumberyard or home improvement store.
The first step when building a tufting frame is cutting all the pieces to size and arranging them in the shape of the finished product. Once all your pieces are cut, sand any rough edges down so they don’t snag on anything later on in the process. Then glue them together using wood glue and let them dry overnight before moving on to the next step.
Making a Rug Tufting Frame
Materials:
1/2″ plywood (enough to make 4 frames)
2″x4″ lumber (enough to make 4 frames)
3/8″ dowels (1/4″ for legs, 1/2″ for everything else)
screws, nails or glue
Tools:
table saw or circular saw with guide rail attachment
router with trim bit if you’re making round legs (see below)
Step 1: Select a Size
A rug tufting frame needs to be large enough to handle the size of rug you’re going to be tufting. The minimum recommended dimensions for a floor framing are about 6 feet long by 3 feet wide, but if you’re going to be using a patterned rug, you may want to go larger.
Step 2: Gather Your Materials
You’ll need some wood (preferably hardwood) and a few other materials:
A drill/driver with a Phillips head bit and screwdriver bit
A saw (preferably a miter saw)
Wood glue (rubber or yellow)
Staple gun with 1/2-inch staples
The type of wood depends on how much weight your frame will need to support. You can use pine for smaller frames, but it won’t last long under heavy weights. Hardwoods like oak are better suited for larger frames that might have more than one person sitting on them at once.
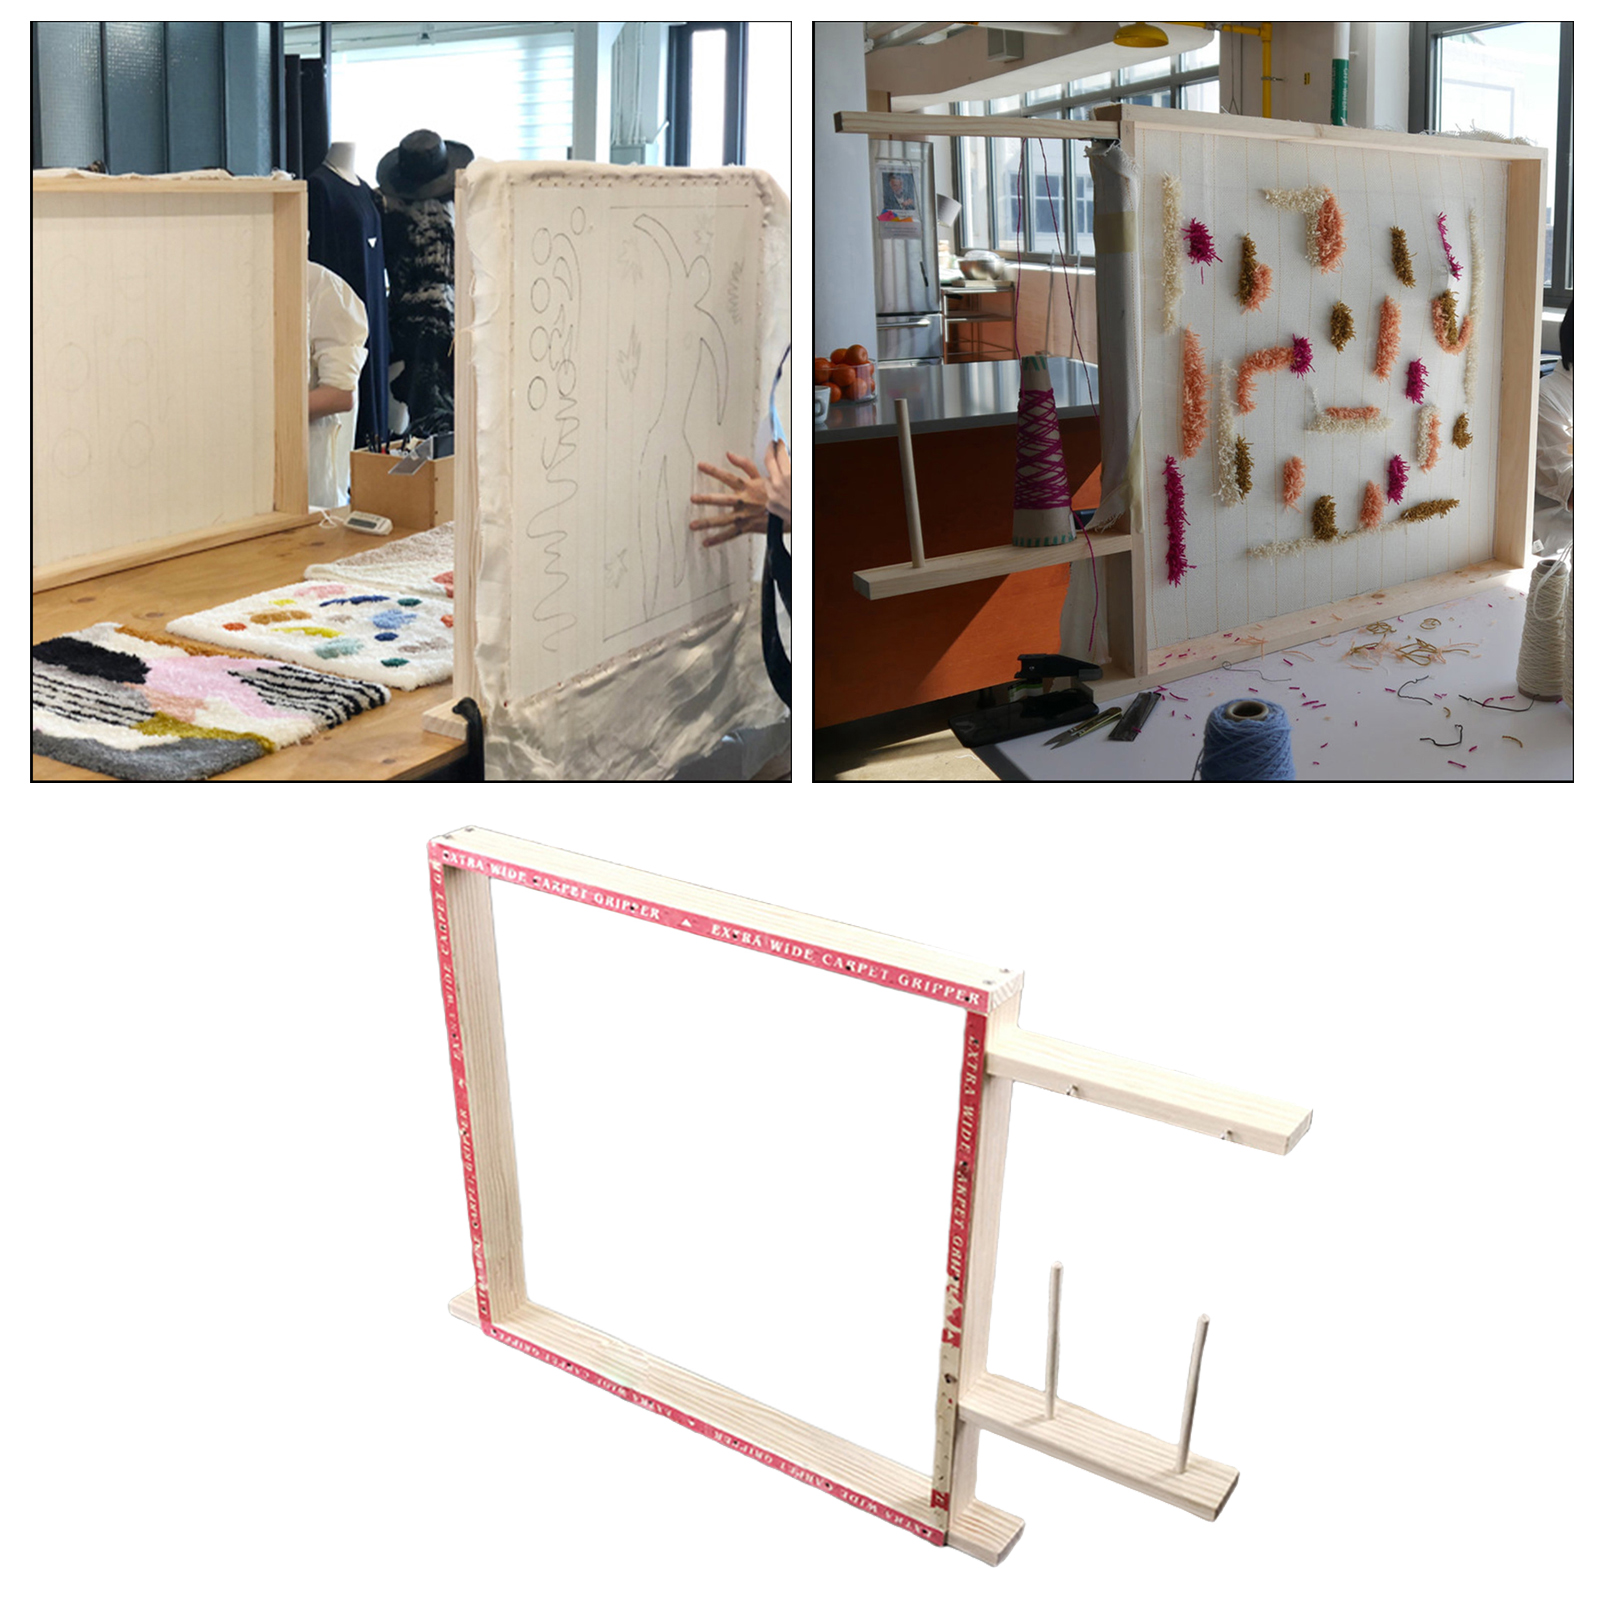
A tufting frame is a tool used to hold the rug while it is being tufted. Like many tools, there are many different styles and designs for a tufting frame. The most basic designs include four legs with a wooden base, two pieces of wood with holes drilled in them, or a piece of wood with an adjustable height
Materials needed:
– 1x4x8″ pine board (or other wood) – 2
– 1x2x8″ pine board – 2
– 3/4″ plywood – 8′ x 4′ (or larger)
– Wood glue
Tools needed:
– Drill or hammer & nail set
– Saw or jigsaw