The purpose of this small guide is to share some of the most common mistakes made by the newbies when building their first wooden traps and shed some light on the best ways of building a strong and durable snake trap.
When building a snow cave, there are several steps to follow in order to ensure the highest levels of safety and comfort. Learn more about how to build an igloo-style snow cave, including what materials you’ll need.
How to build a snow cave
If you’re headed out into the wilderness, you’ll want to be prepared for just about anything. One of the most important things you can do is make sure that you have a good shelter for yourself and any people or animals who are with you. The best type of shelter is one that can be built quickly and easily, but also withstands harsh weather conditions. Here’s how to build a snow cave camping!
When building the cave, it’s important to remember that there are two different types of snow caves: those that are dug out by hand and those that are made with snow blocks. Both will work well as long as they’re constructed properly and with proper insulation in mind; however, if you’re going to be using this on an extended trip or during severe weather conditions (especially if there’s wind), then it’s best to use blocks instead of digging by hand. This will allow you to make sure all of your materials are secure even in strong winds.
Snow shovels (if using blocks instead of digging)
If you are planning to go camping in a snow cave, there are few things that you need to keep in mind. Here are some tips to help you build a safe snow cave.
1. Choose an area that is free from avalanche danger and away from any crevices or cracks in the ground. The area should also be fairly flat.
2. Dig out the ground until you have a space that is large enough for your body size and long enough for you to lie down comfortably in it (with your head near the entrance). Make sure that the roof is high enough so that it doesn’t collapse on top of you when it starts snowing heavily.
3. Remove all loose snow from inside your cave so that water vapors will not build up inside it while you are resting inside it during heavy rains or snow storms. If there are no loose rocks or debris inside the cave, then make sure that there are no gaps between rocks or trees which could allow rainwater to seep through them and into your shelter during bad weather conditions.
4. Cover the entrance with plastic sheeting or tarps so that rainwater does not get into your shelter while sleeping inside it overnight during heavy rains or snowstorms
A snow cave is an extremely effective shelter for winter camping. It can be built in just a few hours and provides protection from the wind, rain, snow and cold.
The best part? Snow caves are cheap, easy to make and can be built without specialized equipment.
Step 1: Find a good location for your snow cave
Look for a site that is sheltered from the wind and located at least 100 yards from any avalanche-prone slopes. The site should be on top of an open area free of rocks or other obstructions that could collapse your shelter. If you’re building with others, try to find several clear areas so everyone has plenty of room to build their own caves.
Step 2: Make sure you have plenty of snow
Ideally, your cave will have a 6-foot dome-shaped roof with a 3-foot entrance hole at the front end. This allows for enough headroom inside while still allowing enough air circulation inside so condensation doesn’t become too much of a problem during the night. With these dimensions in mind, make sure there’s enough snow in the area where you want to build your shelter so that each person can easily collect at least 25 pounds (11 kilograms) of snow per hour
The snow cave is one of the simplest and most effective survival shelters you can build. It’s an excellent choice for cold weather survival in nearly any environment.
The main benefit of the snow cave is that it’s easy to dig, requires no additional materials (besides a shovel), and provides excellent insulation from the elements.
In addition, a well-built snow cave will allow you to stay warm during even the coldest nights outside.
The biggest drawback of using this shelter is that it takes some time and effort to construct it properly. If you’re in a hurry or not experienced with building them, then you may want to look elsewhere for shelter options.
1. Use a shovel, snowboard or other tool to create a hole in the snow. The hole should be wide enough for you to crawl into with your legs bent and head lowered.
2. Once you’re inside the cavity, start digging out more snow from the back of it so that there is room for your body to sit up straight without hitting your head on the roof of the cave.
3. After you have made a large enough cavity for yourself, start cutting out blocks of snow from around the entrance to make it easier for you (and others) to get in and out of the cave when necessary. The blocks should be about 2 feet wide by 2 feet tall by 6 feet long or so (depending on how big your group is).
If you’re stranded in the wilderness, there are a few basic rules of thumb to follow. An emergency snow cave is one of the most important shelters you can make. If you know how to build one, you’ll have a place to keep warm and dry while waiting for help.
Here’s how to build a safe snow cave camping:
Find a good spot. Look for flat areas where wind won’t blow the snow around too much. Avoid any steep slopes that could collapse under your weight or bury you in an avalanche.
Dig out an entrance tunnel. It should be about three feet wide and tall enough that you can get through without crawling on your hands and knees. Make sure it slopes slightly downward to allow water to drain off toward the opening so it doesn’t pool inside the shelter (this will make it even colder). You’ll need this tunnel so that your body heat doesn’t melt all the snow above it when you go in and out of your snow cave!
Pile up loose rocks on either side of your entrance tunnel so that they form walls about 18 inches high (this will keep blowing snow from collapsing down onto top of your shelter). Then add some rocks inside as well so that they form a roof overtop
A safe snow cave is a snow cave that is built with the knowledge and tools to ensure your survival. A good snow cave will provide shelter from the elements, but also serve as a place to rest and sleep.
A snow cave can be constructed without any equipment, but it’s much easier and safer with the proper gear. Using a shovel or ice axe, dig an entrance tunnel into the side of a hill or mountain, using your body weight to push as much snow out as possible.
The entrance should be about 3 feet long and 3 feet wide, with enough room for you to crawl through comfortably. Make sure that there are no rocks or roots sticking up out of the ground before digging into them! Once you’ve dug into the hillside far enough, build up two walls on either side of the entrance with packed-down snow blocks. Build these walls higher than your head so that they protect you from falling rock or debris outside.
Continue digging until your tunnel reaches at least 6 feet deep (about 1 meter). This will give you enough room to lie down comfortably while still having headroom above your head when standing up straight.
Once you reach 6 feet deep, start digging out a sleeping platform
You can build a snow cave with just your hands, but it’s better to use a shovel or snow saw, and a compass if you have one.
Snow caves are relatively easy to build, but you need to be aware of the dangers involved. Your first consideration is avalanche danger. You should never build a snow cave in an avalanche-prone area without considering the risk.
The second thing to consider is ventilation. Snow caves can trap carbon dioxide and kill their occupants, so you need to make sure there is adequate ventilation.
A third issue is safety from falling into the ground. If you dig straight down into the ground, then there is a chance that you might fall through the roof of your cave and get trapped underneath it.
Building a Snow Cave
To build a snow cave, start by finding an area that has reasonably solid snow cover, but not too much wind drift (loose powdery snow). Look for an area where there are rocks or tree stumps sticking up through the surface of the snow so that you can use them as reference points for digging straight down into the ground (it helps if there are multiple reference points).
Next, clear away all loose material from around your chosen digging spot so that you only have large chunks of
1. Start with a good spot. Choose a low, protected place that’s out of the wind and on the leeward side of hills or trees. Avoid avalanche areas and avoid hollows where people have been digging before you.
2. Use your shovel to clear away the snow down to the ground surface or as deep as you want your cave to be. You can dig out the floor by hand if you want, but it’s much easier if you use a shovel; even better if you have an ice axe too (see below).
3. Build a thick wall at the entrance by scooping out snow with your hands or using a scoop made from two plastic bags taped together (see below). When you’re done, it should be at least as tall as your height (so when you’re sitting inside it’s not so dark that you have to hunch over).

The first and most common is the igloo. This type of cave is built with blocks of snow stacked together to form a dome-like structure. It’s usually an oval shape, but you can build it in any shape you like. The igloo has several advantages over other types of snow caves:
It’s easy to build (especially if you use a shovel).
It’s very strong — especially if you use a rope to tie the blocks together.
It’s easy to maintain your body temperature inside the igloo (and retain heat from your body).
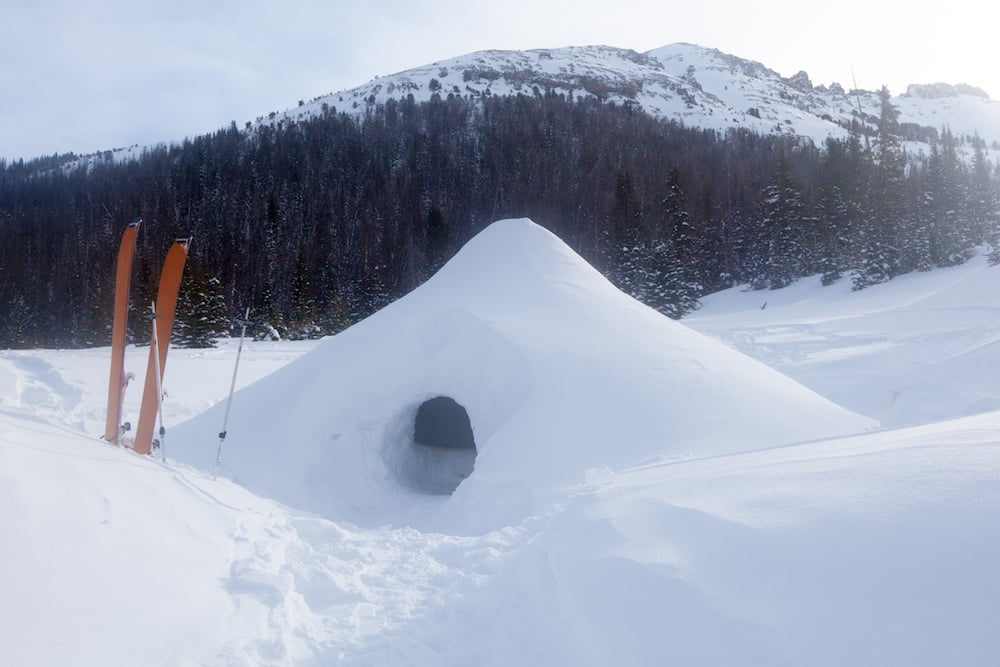
The second type is called a quinzhee, which is similar in shape and appearance to an igloo, but does not require blocks of snow to be stacked together. Instead, it is made by hollowing out a large mound of snow using shovels or hands and then cutting tunnels into it for entrances or exits. Quinzhees are much less sturdy than igloos because they are not as well insulated from the cold air outside — so they may melt faster than iglooses.