In this project you will learn how to build a sliding cabinet drawer. This is an easy wood project that anyone with some basic experience with woodworking can complete. The materials used for this sliding cabinet door construction are fairly inexpensive and allow you to customize the look of your project to give it an unique touch.
You might know the feeling. You have this cool design idea and you want to build something in your workshop. Something along the lines of a hidden sliding storage space. Just like a drawer, but instead of going straight up it goes right and left. Kind of like a cabinet.
How to build a sliding drawer
A sliding drawer is a great way to add extra storage space to your kitchen. The best part is that it can be built in a weekend, with basic carpentry skills and tools.
Step 1: Measure and mark the location of the drawer slides on the drawer box. The distance between the two slides should equal the width of the box plus 1/2 inch (for example, if your drawer box is 2 inches wide, then place each slide 2 1/2 inches apart). Mark each hole for drilling with a marker or pencil, then center punch each mark so the drill bit doesn’t wander during drilling.
Step 2: Drill pilot holes for each screw in each marked location on the back of your drawer box using a drill bit that matches the size of your screws (1/4 inch for No. 6 screws). You may want to predrill larger pilot holes than usual because there will be some tear-out along with chips flying around while you’re drilling these holes — it’s better if they get caught in your pilot hole instead of going all over your workbench!
Step 3: Attach one end of each slide onto a side rail using two countersunk wood screws per side rail, then repeat
Building a sliding drawer is a simple project and takes very little time to complete. You can build a sliding drawer in one day, if you have all the materials on hand and are familiar with basic woodworking techniques. The finished product is a great addition to any kitchen or pantry.
The first step in building your own sliding drawer is to gather all of the materials needed for the project. This includes wood, glue, nails, screws and any other hardware that may be required. You will also need a saw and sandpaper to complete the job.
To start, you will need to cut your wood down into smaller pieces that are easy to work with. This can be done using a table saw or circular saw with an adjustable blade guard installed on it. A miter saw could also be used as well if you have one available. If you do not have access to these types of tools at home, go ahead and ask at your local hardware store if they would mind cutting them for you in exchange for some cash or merchandise from their store!
Once you have all of your pieces ready for assembly, start by assembling them together using nails or screws according to whatever design plans you drew up beforehand; this step should not take long as most cabinets are
If you want a drawer that slides, then you will need different hardware than if you are building a standard box. The easiest way to make a sliding drawer is to buy the hardware online and install it yourself. There are many options for drawers that slide, including those that are made out of wood and metal. The type of material used will depend on the look you want in your kitchen and whether or not there is enough room for the drawer to slide out from behind other cabinets.
The first thing that needs to be done is measure the cabinet opening where the drawer will be installed. Make sure that this measurement includes any trim or molding that may be used around the opening as well as any other obstacles like pipes, wires or plumbing lines. The drawer box needs to fit properly into this opening so make sure it is large enough before you start making cuts on your boards.
Once you have determined what size box will fit into your opening, cut each board down according to its length or width depending on which measurement is smaller between these two components. Once all of your boards have been cut down, measure them again so they are all exactly the same length; this will ensure that everything fits together properly without any gaps between
The hardware for your sliding drawer is easy to find. It’s just like any other drawer with a few modifications.
Sliding Drawer Hardware
The first thing you need is a pair of guides for the drawer to ride on. These are usually simple metal strips that slide on the sides of the cabinet or drawer. There are several different types available, but they all work in basically the same way. The important thing is that your guides allow for easy movement, but keep your drawer from coming out of alignment with the rest of the cabinet.
You’ll also need some kind of latch that holds the drawer in place when it’s open and keeps it from falling out when it’s closed. If you’re making a cabinet with drawers that pull out rather than drop down, then there will be no need for a latch because gravity itself keeps everything in place while open. This also means that you don’t need any sort of locking mechanism on your slides themselves since gravity will keep them closed without any help needed.
If you’re building a cabinet where drawers pull out rather than drop down, then there are several different types of latches that can be used:
Spring-loaded push button latches (also known as “drawer glides”) – These are
For this project, you will need:
– a router table
– a CNC router (optional)
– a table saw
– a miter saw or circular saw
In this video, I show you how to build a sliding drawer that can be used for cabinets, drawers, bookcases and just about anything else you want to put them in. All the parts are made from solid wood and when assembled together they are super strong! There are no screws or pieces of plastic holding them together. This video shows how to make the sides of the drawer and then how to put them together with some basic joinery techniques.
How to Build a Sliding Cabinet Drawer
Building a sliding cabinet drawer is not as hard as it seems. The first step is to get all of your materials together. You will need wood, hardware, screws and wood glue. The wood that you choose should be solid wood and not plywood. Plywood is less expensive but has a tendency to warp when exposed to moisture. Also make sure that you have a good quality drill with extra bits and sandpaper for prepping the surface before assembly. You will also need two people to help you with this project because the weight of the drawers can be heavy especially when they are full of items
The first thing that you want to do is measure out how wide your drawer will be and cut the sides accordingly. Once they are cut out, sand them down until they are nice and smooth so they will slide easily on the runners later on in the project. It is important that these sides fit tightly together so that nothing falls out when you open or close them later on in the process.
Now take your top piece and cut it out so that it fits snugly inside one end of your side pieces without any gaps between them at all
The sliding cabinet drawer is a great addition to your kitchen. It is used to store items such as cutlery and silverware, napkins, cooking utensils and other small items.
It can also be used in other areas of the house, such as bathrooms or offices. In this article we will show you how to make a sliding cabinet drawer with wood. You can use it as an idea to create other types of drawers for any type of furniture you want to make in your home.
Materials:
Wooden boards (4) – 1 x 10 cm (1 x 4 inches)
Wooden board (2) – 3 mm thick (1/8 inch)
Wooden dowels (2) – 5 cm long (2 inches)
Wooden dowels (2) – 6 cm long (2 1/2 inches)
Wooden dowels (4) – 8 cm long (3 1/4 inches)
How to Build a Sliding Cabinet Drawer
Sliding cabinet drawers are a great way to hide clutter and make room for other items in your kitchen or bathroom. They’re also an easy way to add storage space without having to think about installation. Materials can be purchased at home improvement stores, but you can also use scrap wood from cutting boards or other projects.
Measure the drawer opening and cut the wood to fit inside it. You’ll want to make sure there is enough room for the drawer to slide easily and that there’s no extra material on the sides of the opening so you don’t end up with a gap between the edge of the drawer and wall when it’s installed. Cut two pieces of plywood for each drawer: one piece as wide as your opening, and one piece as tall as your opening plus 3/4 inch (2 cm). The height measurement is important because it ensures that when you install the bottom piece of plywood in step 6 below, it will overlap slightly with both sides of your opening so that no light shines through from underneath.
Saw grooves into one side of each piece of plywood so that they will fit together flush once installed. Be sure not to saw too deep into one side or
A sliding drawer is a great way to add storage space to your kitchen and make it more convenient. The trick is building the drawer so it slides smoothly. Here are step-by-step instructions for building a sliding cabinet drawer that will slide easily and last for years.
1. Cut the 2×4s for the sides, front, back and bottom of the drawer according to the measurements shown in Figure A (below). Cut the plywood top and bottom panels from ¾-inch plywood.
2. Attach the sides to the front, back and bottom pieces with 1¼-inch screws (Photo 1). Make sure all corners are square before driving in any screws. Attach one side first then fit the other side into place before driving in any screws on that side. Attach the top and bottom panels (Photo 2). The plywood edges should be flush with outside edges of 2x4s so when you install them they will be flush with outside edges of other components such as doors or drawers that they meet up with later.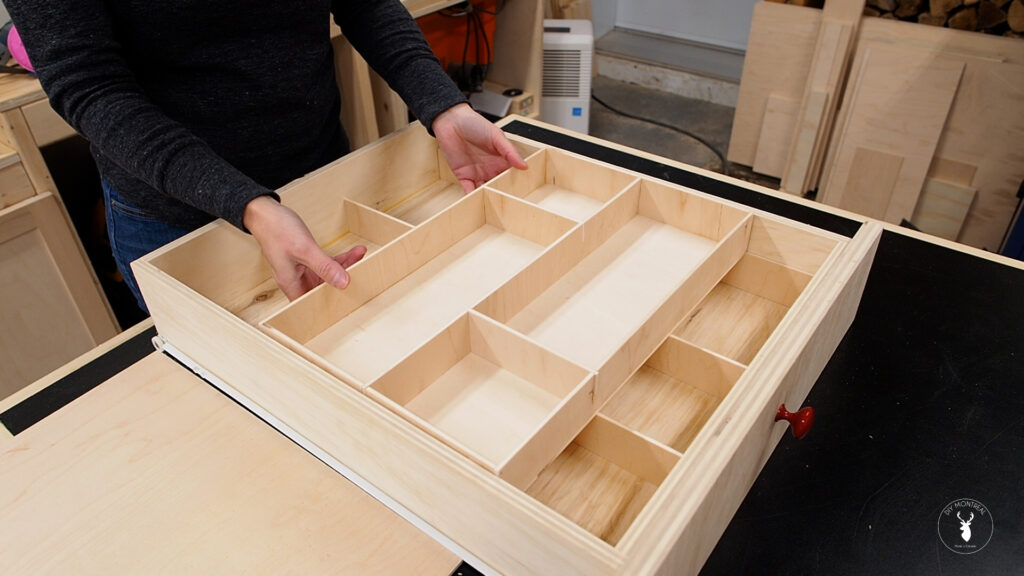
3. Drawer runners are made from ¾-inch thick hardwood plywood cut into pieces that match width of assembled drawers plus extra length at each
The first step to building a sliding cabinet drawer is to cut the sides and dividers. I used 1/2 inch plywood for the sides, but you can use any thickness you want. Just make sure it will slide easily in the tracks. The dividers are made from 1/4 inch plywood.
The next step is to cut the bottom panel. This can be any size or shape as long as it fits into your drawer opening.
Next, attach all three pieces together using glue and brad nails.
Once your bottom panel is attached, you can then attach it to the sides of your cabinet using screws or brads and glue.
The last step is to add some handles or knobs on each side of the drawer so that you can open and close them easily when needed!