This project is about how to build a simple bookcase. There is no magic in it, but you will need a couple of hours and just some basic tools to make this one. Anyone can do that. I hope that the instructions in this article are detailed so even if you are not very experienced, you’ll build this simple bookshelf with my help.
The how to build a simple bookcase article will teach you the basics of this construction. Though I have prepared it for a specialized market, anyone who wants information on how to build a simple bookcase will find this guide useful.
How to build a simple bookcase
The bookshelf is an essential piece of furniture, not just for the home library or study, but also for the living room and bedroom. There are many types of bookshelves, from small to large, from simple to complex.
There are many ways to build a bookshelf. This video shows how to make a simple bookcase using woodworking tools and materials that you can find at your local hardware store.
If you want to learn how to build your own wooden bookshelf, then check out this video tutorial. Watch this video now and learn how to build an awesome small bookshelf in no time!
Building a simple wooden bookshelf is a good weekend project for those who love woodworking, and the end result is an attractive piece of furniture that can be used to display books, CDs or DVDs.
A basic bookshelf requires no complex cuts and only basic carpentry skills. The materials needed include two 12-foot 2x4s and four sheets of 1/2-inch plywood. Other materials you may need include a power saw, router with bit set, drill, hammer and nails or screws.
Cut the 2x4s into three pieces: two pieces at 8 feet long and one piece at 5 feet long. Cut the plywood into four pieces: two pieces at 7 inches by 12 inches, one piece at 4 inches by 12 inches and one piece at 4 inches by 9 inches. Nail together two of the 8-foot 2x4s to create a shelf unit that measures 41 inches wide by 16 inches deep (one shelf). Repeat this step to create another shelf unit that is identical to the first one. Use your power saw to cut off about 3/4 inch from each end of both units so they fit together flush with no gaps between them when placed side by side.
/cdn.vox-cdn.com/uploads/chorus_image/image/66530547/build_bookshelf.0.jpg)
Building a bookshelf is one of the easier DIY projects. It’s also very rewarding, because you can use it to display your favorite collectibles and books. If you’re looking for something easy but still want it to look good, this guide will help you build a simple bookcase that will fit in with any room’s decor.
Materials:
! – 2x4s (2) – 36″ long (1) – 24″ long (2) – 18″ long (1) – 9″ long ! – 1x4s (4) – 24″ long (1) – 12″ long ! – Dowels (2) ! – Wood glue ! – Screws ! – Sandpaper !
Building a bookshelf is a great way to add shelving space to any room. A simple bookshelf can be built in an afternoon and will last for years.
The project shown here is built using conventional construction methods, but you can also build your own bookshelf using pocket-hole joinery (see below). You’ll need basic tools: a drill/driver, circular saw or jigsaw, hammer, tape measure and square.
Step 1: Cut the shelves
Cut three shelves 27-1/2″ long from one 2×6. These will support the back of the bookcase – so the shelf should be as tall as possible to leave plenty of room for your tallest books. The remaining two shelves are 22-1/2″ long. You also need four pieces of 1×4 lumber cut to length at 26″. These will be used as rails around the inside perimeter of the cabinet – so it’s important that they’re exactly 26″ long so they fit snugly between two posts without any gaps.
Step 2: Assemble posts and supports
To create an attractive base for your bookcase, lay out three posts that are each 12″ square on a flat surface with their inside edges flush together and their outside edges flush with
You can build a bookshelf with two or three shelves, or add as many as you need to accommodate your collection. If you want to make a large, free-standing bookcase, use 4x4s for the uprights and 2x6s for crossmembers.
The first step is to cut the pieces you’ll need. Use a table saw or circular saw (or an electric jigsaw) and straightedge to rip all of the boards. Rip a 1/2-in.-wide by 3/8-in.-deep rabbet on one edge of each shelf board, so that it will fit snugly into the groove in the front and back rails.
Standard shelf depth is 13 in., but if you want deeper shelves, increase the lengths of all four side and back rails accordingly. If you want shallower shelves, reduce these lengths by 1 in.
Next cut the plywood shelves to size; they should be about 1/2 in. narrower than the inside width of your bookcase sides (this will allow room for shims). Cut dadoes into each shelf with a dado blade attachment on your table saw; this will hold them firmly against the front and back rails when you assemble everything later on
If you have a collection of books and need to organize them, read this article. We will tell you how to build a small bookshelf, as well as give advice on the design and construction of bookcases from wood.
This is an easy project that anyone can do at home, even if you have little experience in woodworking. The only thing required for the creation of such furniture is a piece of wood (in our case – pine), glue and screws with nuts.
In the first step we need to cut pieces of 2×4 lumber into boards with a width of 20 cm and length 120 cm each. Then align them in pairs according to their length and drill holes through them. Next, we install the assembled wooden boards vertically along the wall using screws or nails so that they are firmly attached to it.
Now we need to make shelves for our small bookshelf: they should be 25-30 cm wide, depending on how much space we have left after installing them vertically along the wall. In addition, it is recommended to make shelves with different heights according to their location – lower ones closer to the floor, higher ones closer to the ceiling; this will help us place books more conveniently (for example: children’s books will not
How to Build a Small Bookshelf. A small bookshelf is a great way to add extra storage to your home. You can place these bookcases in any room of your house for extra storage space, or use them as a decorative piece. When building a small bookshelf, you should use the same materials as large shelves and keep the same basic construction methods in mind.
The first step is to choose wood that will be used for the shelving unit. The wood needs to be strong enough so that it won’t bend or break under heavy loads of books and other items. It is also important that the wood be smooth so that it can be painted easily after construction.
Materials Needed:
2x4s (for sides)
1x6s (for shelves)
Plywood or OSB (for back)
In this tutorial, we’ll show you how to build a small bookshelf. This small bookshelf is perfect for organizing your office or bedroom. The shelf is made from 2x4s, so it’s easy to build and sturdy. We’ll also show you how to stain the wood to match your decor.
Check out our other shelves:
How To Build A Floating Shelf – https://www.youtube.com/watch?v=2Q_A5o6O2l0
How To Build A Corner Shelf – https://www.youtube.com/watch?v=jE6OgIeX_7Y
1. Create a plan for the size of your bookshelf. If you want to make a small bookshelf, then it is important that you create a plan for its size. The first step would be to measure the length and width of the wall where you want to place the shelf.
2. Cut pieces of plywood to size using a miter saw or circular saw. Once you have cut all of the pieces, use a router and round over edges of each piece by 1/4 inch on each side.
3. Make two cuts along the bottom edge of each piece of plywood so that you can attach them together with pocket screws (#2×2). Make sure that you don’t cut off too much so that you can still attach the sides onto each other easily with pocket screws.
4. Attach sides together with pocket screws and then attach them onto one another on top so that they form an upside down letter “T.”
5. Cut out four pieces from 1×4 pine boards and then attach them onto each side of the upside down letter T so that it looks like an upside down letter “I.” You will need to use glue as well as brad nails in order to secure everything together properly
How to Make a Wooden Bookshelf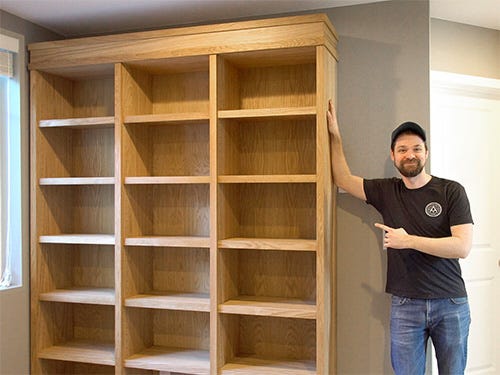
A DIY bookshelf is an excellent way to add storage space in any room. It can also be used as a media center, or even a TV stand if you’re short on space. If you’re looking for an affordable solution that’s both beautiful and functional, look no further than this DIY wooden bookshelf tutorial.
This project will take less than two hours to complete and requires basic tools such as a miter saw, drill and hammer. You’ll also need some wood glue and finishing nails. The overall cost of materials is around $50, but you’ll save money on shipping costs since most lumberyards will cut your wood for free.
Materials:
Materials:
3/4″ x 2″ Pine Boards (5) – Lumberyard will cut them for free!
1 1/2″ x 3/4″ Pine Boards (1) – Lumberyard will cut them for free!