No room for a corner shower? No worries. There’s an easy solution for you. A corner shower bench is the ideal solution and it provides a place for bathroom storage too!
Shower benches are an ideal choice for a smaller shower space or bathtub. They provide additional seating and storage space in a very convenient manner. A shower bench is essentially a vanity of sorts, and it can be used to make the most out of your bathroom on a budget while adding style at the same time. It has been considered one of the must-have items in bathroom since 1990s, and though it might sound like a relic, there are still people who opt for multipurpose shower benches over pricey vanities with mirrors.
How to build a shower seat
Building a corner shower bench is a great way to add more storage and seating space in your bathroom. These benches are also useful when you have limited space, as they can be placed against the wall where you need them most.
Building a corner bench will not only make your shower safer and more comfortable, but it will also add value to your home when it comes time to sell.
A built-in bench is an easy DIY project that can be completed in just one weekend. The best part is that there are many different ways to build them, so you can create something that fits your style and needs perfectly.
Step 1: Measure Your Space
Before you start building anything, measure the space where the bench will go. Measure from the outside of each corner of the room down to where you want the seat to be located on each wall.
Step 2: Cut Your Wood Boards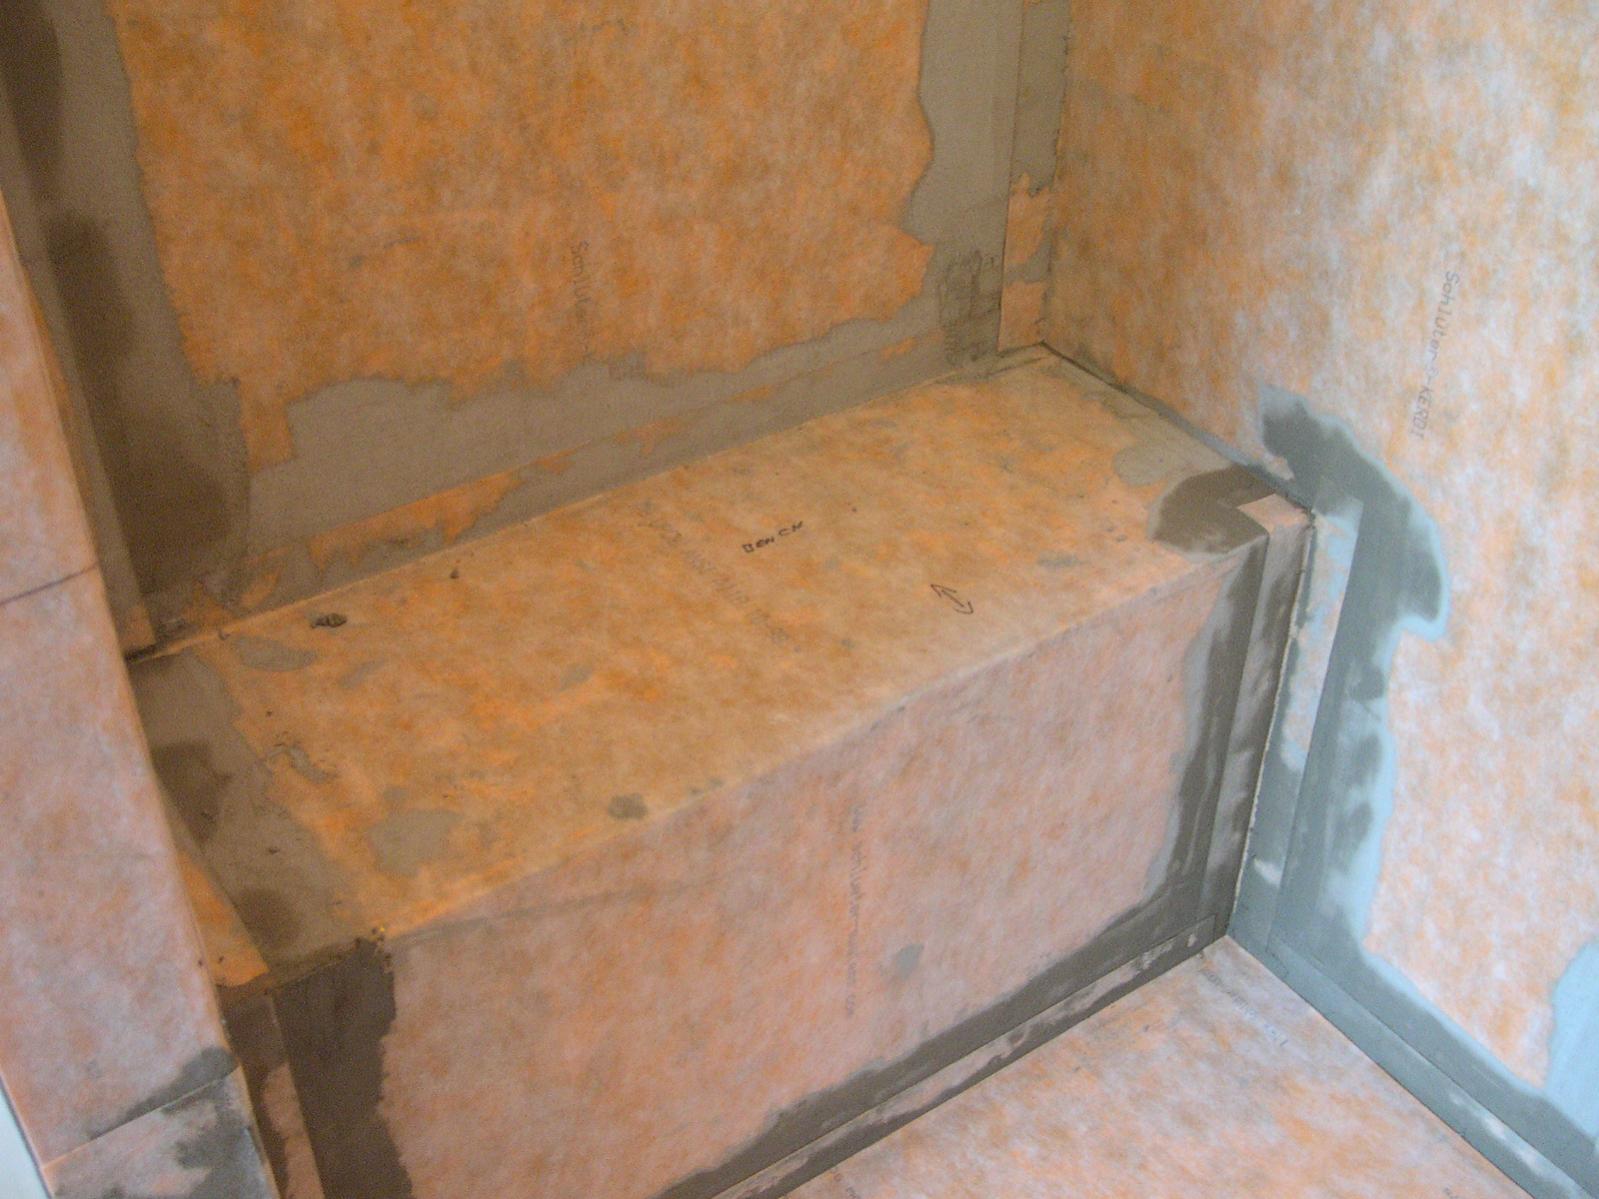
Cut two pieces of 2×4 lumber at 9 inches long for each side of the bench (this will allow enough room for both a top and bottom piece). You’ll need two for each side of your shower stall — four total boards for this project. The width of these boards depends on how wide you want your finished seat to be; we chose
How to Build a Corner Shower Bench
A corner shower bench is a great way to add extra seating while still leaving space for showering. The project is simple and inexpensive, and it doesn’t require any special skills. Here are the basic steps:
Step 1: Measure the length of your wall and mark where each shelf will go. Then measure from the side wall to the center of each shelf and divide that number by two — this will be the distance between each shelf. Use a level to make sure each shelf is level with one another.
Step 2: Cut your 2x4s down to size using a circular saw or miter saw. You’ll need four pieces of 2×4 for each corner bench, plus two more for attaching them together at their ends (see below). You’ll also need 2x4s for creating braces for your seat frame (see below).
Step 3: Cut all your pieces down to size according to these measurements — don’t forget about making sure they’re level with one another! Also cut out holes in the backside of your boards so they can fit over pipes once you’re done building this thing.
Step 4: Attach the top piece of wood onto your wall using some screws or nails; if possible
Building a corner shower bench is easy. You simply need to follow these steps:
1. Measure the area where you want to put your bench and mark it with painter’s tape or a pencil.
2. Use a leveler or plumb bob to make sure the surface is even. If necessary, use shims under one side of the plywood to level it out.
3. Cut the plywood sheet into two pieces that are each at least two inches wider than your measurements for the width of the shower so that you can screw them together once they’re in place. Cut several pieces of 1×4-inch lumber into lengths that are long enough so that when placed between two wall studs, they will extend past both sides of your plywood by at least 6 inches on each side (more if necessary) — this will allow you to screw them into the studs on either side of the bench and give extra support for attaching other parts later on. Sand off any rough edges on all surfaces before moving on to step 4!
4. Attach one piece of plywood onto one side wall using 3-inch screws through predrilled holes; use at least four screws per
If you’re looking for a way to make your bathroom more comfortable, a shower seat can be the perfect solution. These seats sit in the shower and provide extra seating without taking up valuable floor space. They’re also ideal for people who have difficulty standing or sitting on their own.
A shower seat can be as simple or elaborate as you like. The simplest designs use plastic or metal frames and slats that fold down for easy storage. More complex models feature recessed seats with backs and armrests, making them more comfortable than basic options.
If you want to build a corner shower bench, here’s how:
1. Lay out the frame pieces on the floor so they form an L shape with the long side against the wall.
2. Use a drill bit slightly smaller than your screws to make pilot holes in each joint where two pieces meet, then screw together all of the joints with 1-inch screws (or longer if necessary).
3. Fit together two short pieces together to form one long side of your bench; do not screw them together yet! Then fit together two long pieces together; do not screw them yet either! Once both sides have been
Building a shower bench is an easy DIY project that can be completed in a weekend. The materials required for this project are basic and readily available at most hardware stores. If you want to save money, consider using reclaimed wood from your neighborhood salvage yard.
Step 1: Cut the Wood
The first step is to cut the pieces of lumber that will make up your shower seat. Use a miter saw to make straight cuts on both ends of each board. These cuts should be made at 45-degree angles so they fit together properly when you put them together later on in the process.
Step 2: Sand and Stain the Wood
Once all of your lumber has been cut, it’s time to sand each board down to remove any splinters or rough edges that may have developed during the cutting process. Once these have been removed, use stain or paint on each board so that they all match in color, creating a uniform look for your finished product. You can choose any color scheme you like; we used a dark gray stain with white paint for our project since we had a lot of gray wood already in our house!
Building a floating shower bench is easy and inexpensive. The materials you need will cost you less than $100, but the finished product will look like it was professionally installed.
Building a corner shower bench isn’t as difficult as it may seem. You’ll need to determine what size of shower bench you’re going to use and then measure and cut the lumber according to your measurements. The only tools needed are a miter saw and handsaw, but it’s helpful to have a drill/driver for fastening screws.
Once you have all the pieces cut out, assemble them using glue and nails or screws. If using glue, make sure that it dries completely before moving on to the next step. If using screws, make sure they are pre-drilled properly into the wood so they don’t split or crack any pieces when being screwed into place.
Corner shower benches are designed to save space, but if you want one that is more than just a place to sit and wash your feet, you will need to make a deeper bench. The depth of the bench allows you to sit on it comfortably without having to bend your knees. If you want to build one yourself, it’s not as hard as it may seem.
Step 1: Build the sides
The two sides of your corner shower bench will be built from 2x4s. Cut the pieces at 15 inches long and pre-drill holes for the screws that will hold them together. Screw them together with 3 inch screws in each corner joint.
Step 2: Stain or paint the top
If you want a stained look on your floating corner shower bench, apply several coats of stain and sand between coats with 220 grit sandpaper. You can also paint it if you prefer, but be sure to use an oil-based paint so that it doesn’t peel off later when exposed to water for long periods of time (oil based paints will not peel off).
There are many ways to build a shower bench. This article will focus on how to build a corner shower bench. First, let’s take a look at what goes into making a corner shower bench and then we will focus on how to build one.
Corner Showers
Corner showers are becoming more and more popular in residential homes. They save space and give you the ability to get clean while getting a great workout at the same time! What really makes this work is having a corner shower bench installed. This allows you to sit down in your shower instead of standing up.
Shower Benches
A shower bench is similar to an ordinary chair but it has been modified for use in the shower. The most important aspect of these benches is that they are waterproof so they don’t get damaged when they come into contact with water during use or cleaning. Most people choose to install their benches directly against the wall where there is plenty of room for them to sit comfortably. This also helps prevent injury since there won’t be any sharp edges where they can fall into while sitting down or getting up from their seat.
A corner shower bench provides a place to sit and relax in the shower or tub. The design of your shower will determine how much space you have to work with, but most people can fit a corner bathroom bench in their bathroom without any problem.
Building the frame for your own corner bench is easy with the right materials and tools. You’ll need to choose what type of wood you’d like to use, along with whether you want to stain it or paint it a color. Then, all you need are some basic tools, including clamps and drills that can help you put it together quickly and easily.
Materials:
– Plywood (3/4″) x 8′ (1 sheet)
– 2×4″ lumber (2)
– Wood screws (6 1/2″)
Tools:
– Clamps
– Tape measure & pencil
Step 1: Build the bench frame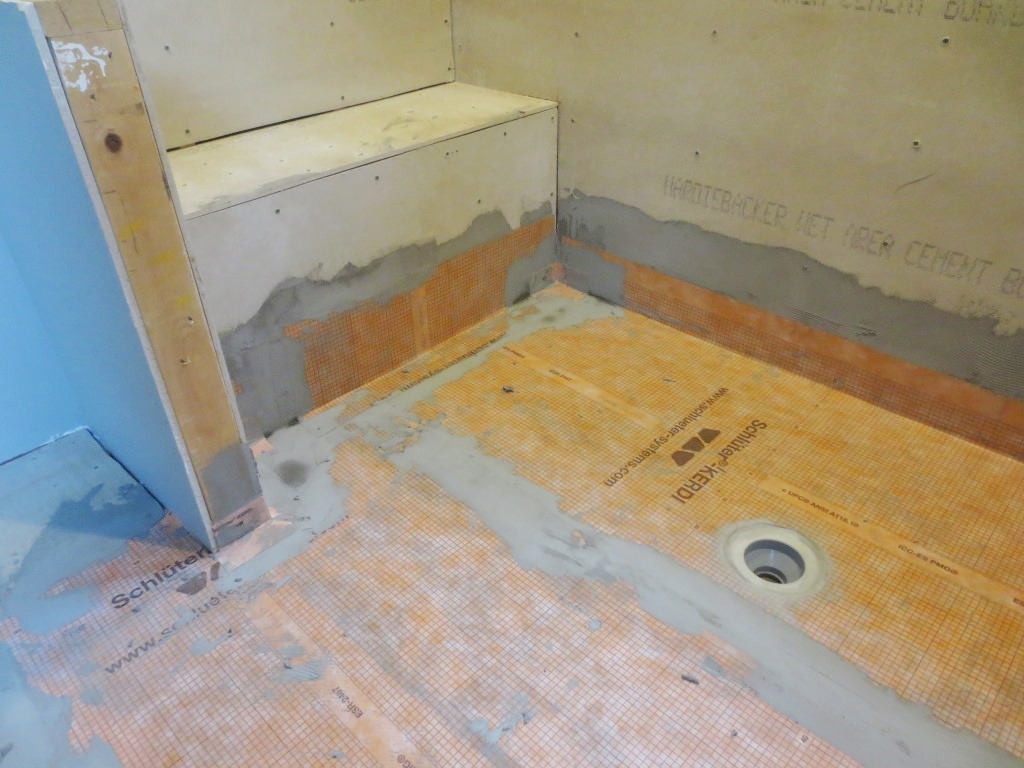
The first step is to build the framing for the shower bench. Use 2x4s, cut to length, and attach them together with glue and nails.
Step 2: Attach a plywood bottom
Cut a piece of ¾” plywood to fit inside of your frame. Nail or screw it in place so that it fits tightly between the 2x4s. You can also glue this piece into place if you want, but I found it easier to nail it in first then use construction adhesive later on.
Step 3: Attach a second layer of 2x4s
Now add another layer of 2x4s on top of your bench frame as shown below. You can either nail them directly to the studs behind your wall or use lag screws through predrilled holes in each board and into the studs behind them. Use construction adhesive between each board and around the edges where they meet each other at 90-degree angles.
Step 4: Attach plywood on top of bench frame
If you haven’t already done so, now is a good time to attach a layer of ¾” plywood over your entire bench frame using construction adhesive and screws as needed for extra strength