I think you should be building your subfloor on a layer of plywood rather than directly on your concrete. Wood is softer and more flexible, which means less swelling and contraction. Below we’ll go over the procedure of how to build a shower pan that sits on plywood.
How to install bathroom floors—bathroom flooring is a huge decision. Bathroom flooring has become the focal point of many bathrooms due to the popularity of tile, stone or other solid surface materials. All these choices give you an abundance of options and that’s why choosing bathroom flooring can be so intimidating. Designing a bathroom with large tiles or marble slabs as the focal point can leave small bathrooms feeling like big empty spaces instead of intimate retreats. There are smaller bathroom floor tiles you can choose, but they don’t always look good with large wall tile and vice versa.
How to build a shower pan on wood floor
Tiling a shower floor is a big job, but if you do it right, it can be very rewarding. You’ll want to start with a concrete slab that’s been cured at least two weeks before you start tiling.
Step 1: Prepare the subfloor by laying down a layer of 1/2-inch-thick plywood over the concrete slab. Screw down the plywood with 3-inch screws every 12 inches along the edges and every 6 inches in the middle. Make sure there’s enough overhang on all sides of the shower pan so it hangs over onto level ground or another surface below. The edge should hang out at least 1 inch from the outermost edge of the shower pan so that water can drain away from your new shower floor easily.
Step 2: Mix up some thinset mortar — you’ll need about 4 inches worth — in a bucket and spread it evenly over your plywood subfloor with a trowel. Let this sit for 10 minutes until it starts to set up slightly before adding any tile adhesive to it so that it doesn’t stick to your old grout if you’re using existing tiles in your current shower surround; otherwise, apply about 1/4
How to Tile a Shower Floor on Concrete
1. Prepare the subfloor.
2. Install the shower pan.
3. Mark and cut tile locations.
4. Set the first tile in place and set the remaining tiles in their positions.
5. Grout and caulk the joints between tiles, using a grout float or trowel to spread grout over the face of each tile, then wiping it away with a damp sponge
If you’re remodeling your bathroom, you may want to consider installing a shower pan on your existing concrete slab. A shower pan can be installed by any homeowner and requires only simple tools such as a hammer and screwdriver.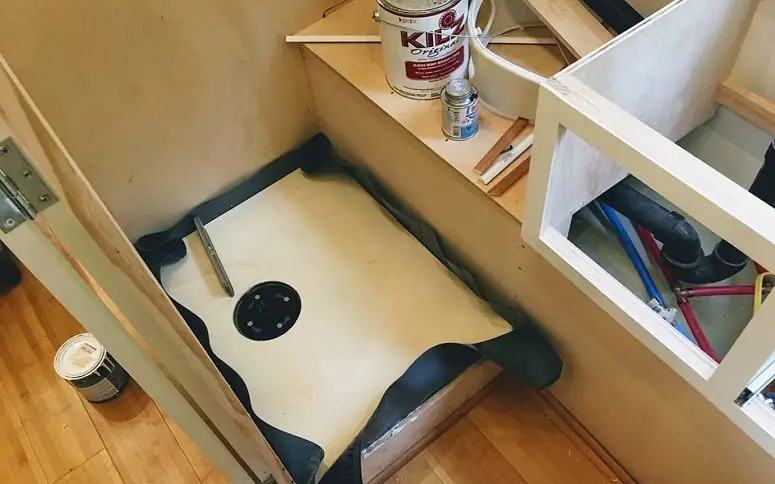
The first step in installing a shower pan is to tear out the old tile or vinyl flooring. This will expose an existing concrete slab. Concrete slabs come in many different sizes, so make sure that you have enough room to accommodate your new shower pan.
Next, use the miter saw to cut two pieces of backer board that are 6 inches wide and 48 inches long. Set these backer boards aside for later use.
Measure 17 inches from each side of the centerline of the wall and mark this point with masking tape or chalk. Use the framing square to draw lines across the entire length of each wall at this mark and then snap chalk lines along these marks using a chalk line reel.
Use a utility blade to cut out sections along these lines using your circular saw so that there is no overlap between them when they are installed together (see Resources below).
A shower pan is a waterproof tray that sits on top of the subfloor and provides a level platform for the ceramic tile to sit on. A shower pan can be constructed in a matter of hours and requires just a few tools, such as a hammer and chisel.
Step 1
Measure out the size of your shower stall on the floor using painter’s tape or chalk lines. The shower pan should extend past the walls by at least 2 inches on all sides to allow for drainage. The pan should be at least 2 inches larger than your drain pipe to allow for expansion.
Step 2
Use a chisel to cut grooves into the concrete where you want to place the wall studs for your shower walls. You may need two people to hold up one side of your wall while another person cuts out the holes with a hammer and chisel. Leave about 1/4 inch between each groove so they will not come in contact with each other when you install them later on.
Building a shower pan can be a complicated job, but it doesn’t have to be. Even if you’re not a pro, you can still do it yourself with the right materials and tools. All you need is a little know-how and the right supplies on hand.
Shower pans are typically made of fiberglass, plastic or metal and come in many different sizes. The size of your shower pan depends on the dimensions of your bathroom and how much space you have available for construction.
Shower pans can be either built-in or free standing depending on how they’re installed in your bathroom. Built-in pans are installed into the floor while free standing pans are set aside from the floor and installed onto a base structure such as concrete blocks or wooden planks.
To build a shower pan that’s both sturdy and durable, you’ll need to choose materials carefully based on the type of flooring material used in your bathroom:
If you’re installing tile over an existing concrete slab, use cement backer board instead of plywood as a base material for your shower pan because it won’t swell or warp like plywood can when exposed to moisture over time
How to Tile a Shower Floor on Concrete
If you’re building a shower in an existing bathroom, it’s a good idea to lay down a waterproof membrane over the concrete slab. This will protect the bottom of the tub from water damage and make it easier to clean.
Waterproof Membranes for Showers
Waterproof membranes are available at home improvement stores or online. They come in rolls and can be cut with scissors to fit your shower pan. You’ll also need some caulk to seal around any cracks or seams in the membrane. A paintbrush is useful for spreading caulk smoothly and evenly over the surface of your shower pan.
How to Build a Shower Pan on Concrete Slab
This is a guide about building a shower pan on concrete slab.
I’m building a shower pan out of cement board and then tiling it with ceramic tile. I’m using an underlayment for the floor to prevent water damage, but I don’t know if this will be sufficient to hold up the tile. I want to make sure that the tile will stay in place during use.
I want to build a shower pan on top of my existing concrete slab by placing cement board over it, but I am not sure if this will work.
In hopes of creating a waterproof barrier underneath my shower pan (to protect against any leaks), I bought cement board and cement backerboard from Home Depot. Cement board is made from portland cement and gypsum, with mineral fibers added (the same materials used to make drywall). It’s designed for installation over wood framing or plywood sheathing. Backerboard is made from portland cement and an aggregate such as sand or gravel or recycled glass, with no mineral fibers added (as opposed to cement board). They both have one side that has been textured so that it can be fastened down with screws or nails.
The problem is that both products are very heavy and expensive — two sheets
Building a shower pan on top of a concrete slab is the most common way to create a shower base. It’s easy to do and relatively inexpensive.
A shower pan is a waterproofed subfloor for your shower enclosure. The pan sits on top of your existing concrete slab, so it needs to be strong enough to support the weight of water that will run through it. A typical shower pan is about 24 inches deep and has two walls made from waterproof material that form the sides of the stall.
A typical shower pan has two walls made from waterproof material that form the sides of the stall. The pan rests on top of your existing concrete floor, but it doesn’t extend beyond its boundaries because you don’t want water leaking into other areas where it won’t be contained by walls or fixtures.
The best way to build a shower pan on concrete is with cement board panels that are designed to be installed directly over an existing slab. Cement board panels are made from cement mixed with sand, which gives them strength and keeps them from crumbling when exposed to moisture over time. They come in different thicknesses depending on how much waterproofing you need for your project, but they’re all easy to install because they’re pre-cut into shapes
The easiest way to build a shower pan on concrete is to use a pre-formed pan. These are available in a variety of sizes and styles, and they’re designed to work with specific shower bases and walls. Once you’ve selected the appropriate pan for your project, all you have to do is follow the manufacturer’s instructions for installation.
Pre-formed pans are made from a variety of materials, ranging from plastic to fiberglass. Some of these pans can be cut with a utility knife or scissors, while others require special tools or modifications before they can be used.
If you’d rather build your own pan, you should consider using cement board as your base material. The advantage of using cement board is that it’s relatively inexpensive and easy to cut and fit around the corners of your bathroom floor plan. However, it’s important to note that cement board isn’t waterproof—you’ll need to install flashing around any seams in order to prevent water from seeping into your shower base.
In addition to flashing, one other thing that’s important when installing a cement board shower base is ensuring that all seams are sealed properly before tiling begins. If you don’t seal these seams properly, they may allow water into your shower base over time
The first step in tiling your shower floor is to build a shower pan. This will be the base for the shower walls, and it needs to be strong, watertight and level. It’s also a good idea to make it as big as possible (within reason), so that you have room for plumbing pipes and other fixtures.
If you’re working on an existing concrete slab, the easiest way to build your shower pan is to make a form from 2x4s and plywood sheets. The trick is to ensure that they are level with each other, so that the finished tile surface will be flat and smooth.
To do this, place your first piece of wood on top of the concrete slab and use a spirit level like this one:
Then add another piece of wood on top at right angles (i.e., with its long side running parallel to the edge of the first piece). You can use nails or screws if you want them secure enough to handle being lifted off later without falling apart, but they’ll do just fine without any fasteners if you just want them stable while building: