A lot of people are turned onto wood paneling or wood siding as an alternative to plywood. Not only does it look great, but can protect your house from the elements and can be just one step in remodeling your home.
Building a shiplap wall is a project that improves the aesthetics of your home and adds a classic country feel to your interior. With some meticulous and well-planned work, you can create yourself a shiplap wall that is both pleasing to the eye and strong enough to last for years.
How to build a shiplap wall
If you’re looking for an easy and affordable way to add character to your home, consider adding shiplap. The look is simple and rustic, with a warm, natural appeal that works well in any style of home.
If you’re new to shiplap walls, here’s everything you need to know about how to install them in your own home:
How much shiplap do I need?
The amount of shiplap needed depends on two things: the size of the wall and how much texture you want. If you just want a small accent wall, then half of a sheet will do the trick. If you want more texture and coverage, then plan on using a full sheet plus some extra pieces for mistakes or repairs later on down the line.
What tools do I need?
You don’t need any fancy tools or equipment to install shiplap walls — just basic carpentry tools like saws, hammers and screwdrivers. A power drill will make things easier but isn’t necessary if you have enough patience to work by hand!
How to build a shiplap wall
Shiplap is one of the most popular wall treatments in interior design, and for good reason. It’s easy to install, versatile and can really add character to a room. But if you’ve never installed shiplap before, it can be difficult to figure out how to get started.
Before you start building your shiplap wall, there are a few things that you need to know about this type of wood paneling:
There are many different ways that you can install shiplap on your walls, but they all have one thing in common – they require precision. If you don’t measure carefully and cut each piece perfectly square, your project will look sloppy and unprofessional. There are lots of different tools out there that can help make sure that everything is cut correctly, but we recommend using a chalk line and a good speed square (or carpenter’s square). The speed square has an adjustable head that allows you to set the angle at which you want your cuts made so that they meet up with other pieces perfectly when installed on your walls.
If
Shiplap is a popular wall treatment that has been around for a while. It’s an easy way to add character and make a room feel more cozy.
Shiplap is a type of cladding that can be used on walls, ceilings and even floors. It’s made from thin boards that are usually applied horizontally, but other patterns are possible.
Shiplap is easy to install, but there are some things you need to know before starting your project. Here are some tips for installing shiplap:
1) Measuring the area where you want to install shiplap
2) Preparing the surface for shiplap
3) Cutting and assembling the boards into panels
How to Build a Shiplap Wall
Shiplap walls are popular because they are built with a series of boards that are cut at an angle, creating a natural pattern that looks like the planks on a ship’s deck. This style of wall has been around for decades, but it is still very much in style today. If you want to build your own shiplap wall, use this guide to get started.
What You’ll Need
-A power saw or circular saw with guide rail
-Chalk line (optional)
How to start shiplap on a wall,
The easiest way to start is to use your tape measure and draw a line from the top of the wall to the bottom. This will be your reference point for measurement. From here you’ll want to measure out 2 inches from each side of your taped line and mark where the middle of that 2 inch distance is. After this, you can use your pencil to mark where all of your studs are located on the wall.
How to do shiplap on wall,
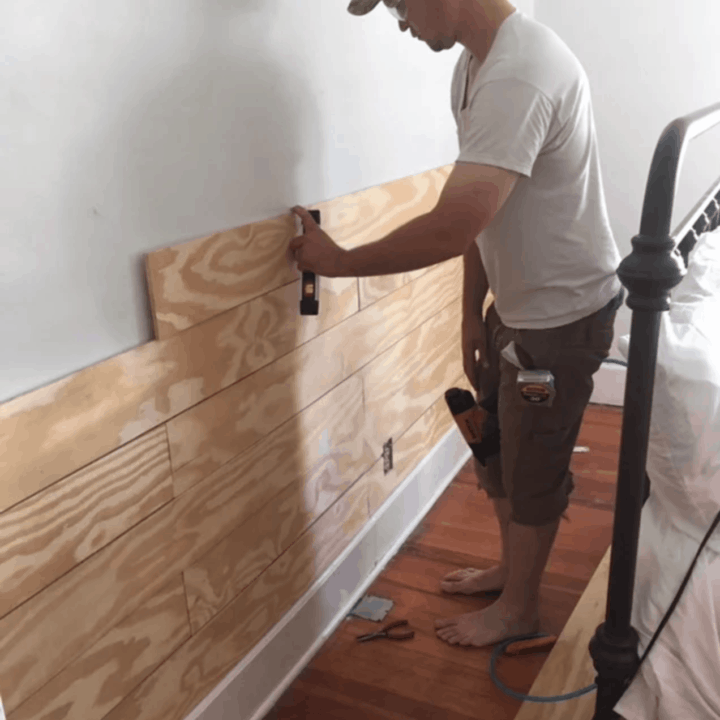
Now that you know where all of the studs are located on your shiplap wall, it’s time to get started with actually building it! The first thing you will want to do is grab one of your pieces of plywood (screwed together) and place it vertically against your wall. You should have one stud directly behind this piece so that it can be secured in place using 3 inch screws through its top into the stud in back. Once this piece has been secured in place, repeat the process for each additional piece until you have enough support for your entire panel (which should be approximately 10 inches).
How much shiplap do i need for a wall,
If you want
If you’re looking to build a shiplap wall, we have a few tips to help you get started.
Shiplap is a popular wood paneling style that’s often associated with barns and other rustic buildings. It’s made with thin boards that are laid at right angles to each other and fastened together to create a vertical surface. The end result is similar to a board-and-batten design, but the exposed fasteners can create an interesting visual effect that adds character to any room. You may want to consider adding shiplap to your next DIY project, or find out how much it costs from contractors near you.
When you’re ready to start building your own shiplap wall, here are some tips on how to do it:
Measure your space carefully before starting any construction work so you know how much material you’ll need for the job. You’ll need enough material for two sheets of plywood (four pieces) plus enough extra material for cutting lengths that will go along the top and bottom edges of each sheet (two pieces). This will give you enough leftovers for any repairs or mistakes that might happen during installation. If possible, buy extra pieces of plywood so
Building a shiplap wall is easy and can be done by anyone. It’s also a great way to add character to your room and make it look more rustic or country.
Shiplap is a type of wood paneling that is made using tongue-and-groove joints. This creates a very strong, durable wall that will last for years to come.
How To Start Shiplap On A Wall:
1)Measure the height of the wall you want to cover and purchase enough 2x4s to cover it from top to bottom.
2)Cut the 2x4s into 4 inch pieces using your miter saw or circular saw. You’ll need about three 4 inch pieces per foot of wall space covered in shiplap panels so make sure you have enough supplies on hand before starting this project!
3)Use construction adhesive when attaching each piece of 2×4 onto the wall with nails or screws at least every 12 inches apart (depending on how thick your shiplap panels are). You don’t want anything shifting around because that can cause problems later on down the line!
You can install shiplap on a wall with a few simple tools. The key is to use the right amount of nails, so you don’t have any gaps between boards. You’ll also want to make sure your ceiling beams are in good shape and that your floor can support the weight of the shiplap.
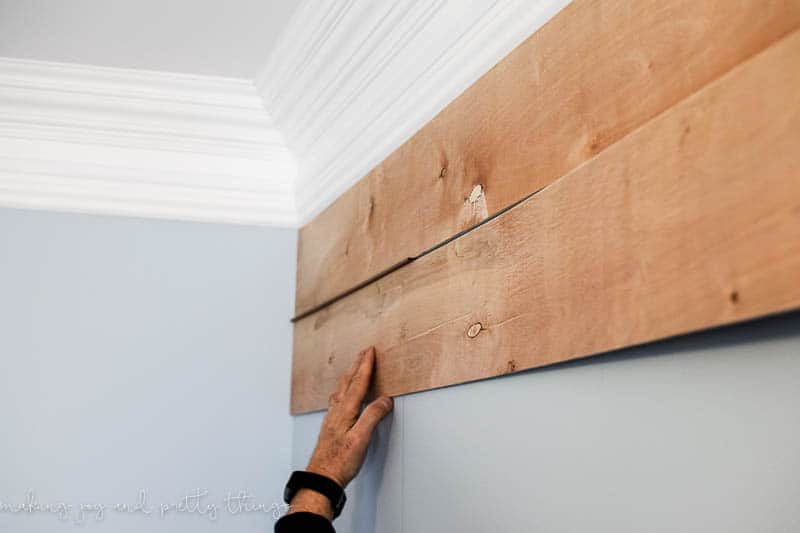
1. Measure and mark your wall for each board. Use a level to ensure that each board is positioned at an even height throughout your room.
2. Drill 1/8-inch pilot holes every 16 inches along each edge of every board. This will prevent the wood from splitting when you drive nails into it.
3. Use a pneumatic nail gun to drive 2-inch finishing nails through each pilot hole, attaching each board in place along the walls and ceiling joists if needed (depending on how high up they are). If you’re using a hammer instead of a nail gun, make sure you’re using galvanized metal screws so they won’t rust over time!
4. Finish off your project by adding trim around windows and doors as desired using either mitered or butt joints — whichever one works best for
How to build a shiplap wall
1. Select your shiplap boards.
2. Cut the boards to length with a circular saw and miter or compound miter saw. Use a bevel gauge to set the miter angle of the first cut, then make similar cuts on each board until you have enough for the project.
3. Cut small notches in the ends of each board with a handsaw so they will fit together closely when installed vertically on the wall. The width of the notch should match the thickness of your shiplap clapboard (about 1/4 inch). It’s important that you don’t cut too deep into the wood because you won’t be able to nail through it without hitting another board in back (and splitting it). If you are working with thinner stock, you may need to use a chisel or knife to remove some material from inside your notches before nailing them together with 2-inch finish nails.