Growing up, my mom had a shadow box hanging in her house (a long story for another time). I remember it holding newspaper articles about me and my brother. In high school, my senior statement was featured there too. Now, it’s just for show but I love the idea of showcasing memories this way. Though this project is a little more involved than I’ll ever attempt on my own, it’s a great tool to gift loved ones with that idea or to give to future you as a memento of old times.
Are you planning to start a project that involves making a shadow box frame? Well, if you are then it is important for you to know some of the tips and tricks for building these frames. The first thing that you need to know when it comes to building these frames is how to do it with precision. This will help you get the measurements right and also ensure that the joints are tight enough.

How to build a shadow box frame
With a shadow box frame, you can display photos, collectibles and more in a unique way. To make your own shadow box frame, you’ll need to build the frame and then fill it with items.
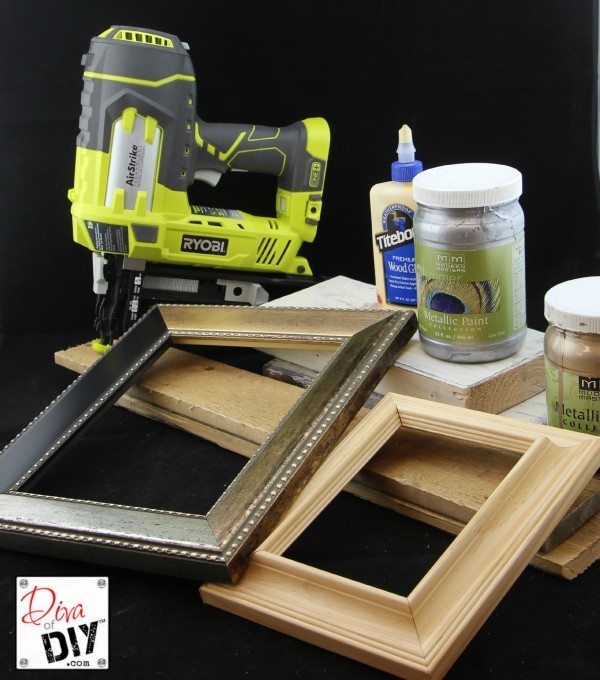
Step 1: Gather Materials
To make a shadow box frame, you’ll need some basic materials. These include:
– A piece of wood or other material that is at least 1″ thick (a piece of plywood works well)
– A saw to cut the wood into shape
– Glue for attaching glass or other materials to the front of your shadow box
– Glass (optional)
– Picture wire (optional)
The most common type of shadow box is made from a wooden frame and glass. The glass is usually framed in wood or plastic and can be clear, tinted or frosted. The front of the frame is usually painted black or another dark color so that light entering from behind does not reflect back at the viewer.
A shadow box can be made from a variety of materials, including cardboard, plywood, metal and more. It can also be purchased ready-made at craft stores and home improvement stores. A shadow box can be used to display anything from medals to jewelry to photos and other memorabilia.
The actual process of making a shadow box varies depending on what material you use for it. If you are using wood or metal as your base, you’ll need to cut out the pieces that will comprise your base and assemble them together with glue or bolts. If you’re using cardboard, there are several ways to create your frame: You can glue two pieces together (with one piece upside down) before cutting out the shape needed for your design; you can cut out two pieces separately then glue them together; or you can use duct tape or hot glue gun to adhere two pieces together first before cutting out your desired shape.
Step 1: Measure the frame and cut the cardboard
If you have a shadow box frame, you might not need to do this step. But if you’re making one from scratch, measure the inside of your frame and cut two pieces of cardboard to those dimensions.
Step 2: Attach the cardboard to each other
Glue or tape the pieces together. If your cardboard is thin enough, you might be able to just tape it together. If not, use glue or another adhesive product like hot glue (again, as long as it’s not too runny).
Step 3: Cut a hole in the middle of each side of the frame (optional)
This will allow you to put pictures into the frame without having to take out any glass at all! If you want to do this, use a utility knife or box cutter to cut out an opening between 3″-4″ wide.
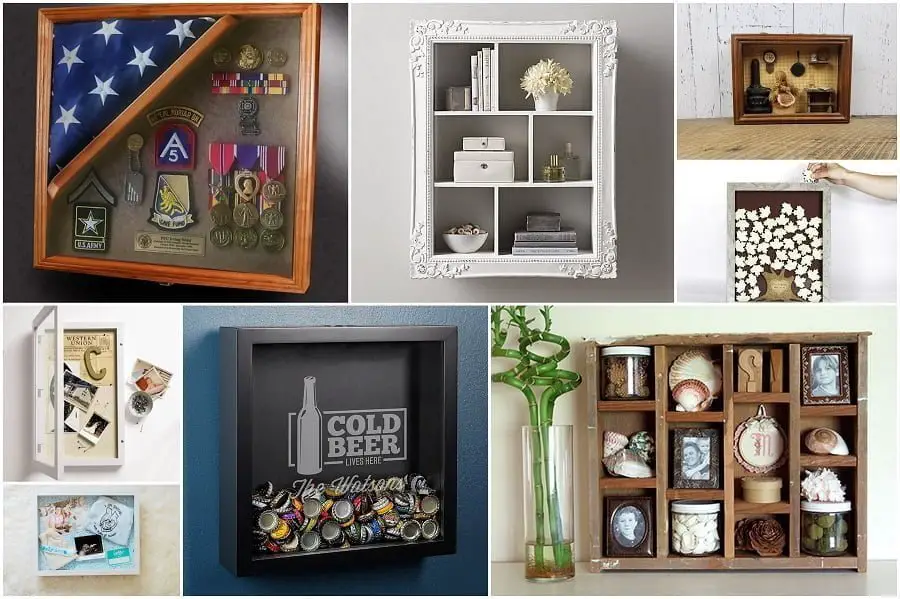
Shadow box frames are useful for displaying small objects. They can be used for a variety of purposes, including displaying art and photographs.
You can make your own shadow box frame from scratch or use pre-made materials to create one.
There are many ways you can create a shadow box frame, such as using wood or cardboard. The most important thing is that you have the right tools and measurements so that everything fits properly.
1. To make a shadow box, you need to have the right materials and supplies in your home. You should have a sturdy work surface, such as an old table or desk, with plenty of room around it. You’ll also need some tools like scissors and glue.
2. The first step is to take your frame apart if it’s already assembled. This is usually done by unscrewing the corners or screws on the sides of the frame. If you don’t want to use screws to hold the glass front in place, you can use tape instead.
3. Once you’ve taken it apart, you can use cardboard to cover the back of the frame so that it looks nicer when finished. Cut some pieces of cardboard into squares that are about twice as big as your frame’s backing board (the thin piece of wood that holds everything together). Then use glue to attach them onto each side of the backboard until all four sides are covered with cardboard and no more than ¼ inch (0.6 cm) of wood shows through on any side.
How to make shadow box frame from cardboard
Making a shadow box frame is a great way to display memorabilia and keepsakes. The best part is that it’s really easy to do and you can make one using a variety of materials.
A shadow box is basically a box with a glass front, usually with some sort of decorative frame around it. The glass front lets people see what’s inside without having to actually open the shadow box or remove anything from it. It’s perfect for displaying things like awards, pins, medals, coins and other small items that need to be kept safe but also displayed so others can see them as well.
If you’re looking for an easy way to display your collection of pins or medals, consider making yourself a shadow box frame from cardboard or wood. You’ll be able to customize it so that it fits your specific needs and tastes, giving you more flexibility than buying one off the shelf at the store would allow for!