How to build a roof in minecraft: The roof is the top part of any building .Roofs are generally supported by walls or similar vertical surfaces such as beams or columns. A thatched roof may be covered with gravel, shingle, tiles, or slate, with concrete, stone, leaves, grass, or sods becoming more common. The pitch (slope) of the roof will depend on the materials used and the style of construction. The composition of a roof may be determined by availability of materials and local practice or laws.
Minecraft Roofs are tricky to master because the laws of physics make it a little bit more difficult to build them compared to a normal house. But don’t panic, you can learn how to make a roof in Minecraft.
How to build a roof in minecraft
Step 1: Build the Foundation
Build a 2 by 3 rectangle of dirt. The height should be one block lower than your finished roof. This will allow you to walk under the roof without hitting your head.
Step 2: Place Blocks on Top
Place blocks above the foundation, but make sure they don’t touch the ground. If they do, remove them and try again until there are no blocks touching the floor.
Step 3: Add Walls Around Your Dome Roof
Place walls around your dome roof as shown in the picture below. The walls should be placed so that they touch both sides of every block on top of each other, creating an enclosed area for players to stand inside of.
The first step to building a roof is to start with a basic frame. The most common type of roof is the gable roof, which is made up of two sides and a top. If you want to make your own gable roof, then all you’ll need are some wooden planks and sticks. Here’s how:
Step 1: Place two columns of wood on the ground.
Step 2: Place another column of wood on top of each column that you’ve placed on the ground. Make sure that they are about 1 block away from each other so that they don’t overlap when you place your next column of wood on top.
Step 3: Place another two columns of wood on top of your first set of columns and make sure that they are just as far apart from each other as they were before in order to create an open space between them where your roof will be located.
Step 4: Place another column of wood directly over where your first set was placed so that it covers all but one block on either side and then place another column right after it so it covers those last two blocks as well (see image). This will create an opening for light to come through so
To build a roof, you’ll need to have your house built in a shape that is closed at the top. This can be done by connecting walls and making sure they’re not in the way of each other. It is also possible to create roofs that are open at the top or slanted.
If you want to make an actual dome, you’ll need to surround it with blocks on all sides, including the top. To do this, you can use any type of block as long as it’s connected with others around it and has no gaps between them.
For example, if you want to make a dome with dirt blocks, then all you have to do is place down two dirt blocks next to each other and then repeat that process until your entire area is covered with dirt blocks. Then take away all of the air from inside by placing down more dirt blocks until there’s no more air left inside of your dome!
Here are some tips to help you build a roof that is both sturdy and attractive.
Draw a rough sketch of the building on graph paper or in a CAD program. This will help you visualize your design before you begin building.
Place two blocks side-by-side at the bottom of the dome, with the top block slightly higher than the bottom one. Use this step as a guide for placing all other blocks, making sure that each row is slightly higher than the last.
Continue building up until you reach the desired height of your structure. It’s best to leave an extra block hanging over each side so that you can attach them later on.
A roof is a structure that covers the top of a building. The purpose of the roof is to protect and shelter people and property from the elements.
The type of roof that you install on your home depends on several factors, including climate, construction materials, and budget.
Types of Roofs
The most common types of roofs include:
Gabled Roofs
A gable roof is characterized by two sloped sides that meet to create four walls. The gable ends are often finished with dormers or windows. Gabled roofs are typically made from wood shingles or asphalt shingles, but they can be made from other materials as well.
Hip Roofs
A hip roof has four sloped sides that meet at their corners to form an upside-down “V” shape on all four sides. Hip roofs are often used in areas with snowfall because they shed snow easily off the structure due to their design. Hip roofs are also useful in areas where there is wind because they deflect wind away from the building itself. Hip roofs can be made from a variety of materials including wood shingles, metal panels or slate tiles depending on your budget and personal preference.
How To Build A Dome Roof In Minecraft
In this tutorial, I will show you how to build a dome roof in minecraft. This is the easiest way I have found so far and it looks really good. It’s also great for building a medieval castle or church. The dome roof is a lot easier than the pyramid roof, but not as good looking.
This tutorial will show you how to make this type of roof using just one block: the corner block. Corner blocks are used for making straight edges and corners for buildings like houses and towers.
First, place two corner blocks at right angles so that they form two walls with an open space between them. Then add another corner block on each side of these walls so that they meet at a point in the middle (see picture above). This forms the basic shape of your dome roof.
How to build a tower roof in Minecraft. The tower roof is a simple and easy way to make your building more interesting. It can be used in many different ways, such as creating a nice lookout point, or just as part of the main structure.
In this tutorial we will show you how to build a tower roof in Minecraft starting with the basic design and then adding some details.
Step 1: Building A Base
To start with, we need to build a base for our tower. This will be made out of blocks (the type doesn’t matter) so that it is strong enough to hold up the rest of the structure. You can make it as tall as you want but for this tutorial we’ll go with 6 blocks high (3 blocks wide).
Step 2: Building The First Layer
Next we need to add another layer on top of our base block by block until it reaches the top of our tower (we’re going with 6 layers). This layer should have sloped sides so that water can run off easily and not flood your house if there’s rain or snow on top of it (as shown below). In addition, each layer should have gaps between them so that light can pass through from above, which is important for plants
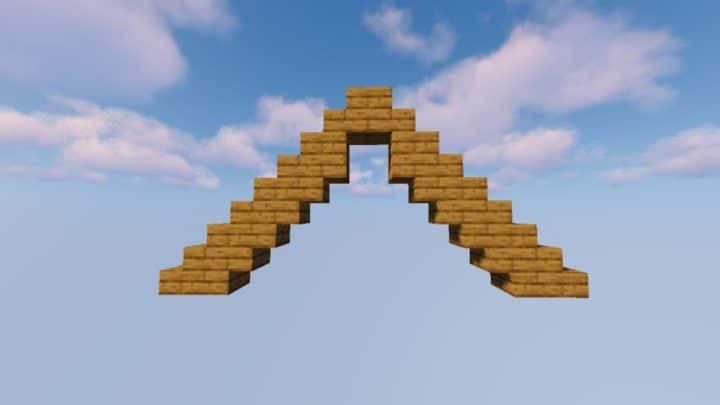
How to Build a Tower Roof in Minecraft
Here’s how to build a tower roof in Minecraft. These types of roofs are often used to create towers and other high structures that would otherwise fall apart under the weight of gravity.
Step 1: Create the base of your tower by building up blocks in a square shape, leaving an indent at the bottom where you’ll build your doorway.
Step 2: Create two sets of stairs leading up from each side of your base, back towards each other at the top. These will be used as ramps for placing more blocks on top later on.
Step 3: Create another set of stairs leading up from one side (not the side with the door) to meet the other set at the top. This will be used for placing more blocks on top later on.
Step 4: Place gravel inside both staircases so they appear like ramps instead of stairs when viewed from above or below them.
Step 5: Make sure there is space between each staircase and its neighbor so they don’t overlap when viewed from above or below them!
Tower roofs are a great addition to your buildings, since they give them an extra bit of height and make them look more realistic. In this tutorial, I’ll show you how to create a tower roof in Minecraft.
Step 1: Make sure you have the right supplies
First, make sure you have all the supplies you need before starting this project. You’ll need:
-A block of wool (any color will work)
-A wooden sword
-One piece of redstone dust (you can get this by mining redstone ore and smelting it in a furnace)
-A ladder or staircase (any type will do)
Step 1: Build the walls of your tower.
Step 2: Build a balcony or walkway along one side of your tower.
Step 3: Place some stairs along the other side of your tower, and make sure they connect to the balcony.
Step 4: Add a roof to your tower by placing slabs over the top of each level (except the bottom).