Drywall, or gypsum board as it is called in other parts of the world, comes in 4’x8′ sheets, with a thickness of 1/2″ and 5/8″. It’s a great building material due to its versatility and speed of installation. The most common use for drywall is construction of interior walls, but it can be used for any application where a hard surface is required (walls, ceilings, even floors).
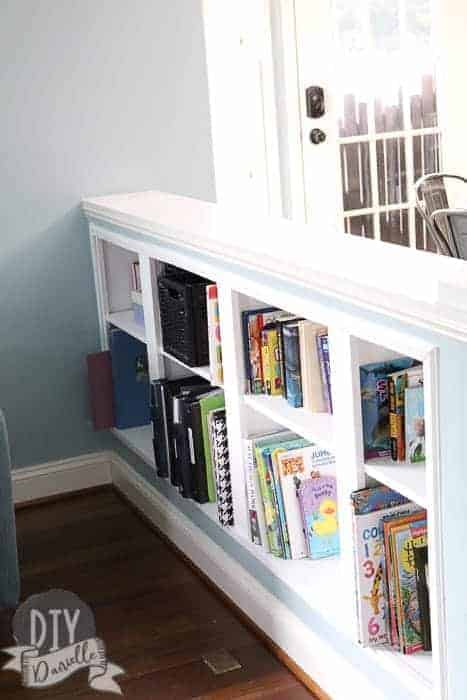
Building a recessed shelf inside of drywall can be a tricky project. There is often no stud or beam on the wall in which to build from, which means the structure must be supported from below at the bottom so that it’s sturdy. This is where I’ve hit many roadblocks, but there are ways to get around them.
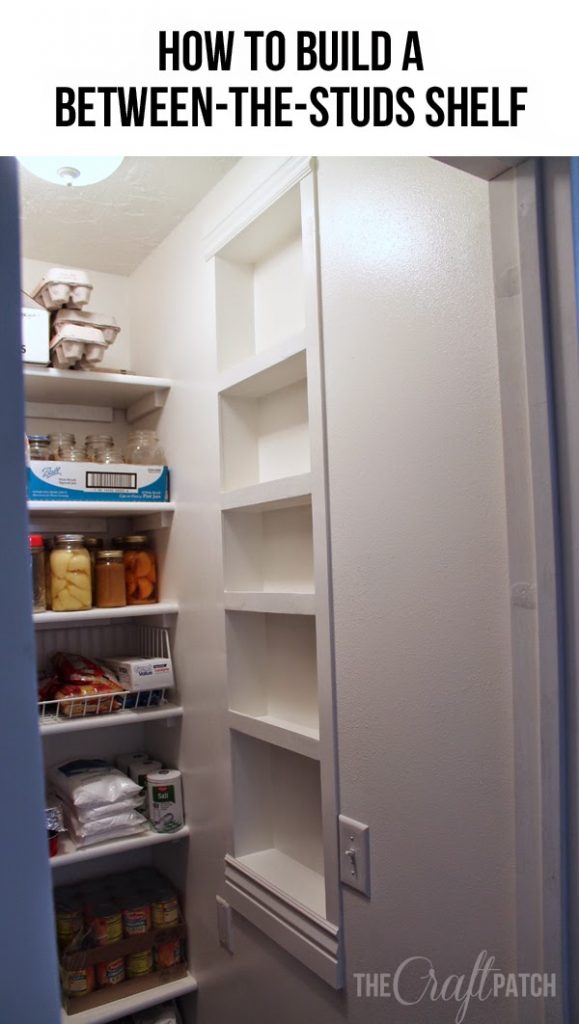
How to build a recessed shelf in existing drywall
If you are considering building a recessed shelf in an existing wall, the first thing you need to do is understand the construction of your wall. Drywall is made up of two layers – a thick back layer and a thin front layer. The back layer is usually made from gypsum board which is sandwiched between two layers of heavy paper on both sides. The front layer is made from either fiberglass matting or paper faced gypsum board. The fiberglass matting allows for greater flexibility than paper faced drywall so it can be used for curved surfaces like arches and domes.
The easiest way to make recessed shelves in existing drywall is by cutting out the back layer of drywall with a keyhole saw (a special type of circular saw) and then installing new backing boards behind it before installing the new shelves into place. This makes it more difficult to get good results with hidden screws because they will show through the holes in your new backing boards. The best way to do this is by using toggle bolts which have been designed specifically for this purpose but they are not very common in hardware stores or home centers yet so if you can’t find them locally then try looking online instead
how to make recessed wall shelves
To make a recessed shelf, first measure the distance between the top of your existing wall and the bottom of your desired shelf. If you have a piece of plywood or MDF that’s longer than this distance, cut it to size. Then cut a piece of drywall to fit over the top of this board. Use drywall screws to attach it to the board and then screw in wood cleats along the edges of each side, so that they hold the top piece in place when you flip it over and screw it down into place.
Once you’ve got your top piece secured with cleats, measure down from that point and mark every 16 inches with masking tape or painter’s tape. Then use a level to draw straight lines between these marks, creating 16-inch squares on your drywall. Drill holes at these points using a hole saw attachment for your drill, then use a putty knife or chisel to remove any excess material from inside each hole
Next, break out any additional drywall from around these holes using a hammer and chisel — just be careful not to damage any surrounding surfaces! Once this area is clear of old drywall, use silicone caulk to fill in any remaining gaps between.

how to build shelves in a recessed wall
If you want to build a recessed shelf in an existing wall, you’ll need to cut out the drywall around the area where you want to install your new shelf. The best way to do this is with a reciprocating saw and drywall saw.
To begin, use a level to draw lines down from the top edge of your existing shelf. These lines should be parallel with each other and should extend from the corner of your wall at least two feet into the room. Use a pencil to mark along these lines on the wall’s surface.
Next, use your reciprocating saw to cut along these lines through all layers of drywall at once. You should see a row of holes where there was once solid material in front of you when you’re finished cutting.
Now comes the tedious part: using your utility knife and drywall saw, cut out each hole into an oval shape with straight edges at both ends. Make sure that these edges are even when you’re done cutting out all holes.
Once you’ve done this for all holes, it’s time to fill them in with spackle or joint compound so that they’re flush with the rest of the wall surface again. You can smooth out any rough spots by sanding them down with fine grit.
So what we’re gonna do is we’re going to build a set of shelves like this, and they’ll go in here. Now this is just our drywall that’s been backfilled with insulation and a little bit of acoustic matting. This is the actual wall itself. So, it’s not perfect but it’s all we’ve got.
Now what I’m going to do first is take a utility knife and I’m going to mark out where my shelf boards are going to go on these studs here. And I’m going to put them at least two inches away from the studs because otherwise there’s not really any room for anything else in here. And if you don’t have anything else in here then they can go right up against the studs because there won’t be anything else blocking them anyway.
Now when you cut through the dry wall like this, please wear safety goggles or glasses and also make sure that you wear gloves so that when you’re cutting through things like fiberglass insulation or acoustic matting it doesn’t get into your eyes or your hands and stuff like that because it can irritate your skin.
Here’s how to build shelves in a recessed wall:
1. Measure the depth of the recessed wall and cut two pieces of lumber to that length.
2. Cut two more pieces of lumber to the width of the wall.
3. Use wood glue and brad nails to attach the short pieces to the long ones so that they form an “L”-shaped structure. Attach them at a right angle, with each leg 16 inches long.
4. Measure and mark for holes for shelf pins every 12″ along both sides of this frame, using your level as needed for accuracy (you can leave room for adjusting later).
5. Drill 1/4-inch pilot holes through all four sides of this frame with an electric drill/driver; then hammer in shelf pins until they’re flush with the surface on all four sides of your frame. You’ll need at least four pins per side, but you can add more if needed for stability or extra weight on your shelves (as long as there’s room for them).