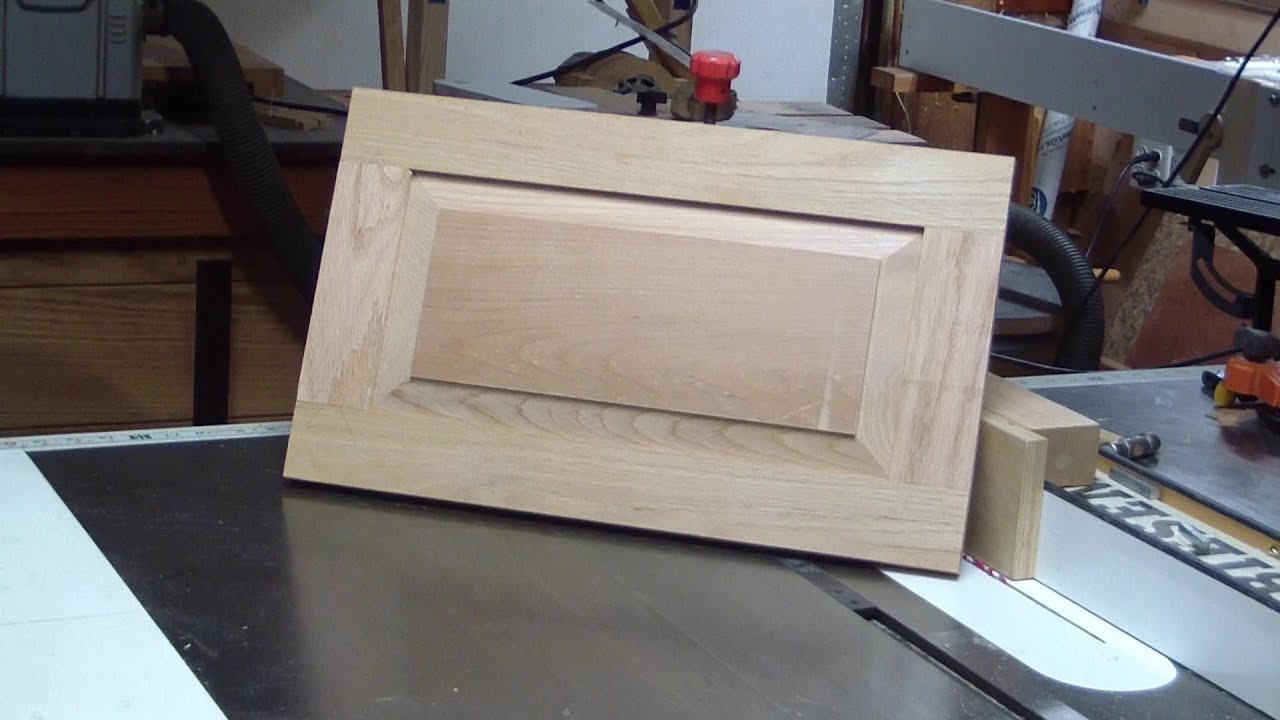
Building a raised panel cabinet door is a very popular project among woodworkers. Its large size and distinctive face frame gives it a naturally formal appearance. In fact, many customers prefer the look of a custom made raised panel cabinet door on their kitchen cabinets or armoires.
There are three types of raised panel cabinet doors, each described in the article to help you choose a wood. Planning is also discussed so that your panels are straight and true with little or no sanding. It is also important to know that there are many ways of constructing raised panel doors, usually determined by the species of wood used. I will show you a method using face frame construction which reduces the amount of jointing required when compared to other methods.

How to build a raised panel cabinet door
If you are looking for a project that will impress your friends, then this is it. Building raised panel cabinet doors is a very rewarding experience and the results are beautiful.
This article will teach you how to build raised panel cabinet doors with a router, table saw or table saw and router combination.
Before starting any woodworking project, it’s important to collect all of your tools and materials together in one place so that you’re not scrambling around trying to find them when you need them most. When it comes time to actually begin construction of your raised panel cabinet door, take all the time needed to ensure that you’ve fully prepared yourself for success.
Use a Shop Vacuum and Chalk Line
When working with any type of wood, it’s always best practice to use a shop vacuum when sanding or routing. This will help keep the dust down in your work area and on your finished product which will allow for clean lines and an even finish on your cabinets when completed. If using a router in conjunction with this project, be sure to use a 1/4″ straight bit and use this guide by Rockler Woodworking & Hardware Company to determine how much material needs to be removed from each side.

how to make arched raised panel cabinet doors
In this article, I’ll show you how to build a raised panel cabinet door. I’ve built many of these doors and this is the method that I use most often.
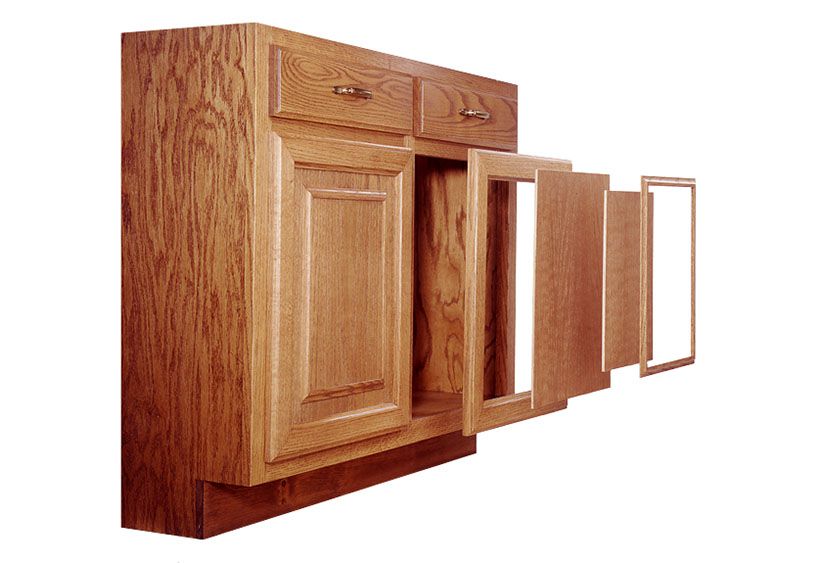
If you’re not familiar with raised panel cabinet doors, they’re simply a type of cabinet door where there are raised panels on either side of the door. These panels are usually made from plywood or MDF (Medium Density Fiberboard). They can be any shape or size you want them to be, but most people choose something that looks like an archway for their raised panel cabinet doors.
The main reason why people choose this style is because it looks good and makes the cabinets stand out more than if they didn’t have any raised panels at all. It also gives them a little bit more character than just having plain flat panels on each side of the door.
Materials Needed:
2×4 lumber – You’ll need 6 pieces of 2×4 lumber for each door (12 total). You can use either pine or fir for these. Just make sure that all 12 pieces are cut from the same length board so that they’ll match up nicely when you put them together later on in the project.
how to make raised panel cabinet doors with a router
Building raised panel cabinet doors is a great way to add style, craftsmanship and value to your home. They’re not difficult to build, but they can be time consuming. If you have the right tools and a little patience, however, you can make them yourself.
With this guide, we’ll show you how to build raised panel cabinet doors using a table saw and router. This method allows you to customize the size of your door and get the exact look that suits your space best.
The process is a little more involved than simply buying pre-made panels from a store or online. But if you love working with wood and like seeing the end result of your hard work come together with each step, then building your own arched raised panel cabinet doors will be well worth it!
how to build raised panel cabinet doors with a table saw
Making raised panel cabinet doors with a table saw is a simple and straightforward process. The following instructions will show you how to make raised panel cabinet doors using a standard table saw, but the same process can be used for other types of woodworking tools as well.
Step 1 – Cut the Moulding Pieces
The first step in building raised panel cabinet doors is to cut the moulding pieces. You will need one piece of moulding for each side of each door, so if you want two doors that are identical in appearance, then you need four pieces total (two on each side). The width of these pieces will be determined by the size of your table saw’s fence or rip fence, so it may vary depending on what type of saw you have.
You should also cut two additional pieces that will be used as supports for your doors. These pieces should be about 1/4″ shorter than any one side of your door frame so that they fit inside when installed but do not protrude beyond it. It is important to ensure that these support pieces are perfectly square before installing them because they will form part of the frame around which you’ll install your panels later on.
Here’s how to make raised panel cabinet doors with a table saw. The process is simple, but there are a few tricks that will help you achieve professional results.
Step 1: Cut the Sides and Bottom
The first step is to cut the sides and bottom of the door. You can use a table saw or a circular saw for this step. If you’re using MDF, it’s important to make sure that your cuts are square. If they aren’t, then you’ll end up with an off-square door that doesn’t fit together well.
Step 2: Cut the Ends and Top
Next, cut the ends and top of your door. This time, you’ll need to use a router because these pieces are too small for a table saw. Set up your router table with ½” plywood as a sub fence, then clamp down some ½” scrap wood underneath it so that it stays in place while you work on other things in your shop or change out bits on your router.