Do you need to build a pocket door frame? Pocket doors are very convenient if you want to conserve space. They slide into a wall, which means they don’t leave any gaps that swinging doors do. They take up no space when they’re not in use. On top of all that, the pocket door can blend in with the rest of the wall while in the closed state.
Why build a pocket door frame? Call me old fashioned but I thoroughly enjoy achieving a “do it yourself” (DIY) project at home. I’m pretty sure the feeling of satisfaction is part nostalgia, and the other part is flexing my often limited DIY skills. Those limited DIY skills have imparted me with an unhealthy amount of interest in projects that call for building your own pocket door frame . This guide will walk you through the different parts of building a pocket door frame from start to finish. In addition to easy to follow instructions and pictures, I’ve included links to the tools I used, some required tools that you may or may not want to purchase, and a word about inexpensive substitutes for other tools.
How to build a pocket door frame
If you’re building a house from the ground up, you can install a pocket door system from scratch. But if you’re remodeling an existing home, it’s best to add a pocket door to an existing wall. That way, you can maintain the integrity of your structure and avoid any damage to the sheathing or framing.
To install a pocket door in an existing wall, follow these steps:
1. Measure and mark the location of the hinge plates on both sides of the opening where you want to install your pocket door. Make sure that both hinge plates are level with each other and that they are centered over the frame opening.
2. Drill pilot holes through the drywall into each stud and then insert drywall anchors into each hole so that they protrude 1/4 inch above the surface (see Resources).
3. Secure one hinge plate to each side of the opening using 1-5/8-inch screws (see Resources). Make sure that all screws are installed at least 2 inches away from any electrical wires or pipes in order to prevent damage during installation.
Pocket door frames are not just for new construction. They can be used to add an extra entrance to an existing room, or to replace a standard swinging door.
The process of installing and hanging a pocket door is not difficult, but it does require some carpentry skills and tools. If you’re planning on installing a pocket door frame in an existing wall, here are some tips for getting the job done right.
Step 1: Measure and mark the wall where the opening will be located. The width of the doorway should match that of the frame — most wall-mounted pocket doors are between 24″ and 36″ wide. The height should be no more than 7 feet 5 inches tall (2 m).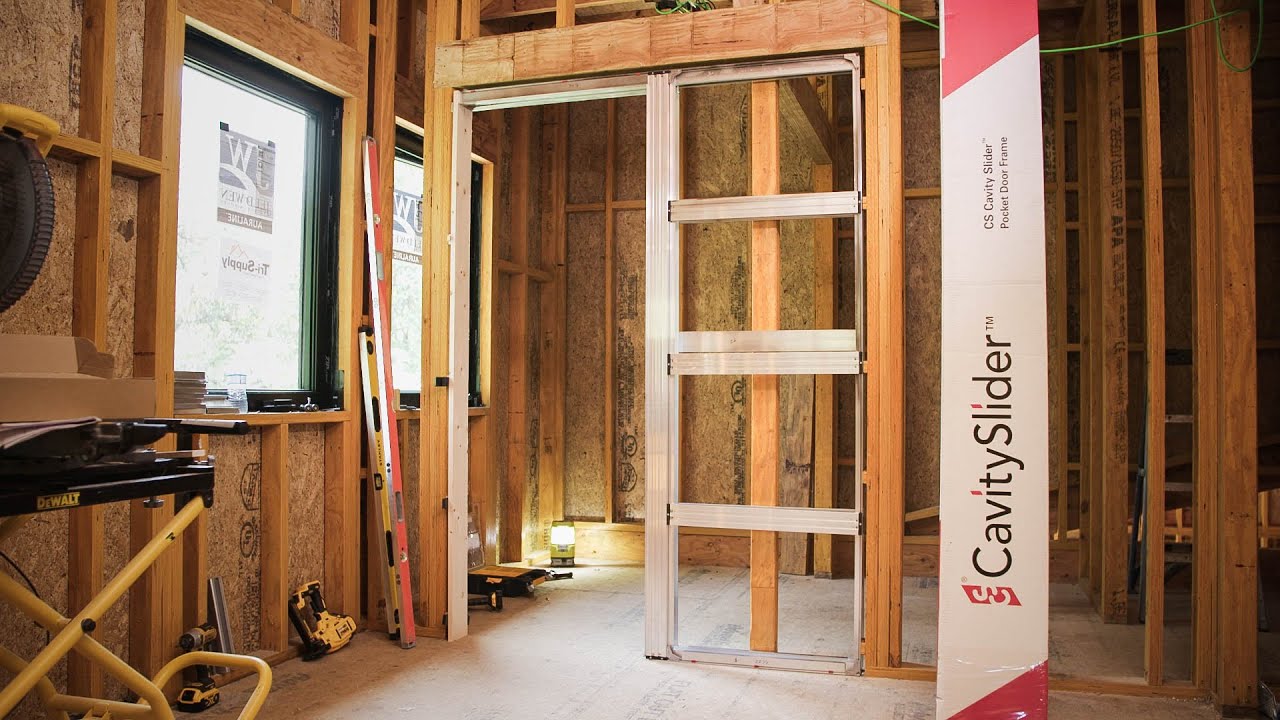
Step 2: Cut out the opening with a circular saw, jigsaw or reciprocating saw as needed based on your desired size, using a straightedge and level as guides for straight lines. Remove any drywall scraps from inside the opening with your vacuum cleaner, hammer or screwdriver as needed.
Step 3: Install blocking between studs along each side of the doorway opening so that they extend into both sides by at least 1 inch (3 cm). These blocks will hold up both sides of your new frame when it’s installed later on
In this article, we’ll take a look at how to build a pocket door frame.
Pocket doors are a great way to create the illusion of more space in your home without actually having more space. They’re also a fantastic way to hide messy storage areas or make sure that your kids can’t get into your closet.
Pocket doors are made up of several parts that must be assembled correctly in order for the door to work properly and look good.
Pocket Door Frame Kit
A pocket door frame kit includes all of the components necessary to build a pocket door frame. This includes:
Jamb liner
Stiles (wood frames)
Trim pieces (optional)
Hinges
How to build a pocket door frame
Pocket doors are great because they can save space and they don’t take up any room at all when they’re not in use. They’re also great for keeping pets out of certain rooms, and it’s easy to install them yourself if you have the right tools and instructions. Here’s how to build a pocket door frame:
Step 1 Measure the wall where you want to install the pocket door. You’ll need two pieces of wood that measure at least as wide as the opening plus an inch on each side, and as long as the width of the opening plus about 6 inches. Cut these pieces down to size with a circular saw or jigsaw, depending on how much wood is left over after your measuring is done.
Step 2 Install one piece of wood vertically in between two studs using 2″ screws every 2 feet along its length. Make sure that this piece extends past both sides of the opening by about 4 inches so that it will overlap when you place it against another piece later on.
Step 3 Install another piece of wood horizontally over these vertical pieces using 2-1/4″ screws every 4 feet along its length, making sure that this piece overlaps with each vertical piece by about 1 inch
Pocket doors are a great way to add privacy to your room. They are also easy to install and don’t require much maintenance after installation.
In this article, we’ll be showing you how to build a pocket door frame from scratch.
Step 1: Measure the opening
Before you start building a pocket door frame, you’ll need to measure the width of the opening and mark it on both sides of the wall. Then measure and mark the top and bottom of your opening (the distance between them will determine how high up on your wall you want your pocket door). Use your tape measure and make sure that both measurements are equal so that when you cut out your opening, it will fit perfectly in place.
Step 2: Cut out the opening
Now that you have marked where your opening should be cut out, use a reciprocating saw or jigsaw to cut out the wood on one side of your wall. Make sure that you leave enough space on both sides of the cut so that there isn’t any danger of hitting electrical wires or plumbing lines once you remove all of the drywall and insulation. You’ll also want to wear protective eye goggles while sawing through drywall because it can get very dusty during this step