I’m going to share the basics on how to build a patio concrete slab. In other words, How to build a patio. It’s not that hard of a project and even if you have no construction experience, you will be able to follow this tutorial.
Building a patio concrete slab is one of the most popular home improvement projects, and should be much easier than it is. Patios are most often built to last decades, and as a result, there is a lot of money at play. Estimates are that more than $10 billion was spent on building slabs in the USA alone in 2007. The patio construction industry is booming, with small business opportunities opening up nearly every day
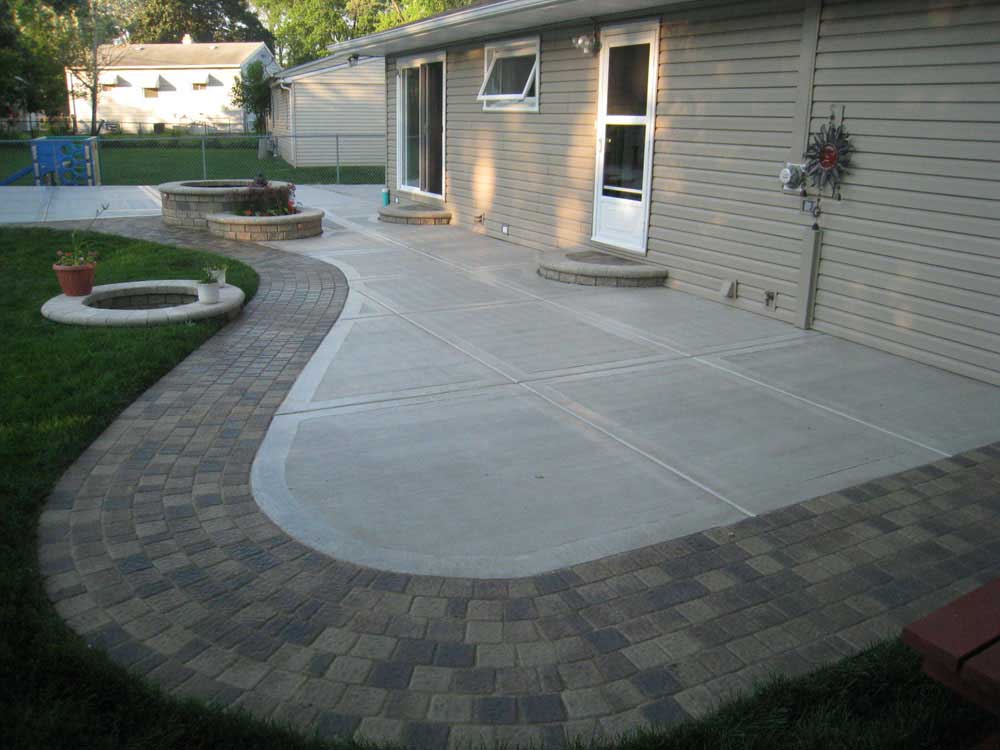
How to build a patio concrete slab
Concrete slabs are the cheapest way to pour a concrete slab. The main advantage is that you can pour them on a level surface, which will save you time and money, as you don’t need to dig up your grass or create an incline. However, the disadvantages include poor drainage and high maintenance costs.
If you want to pour a concrete slab yourself, this guide will help you get started. We’ll cover everything from how much it costs to how long it takes to finish the job.
How Much Does it Cost?
The cost of pouring a concrete slab varies depending on the size of your project and what type of materials you use. For example, if you’re just pouring a small patio for your backyard, then expect to pay around $200-$300 per square foot (1 sq ft = 0.093 m2). If you want to do something large like an entire house foundation though, expect to pay around $300-$400 per cubic yard (1 cu yd = 27 cubic feet or 7.5 cubic meters).
How Long Does it Take?
Most slabs take about 2-3 days to complete if done by one person doing all the work by themselves without any help from others
How to Pour a Concrete Slab
If you’re building a small patio, a concrete slab is the easiest way to create a flat, level surface. The most important step in preparing for your concrete slab is making sure that the ground underneath it is level and compact. If the ground isn’t level or compacted enough, your new patio will have cracks and other problems.
Once the site has been prepared, you’ll need to prepare the concrete mix according to manufacturer’s instructions. Most mixes consist of cement, sand and water, but some may also include gravel or other materials designed to make them stronger. You can purchase pre-mixed concrete in bags at most home improvement stores and supermarkets.
 To pour your concrete slab:
1) Make sure that all materials are clean before mixing them together. Use water from a hose if necessary.
2) Mix all ingredients together well so that there are no lumps left in the bucket when you’re finished adding water. Continue to stir until everything is completely mixed together into one homogenous mixture; this shouldn’t take more than 10 minutes of stirring with a shovel handle or similar tool (or by hand).
3) Pour your concrete
A concrete slab is a floor or platform made of concrete. It’s often used to support buildings, but it can also be used in other situations. For example, you might use a concrete slab to build a patio or put in an outdoor kitchen.
When you’re ready to pour your own concrete slab, there are some things you need to know. This article will show you how much cement and water you’ll need and give tips on how to prepare the site for pouring.
How Much Cement and Water Do You Need?
The amount of cement and water needed for a slab depends on several factors including size, thickness and type of cement. The following table shows the average amounts of cement and water required for different slabs:
Slab Density (lbs./ft3) Required Cement (lbs.) Required Water (gal.) 1/4″ 3.2 27 5/8″ 4 30 3/4″ 5 35 7/8″ 6 40 1″ 7 45 1-1/2″ 9 55 2″ 10 65 2-1/2″ 12 75 3″ 15 85 4″ 20 100 5″ 25 125
Building a concrete patio slab is a relatively easy project that can be done using basic tools. Here are the steps:
1. Prepare the surface by removing any sod or grass, and leveling it out. A string line can be used as a guide for this step.
2. Put down a layer of sand 3/8 inch thick if you have time, or just move on to step 3 if you do not have time for this step.
3. Use a shovel to spread out the mortar over the entire surface of the area where the concrete will be poured. The mortar should be about 1/4 inch thick with no gaps between it and the sand below it (about 3/8 inch). Make sure there are no big lumps or holes in your surface before moving on to step 4!
4. Use wooden forms (like 2x4s) to create lines on top of your sand/mortar layer, creating spaces for your eventual concrete slabs to fit into later on in the project – these forms should line up with where you want your future slabs to end up being placed when they are poured later on in this project! You can get creative here and make patterns with these forms if you wish as well!
Concrete slabs are the most popular way to build a patio. They are relatively inexpensive and easy to install. You can also build a slab on a deck or create a patio in your yard.
Step 1: Prepare the Surface
You will need to prepare the surface of your concrete slab before you pour it. If the area is grassy, remove the grass in strips and dig out any weeds or roots that may be present. Then sweep off any dirt and debris from the area before pouring the slab.
Step 2: Add Reinforcement
You will need to add reinforcement if you’re pouring concrete over an existing surface such as dirt or grass. This will help prevent cracks from forming once your slab has settled into place. To do this, use rebar stakes on either side of where you want your patio to be located and run them through holes drilled into each corner of your planned patio area. These stakes should be placed every 4 feet around your entire perimeter so that they form a square shape around your planned patio area with rebar running through each corner of this square shape. Do not forget to leave room for doors and windows when planning out where these stakes should go!