Ultimately you’ll find a shed plans. There are a lot of homebuilding articles on the internet, but almost all of them cover the basics. This is because they’re targeted at beginners. So if you’ve built or repaired houses and sheds before, you’re liable to be bored with all of them. However, we possess also gathered 10 mega-guides containing every imaginable subject regarding carpentry, house building and even woodworking, with tons of useful (and not so well-known) tips and suggestions originally written by genuine professionals in their field.
In our recent article about how long does it take to build a shed, we explored the process of working with contractors and building your own shed. If you decide to go at it yourself after reading that post, it’s important to realize that you’re going to need to learn how to build a shed properly.
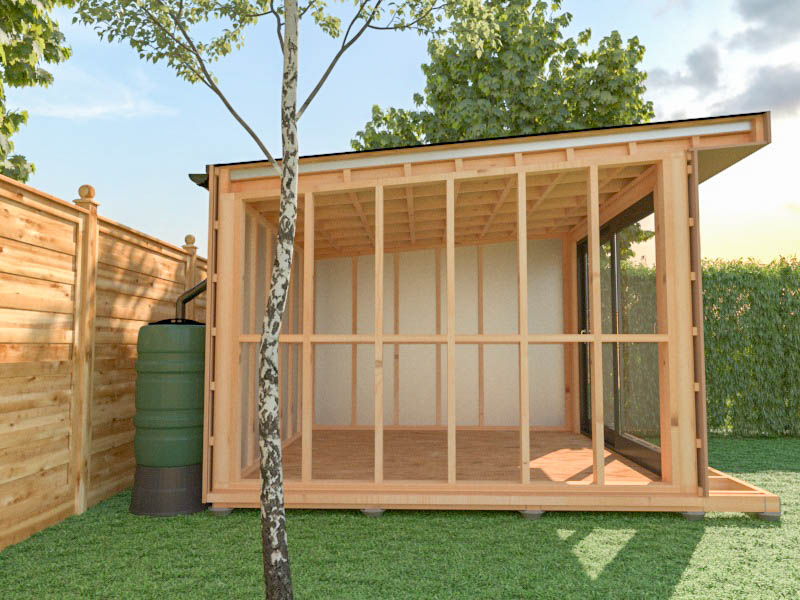
How to build a insulated shed
In this article we will explain how to build a shed and answer the question “How much does it cost to build a shed?” It is very important that you know the average cost of building a shed before you start planning your project. Also, don’t forget to check out our How to Build A Shed Guide for more information.
Craftsman-style sheds are typically built with 2×4 walls and a plywood roof decking. The structure is then sheathed with wood siding or other materials for aesthetic appeal. If you want to save money, you could use treated lumber for the framing instead of cedar or pine.
The following are some tips on how to build an insulated shed:
Use pressure-treated plywood for sheathing because it will last longer than regular plywood and resist rot better than OSB boards;
Install rafters at 16 inches on center (OC);
Use gable end vents as needed;
Install attic ventilation fans in the peak of your roof;
Step 1: Find out the size of the shed you want to build. The size of the shed is usually dependent on how much space you have available to build it. The size of the building will also determine how much material and labor will be needed. For example, if you have a large area to work with, you might consider making the shed larger.
Step 2: Check if there are any local zoning laws or building codes that affect the construction process. Some areas require permits for certain types of construction while others don’t allow certain materials to be used in your shed. If you’re unsure about these requirements, contact your city council or county government office before starting construction on your new shed.
Step 3: Determine how much insulation is needed for your new insulated shed. This will depend on what type of insulation material you decide on using for your project as well as other factors like climate conditions where you live and whether or not there will be adequate ventilation inside the structure once it’s finished being built.
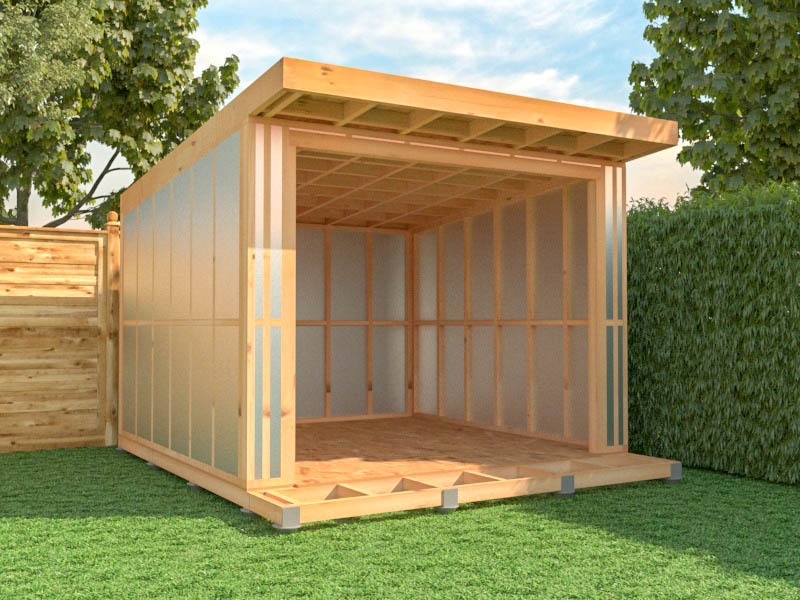
The first step in building your own shed is to decide what you want it to look like. You can build a standard style wooden shed or opt for something a bit more unique. Your choice of color and the type of wood used will make a big difference in the way it looks. The most popular shed styles are gambrel, gable, A-frame and barn style sheds, but you can also create a unique design that suits your tastes.
Step 2 – Prepare the Site
Before you begin building your insulated shed, make sure that you have prepared the site properly. This means removing any existing vegetation from the area where the shed will be built, as well as leveling out any bumps or dips in the ground so that the base of your new structure sits evenly on top of them. If necessary, use a shovel to move soil, rocks or other debris out of place so that they do not impede construction later on down the line.
Step 3 – Build Your Foundation
The foundation is an important part of any shed because it provides support for all other elements within the structure itself, including walls and roofing materials alike.
To build this component yourself, follow these steps:
If you are in need of a shed for your home or business, it is important to consider the best options for both size and insulation. The size of your shed will vary depending on the type of project that you are working on. If you have a large project in mind, then you will need a large shed that can accommodate all of your tools and equipment.
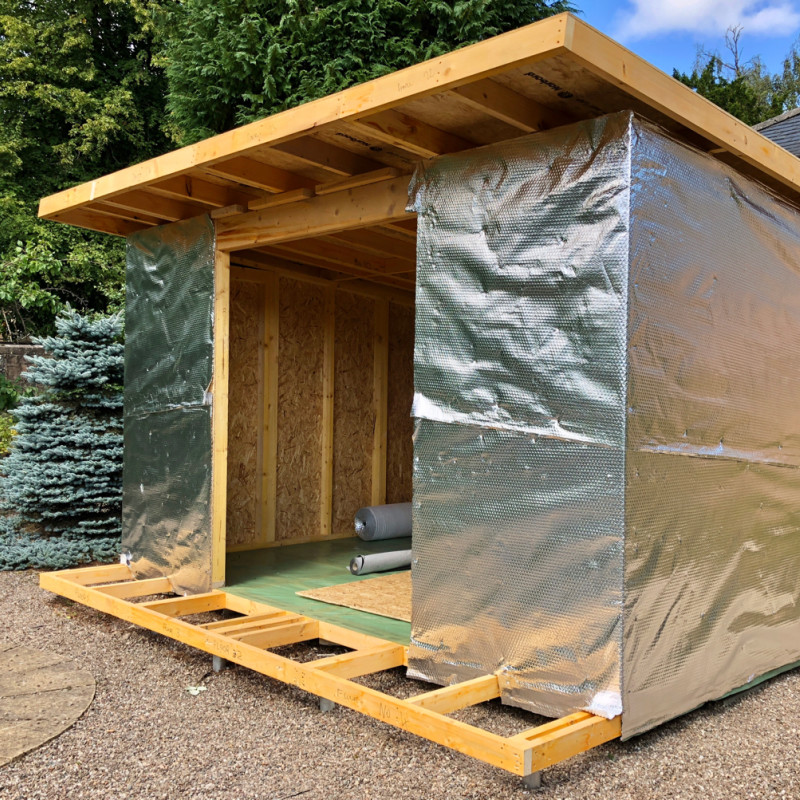
Sheds can be made out of many different types of materials including wood, metal, plastic and other composites. In this article we will focus on how to build an insulated wooden shed.
Building an insulated wooden shed is not as difficult as it may seem at first glance. With the right tools and materials, building a shed can be easy and enjoyable project that anyone can do themselves within a few days time with minimal effort required from their part.
There are many different types of insulation that can be used in order to make sure that your new wooden shed is well protected from the elements such as rain, snow and wind so that it remains intact for many years to come without having any problems whatsoever. Here are some tips on how to build an insulated wooden shed:
Decide on the size and shape of your new wooden shed before purchasing any materials or tools. You will want to make sure that
If you’re building a shed and you want it to be energy-efficient, here are some tips to keep your structure running smoothly.
1. Insulate the walls, floor and ceiling
The easiest way to make your shed more energy-efficient is to start with good insulation in the walls, ceiling and floor. You can use rigid foam board, which is easy and cheap to install, or closed-cell spray foam insulation for better results.
2. Install an exhaust fan
You’ll also need an exhaust fan in your shed if you’re using propane heaters or other types of heating devices. This will help keep the air circulating so that it doesn’t get too stuffy inside the shed.
3. Seal gaps around windows and doors
Gaps around windows and doors can let in a lot of cold air during winter months — even if you have a tight-fitting door with good weather stripping on it! Seal these gaps with caulk or foam weather stripping so that they don’t cause drafts throughout your structure
We use cookies on our website to give you the most relevant experience by remembering your preferences and repeat visits. By clicking “Accept All”, you consent to the use of ALL the cookies. However, you may visit "Cookie Settings" to provide a controlled consent.
This website uses cookies to improve your experience while you navigate through the website. Out of these, the cookies that are categorized as necessary are stored on your browser as they are essential for the working of basic functionalities of the website. We also use third-party cookies that help us analyze and understand how you use this website. These cookies will be stored in your browser only with your consent. You also have the option to opt-out of these cookies. But opting out of some of these cookies may affect your browsing experience.
Necessary cookies are absolutely essential for the website to function properly. These cookies ensure basic functionalities and security features of the website, anonymously.
Cookie
Duration
Description
cookielawinfo-checkbox-analytics
11 months
This cookie is set by GDPR Cookie Consent plugin. The cookie is used to store the user consent for the cookies in the category "Analytics".
cookielawinfo-checkbox-functional
11 months
The cookie is set by GDPR cookie consent to record the user consent for the cookies in the category "Functional".
cookielawinfo-checkbox-necessary
11 months
This cookie is set by GDPR Cookie Consent plugin. The cookies is used to store the user consent for the cookies in the category "Necessary".
cookielawinfo-checkbox-others
11 months
This cookie is set by GDPR Cookie Consent plugin. The cookie is used to store the user consent for the cookies in the category "Other.
cookielawinfo-checkbox-performance
11 months
This cookie is set by GDPR Cookie Consent plugin. The cookie is used to store the user consent for the cookies in the category "Performance".
viewed_cookie_policy
11 months
The cookie is set by the GDPR Cookie Consent plugin and is used to store whether or not user has consented to the use of cookies. It does not store any personal data.
Functional cookies help to perform certain functionalities like sharing the content of the website on social media platforms, collect feedbacks, and other third-party features.
Performance cookies are used to understand and analyze the key performance indexes of the website which helps in delivering a better user experience for the visitors.
Analytical cookies are used to understand how visitors interact with the website. These cookies help provide information on metrics the number of visitors, bounce rate, traffic source, etc.
Advertisement cookies are used to provide visitors with relevant ads and marketing campaigns. These cookies track visitors across websites and collect information to provide customized ads.