
Gardens are great, but there is one thing that can make them even better. An arch in a garden is like a cherry on top of a cake! It adds style and elegance to any ordinary garden.If you have a nice garden, why not add such a beautiful addition? In this article I am going to explain how you can build an arch for less than 50 dollars!
Building a garden arch is a fairly simple task that anyone can do if they have the right instructions.how to make a wooden arch garden arch kit I’m going to be guiding you through the whole process: not just writing about it and hoping you figure it out. I’ll tell you how to do everything from step one to finishing touches.
How to build a garden arch
A garden arch is a great way to create an entrance or a focal point in your garden. You can use an arch to frame a view or to create a passage through your garden.
If you’re planning on building a wooden garden arch, the first thing you need to decide is what type of wood you want to use. There are many different kinds of wood that can be used for arches, and each type has its own characteristics which will affect how easy or difficult it is to work with.
 Wooden Arch Kits
If you don’t have any experience building with wood, or if you just want something simple and quick, then there are plenty of kits available that contain all the materials you need to build an arch. These kits usually include everything from the timber posts and beams, to the nails and screws needed to assemble them together. If you are going to buy one of these kits, then make sure that all the pieces measure exactly as they should do – otherwise your arch won’t look right!
Building Your Own Wooden Arch
Building your own wooden arch can be a lot more rewarding than buying one because it allows you to create something unique that reflects your personality and style perfectly!
How to build a garden arch
It’s easy to make an arch for your garden. All you need is some wood and some nails (or screws) and you can create your own unique archway. Here’s what you need to know…
Step 1: Make a frame. You can use any type of wood as long as it’s not too heavy or expensive. You can also use pieces of old furniture or even recycled pallets if you like the look. Just make sure that all your pieces are joined together securely with nails or screws so that they won’t fall apart when you hang the fabric later on.
Use 2×4 lumber for extra strength if needed but remember that 2×4 wood is very heavy so be careful not to overdo it! You don’t want your arch collapsing under its own weight before you even hang anything on it!
Step 2: Attach one end piece to the other end piece with another nail or screw at each end point where they will meet up when assembled correctly (use more than one at each joint if necessary), then repeat for the 3rd piece going from one side to another (so now you have two separate sides).
A garden arch is a lovely accent to any yard or garden. Whether you’re looking to add privacy, or simply want to add some character to your landscape, an arch is the perfect way to do it. You can buy pre-made garden arches, but they’re often expensive and not very customizable. Building your own arch from scratch gives you the freedom to do whatever you want with it.
There are many different ways to build an arch out of wood, depending on the material you want it made from and how much money you want to spend. The easiest way is with cedar fence pickets available at most home improvement stores. These come in several different lengths and widths, allowing for customization of any size archway. One thing that’s nice about using this method is that you can paint or stain them however you like without worrying about ruining them with moisture damage like you would if they were pressure treated wood.
The most basic way would be to build a simple post-and-beam structure that arches over your driveway or walkway with 2x4s attached together by lag bolts or carriage bolts (depending on how large your structure is). You could also use 4×4 posts and 2×6 boards instead of 2x4s if you have
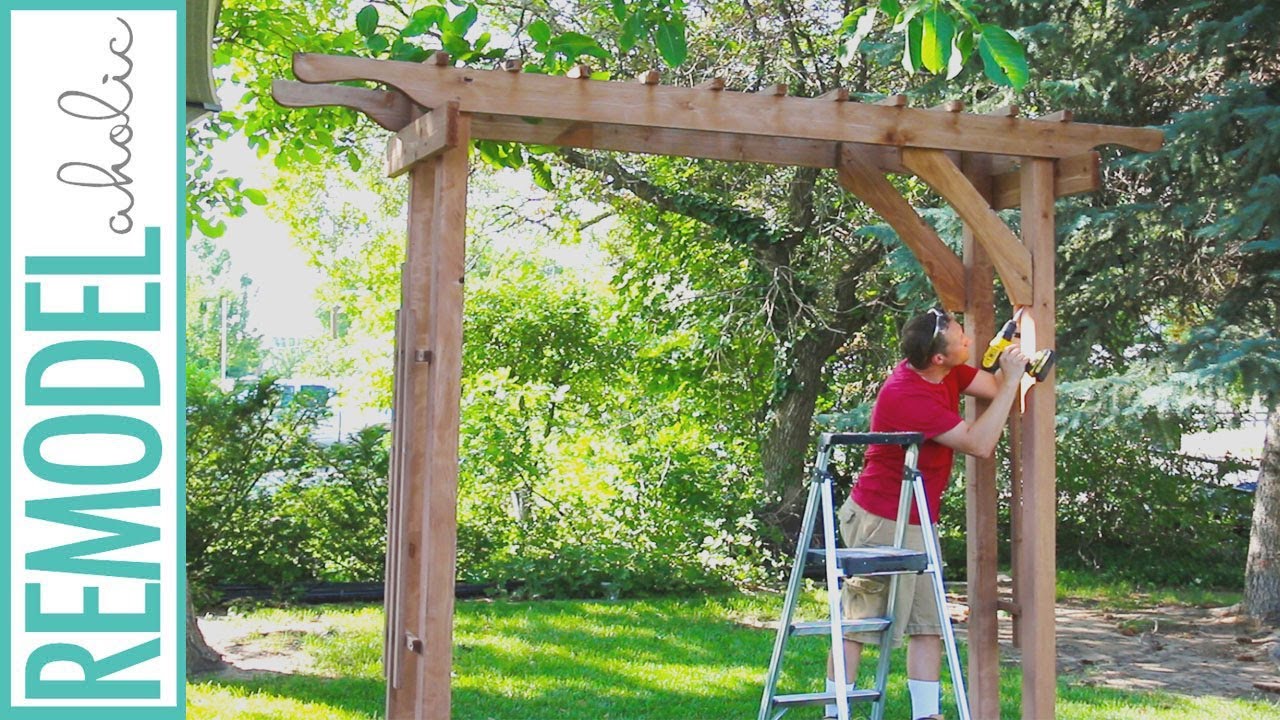
Garden arches are a perfect way to add style and interest to your garden. They can be used as a focal point in your garden or as a way to divide areas. They are easy to make, but the trick is getting the right materials. Here we will show you how to build a garden arch using wooden posts and T-shaped legs.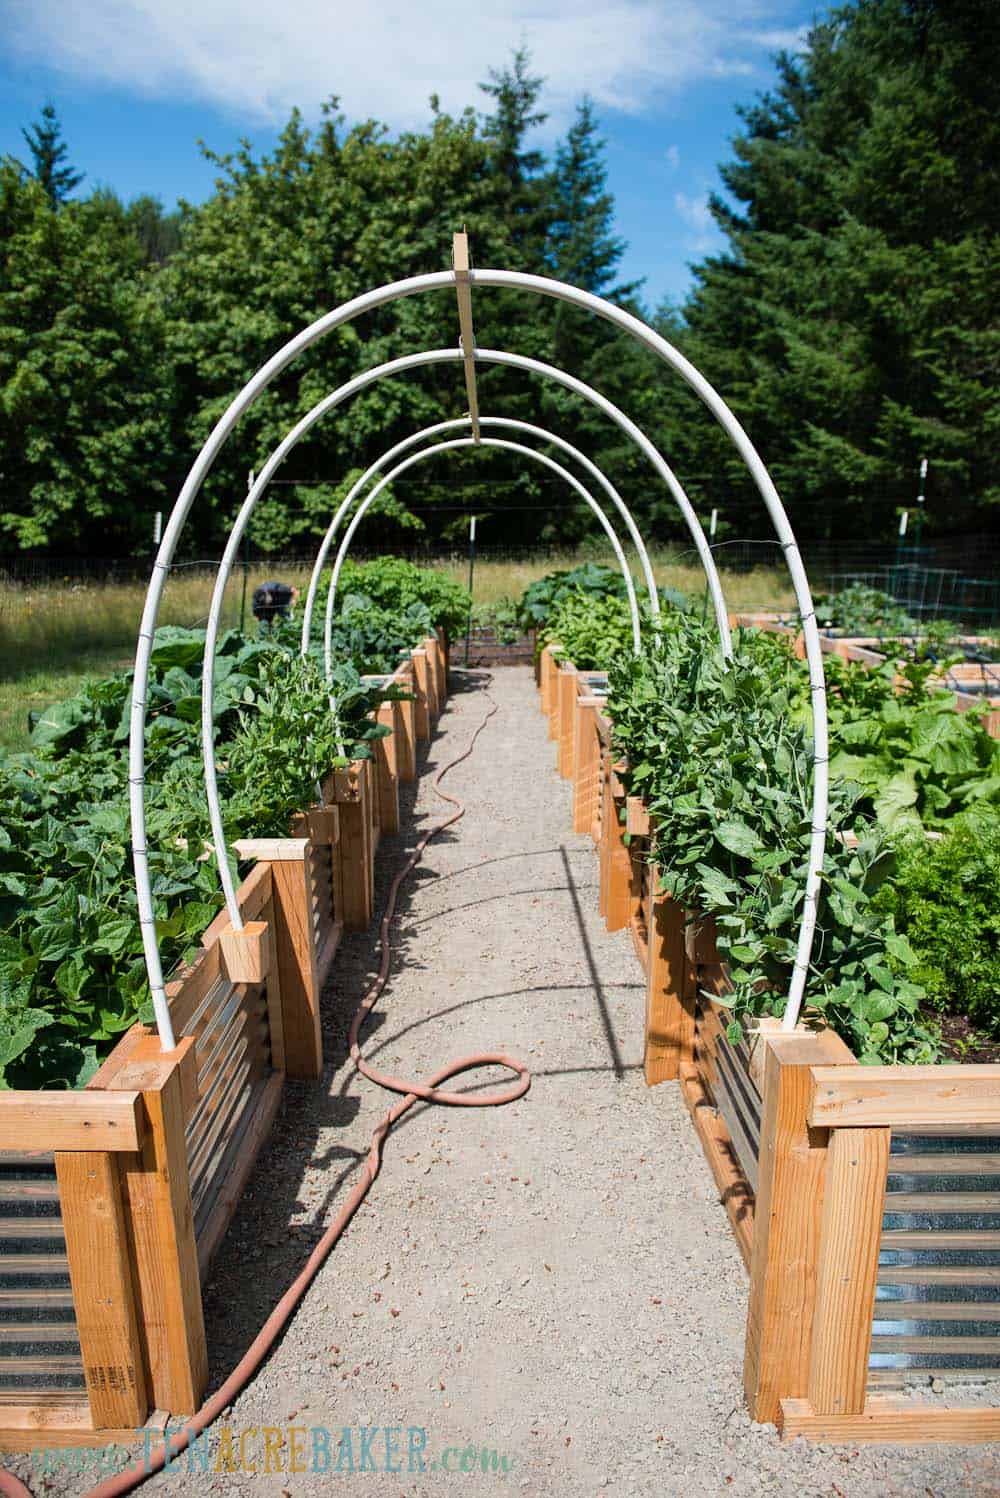
Step 1: Measure and cut the wooden posts
The first thing you need to do is measure the distance between your two posts. This will determine how long your wooden posts need to be. Cut them with a chainsaw or handsaw. Make sure they are straight and square with each other.
Step 2: Attach the T-shaped legs
Use some nails or screws to attach each leg onto each post at the same height as the top of each post (so that they meet in the middle). Make sure they are level with one another so that they sit on top of one another flush when you have finished building it all up!
The last step is optional, but it does make for a nicer finish if you spray paint your new arch white before assembling it!
A garden arch is a great addition to any garden, whether it’s a small patio or large garden. It adds a focal point and can be used as an entrance to your home or as part of a border.
If you’re inspired by the idea of building your own garden arch, here are some tips on how to make one:
Choose your materials
The first step is choosing what kind of material you want to use for your arch. You can easily buy premade arches, but they’re often expensive and may not be suitable for what you want. If you want something more bespoke, then look at local companies that offer custom-made arches. You can also use different types of wood for different parts of the arch — this gives it more character and will make it easier for people to identify which part goes where when they come over to visit your garden.
Draw up plans
Once you’ve chosen your materials and decided how high and wide you want your arch to be (and whether or not you want it to have windows), draw up plans for the entire thing on graph paper or in CAD software like SketchUp (which has free basic versions). This will help with working out where everything needs
 Garden Arch Kit, 7-Feet
This garden arch kit will give you the perfect focal point for your yard or garden. The solid wood construction makes it sturdy enough to withstand the elements. You can rest assured that this arch will last a lifetime. The wood is pressure treated, so it won’t rot or warp. It’s also primed and ready to paint or stain, so you can customize the color to match your outdoor décor.
The kit includes everything you need to build this arch: pre-cut pieces of lumber, nails and screws, and instructions on how to assemble the entire structure. It’s a great way for DIYers to learn about carpentry without having to buy expensive tools or spend lots of money on materials. This kit also works well for professionals who want an inexpensive option for adding interest and style without breaking the bank.
This garden arch kit is easy enough for beginners, but strong enough for experienced carpenters as well. Whether you’re looking for a project that will keep kids busy during summer vacation or something fun to do with your significant other while sipping wine under the stars at night, this garden arch kit is sure to please!
A garden arch is a great way to add a little something extra to your garden. There are many different types of arches that you can build, from simple wooden arches to ornate brick ones. The type of arch that you choose depends on the design you want, as well as the materials available to you.
An arched gate can be built with almost any material, although some are better than others. A wooden arch is strong and lasts for years, but it does require maintenance and repainting every few years. Brick is another popular choice because it lasts for decades without needing maintenance or repainting, but it can be expensive to buy new bricks every time they start looking worn out.
A wooden arch is one of the easiest types of arches to build yourself. All you need are some tools and some wood planks; there’s no need for any special tools or skills here! Follow these steps:
1) Cut three wooden planks into lengths equal to the distance between two posts at either end of your gate – this will form two sides of your arch (the third plank will be used later). If your posts are large enough then you may only need one plank per side; otherwise you may need
Wooden garden arches are a great way to add a touch of elegance and romance to your outdoor space. They are easy to build and can be used in many different ways and places. You can make an arch out of wood with some basic carpentry skills, but it will be much easier if you have some help from friends or family members.
The first step is to choose the location where you want to put your arch. Make sure that this place has enough room for the arch and that it’s not too close to any trees or plants so that you don’t damage them while building your arch.
You will also need to decide on the size of your arch. You can make it wide enough so that people can walk through it or narrow enough so that they have to squeeze through. You can also make it long enough so that people can sit on it while having their lunch outside or short enough so that they have to bend down when going under it.
The next step involves cutting all of the pieces needed for your wooden garden arch kit using power tools such as a circular saw or table saw. Once these pieces have been cut, lay them flat on top of each other and use nails or screws to hold them together tightly so that they don’t move around during construction
This is the easiest garden arch to make. All you need is a piece of wood and some nails.
This arch is made from two pieces of wood and it’s very easy to make. You can choose any size and color for your project. It’s important to use pressure-treated or rot-resistant wood if you’re going to be putting this in the ground outdoors, but you can use regular wood if you’re just putting it on your patio or deck.
To start, simply place the two pieces of wood together so they form an “L”. Nail them together with three nails on each side. Leave some room between the boards so that there’s enough space for your plants to grow through without getting stuck between them.
Now comes the fun part! You can decorate this arbor however you want with paint, stain or even mosaic tiles! Just be sure to allow your paint or stain time to cure before using it as a support for plants or vines.
Step 1: Cut the wood
Step 2: Assemble the arch
Step 3: Paint and seal
Step 4: Install in your garden