
Below are some screens shots of the finished garden, all the way up to staging it for the family Christmas party. To read the full guide and get instructions on adding your own garden, please click here .
Around the summer of 2008, I decided I wanted to have a small garden in my backyard. Everybody knows that it’s not easy to grow plants above ground, how to build a raised vegetable garden waist high raised garden bed plans even though it looks easier than having a garden under the soil.
How to build a garden above ground
How to build a raised vegetable garden with out concrete.
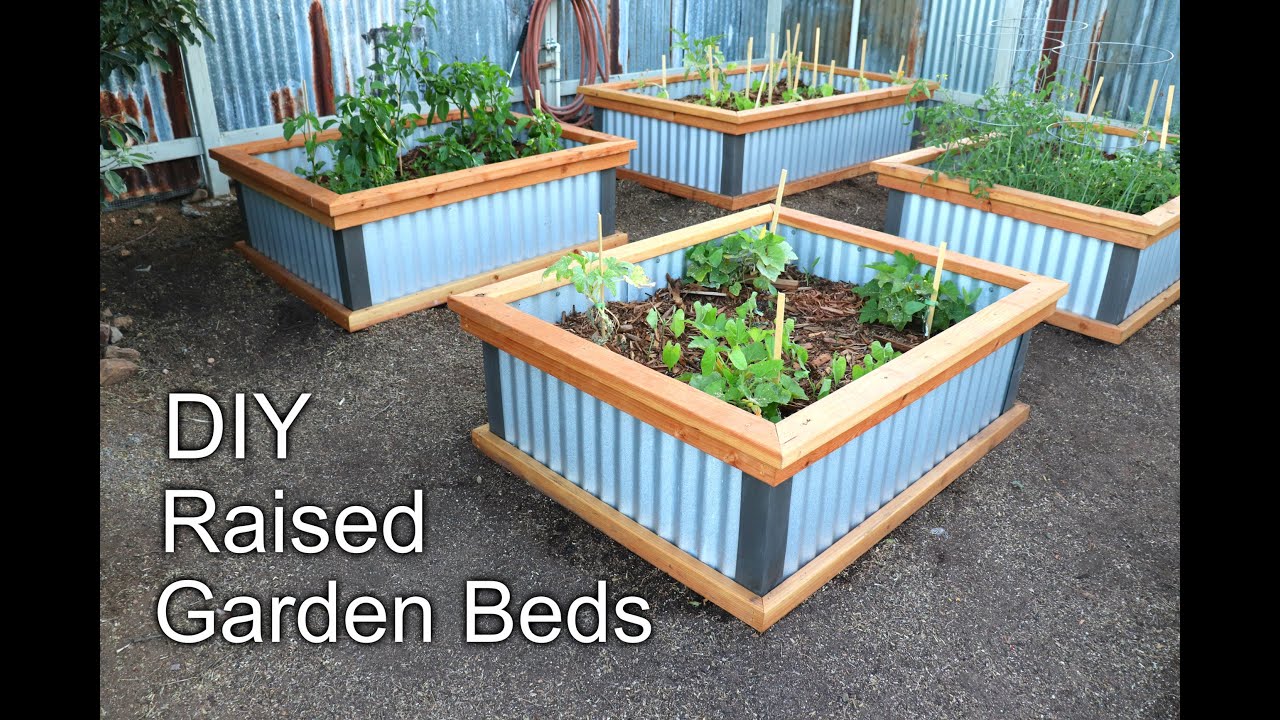
This DIY garden bed will show you how to make waist high raised beds for your vegetable garden.
You can use the same plans to make any size raised bed that you like. These plans show you how to make them waist high, but you can make them any height that fits your needs.
The materials for this raised garden are not expensive and it will only take you about an hour or two to build one of these garden beds. This is a great way to get started in gardening without spending a lot of money on materials or equipment!
Raised garden beds are an excellent way to grow a vegetable garden. They are easy to build, and you don’t need a green thumb to be successful. The hardest part is waiting for them to fill up with soil and plants!
The raised bed provides a nice, flat surface for your plants to grow in and adds some height so that your plants don’t get overcrowded. You can even throw down some mulch or straw around the base of the bed to keep weeds from growing up through it.
I’ve built two raised beds — one is made from cedar fence slats, which I stained with deck stain for extra protection against weather damage, and another is made from pressure-treated lumber (2x4s). Both work well, but there are a few things you should consider before building your own:
These raised garden beds are waist-high, so you can sit on them to work in the garden. They’re built with pressure-treated wood, so they’ll last for many years.
The lumber is available at most home centers and lumberyards. You’ll need a circular saw and a power miter saw or a table saw to cut the boards to length. A jigsaw will be handy for cutting curves and an electric drill/driver will make attaching the boards easier. If you don’t have an electric screwdriver, use an impact driver for driving long deck screws into hardwood decking boards.
Materials List:
4 pressure-treated 2 x 6 x 8′ boards (for the side frames)
8 pressure-treated 2 x 6 x 10′ boards (for the ends)
2 pressure-treated 1 x 4 x 8′ boards (for the shelves)
This is a simple, low-cost way to build raised garden beds. It’s also easy to adjust the size and shape of the bed to suit your needs.
1. Cut the lumber into two pieces that are as wide as you want your garden bed to be and twice as long as you want it to be. In other words, if you want a 10 foot long bed, cut the lumber into 20 foot long pieces.
2. Attach one piece of lumber to another with 2-inch galvanized deck screws (or 3-inch screws for deeper beds). Use at least four screws per joint for strength and stability.
3. Continue attaching boards until all joints are attached, creating one large box with an open bottom and all sides attached together at 90 degree angles (or close enough).
Raised Bed Garden Plans
Garden plan for raised beds is a guide for the layout of your vegetable garden. The most important aspect of any garden design is to make sure that you have enough space. If you are just starting out, then these plans are perfect for you.
The first thing that you will need to do is to determine how many beds you want to build. You should also decide on the size of each bed and whether or not they will be arranged in rows or staggered like a checkerboard pattern.
Once this has been decided, it will be much easier to start planning the actual layout of your garden. If you already have a plan in mind, then all that needs to be done is to adjust it so that it fits into whatever space you have available.
Raised garden beds are a great way to grow vegetables, herbs and flowers. They are easy to build and can be constructed with a variety of materials. If you want to get started on your own raised-bed project, here’s how to do it.
Raised Garden Bed Plans
The first step in building a raised garden bed is choosing the right plan for your needs. You’ll find many different designs available online and in books. Some are simple rectangular boxes, while others are shaped like hexagons or pentagons. You can also buy premade kits if you don’t want to spend time designing your own plan.
Once you’ve decided on a design, measure the area where you want to build your raised bed and make sure it will fit within the space available (as well as meet any local zoning laws). Next, measure the length and width of each piece of wood that will be used for construction (you should have at least four pieces of wood). Then measure the height of each side wall of your raised bed; this will determine how high off the ground your finished bed will sit.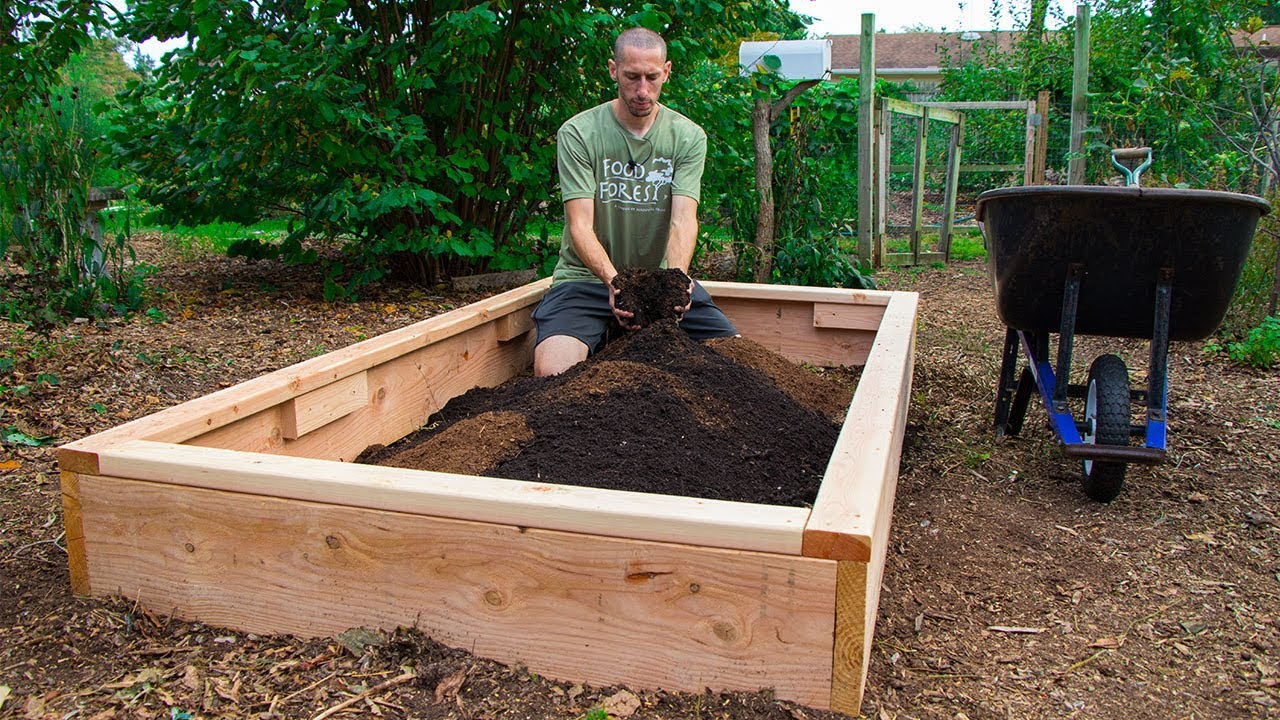
Once everything has been measured out, cut all the pieces of wood according to their measurements; then sand them smooth so they’re easier to work with later on. Next
Raised Garden Beds are easy to build and a great way to have fresh, nutritious vegetables all season long. By building your own raised garden beds, you can control the size, shape, and location of your garden. They can be built for any size yard or garden, but they’re especially helpful for those with less than ideal soil conditions or those who are unable to bend over easily.

Set up a sturdy frame using pressure-treated lumber or cedar wood. The frame should be made with 2x4s or larger wood planks because they do not rot as easily as smaller pieces of wood. Fill the frame with thick layers of quality topsoil mixed with compost and fertilizer. You can also use landscaping fabric to keep weeds from growing in between the slats of wood.
Plant your seeds or seedlings in small groups so that you don’t have too much space between plants. Space them according to the directions on the seed packet or plant tag. Keep your plants watered regularly until they start growing well on their own (approximately 2 weeks).
How to Build a Raised Garden Bed
Raised garden beds are becoming very popular in the home garden. Raised beds are a great way to keep your plants healthy and free from insect pests and diseases. They also make it easy to harvest your vegetables and flowers, because you can just reach over the edge of the bed with ease.
How to Build a Raised Garden Bed: Materials List
Here is what you will need for this project:
4-by-4 posts (16 feet long)
2-by-6 boards or 2-by-8 boards (16 feet long)
1/2″ screws (20 pounds)
Raised garden beds are an easy way to increase the yield and quality of your home garden. They’re also a great way to grow fresh, local produce in small spaces or hard-to-reach areas.
Here’s how to build a raised vegetable garden bed that will help you grow healthier plants and bigger harvests.
What you’ll need:
Materials:
2×4 lumber (8 feet long)
1×6 lumber (10 feet long)
1/2″ x 3″ galvanized steel L-shaped brackets (24)
3/4″ galvanized steel screws (100)
1.Decide on the size of your raised bed. You can make them any size you want, but they are typically 4 feet by 8 feet. If you have a small yard, you will probably want to go with a smaller size, like 3 feet by 5 feet or 3 feet by 4 feet.
2.Measure out where your frame will go. Use stakes and string to mark where you want the corners of the frame to be located (you will want 2 stakes on each end and one stake in the middle). Make sure that you leave enough room for pathways around your garden (which should be about 24″ wide for easy access).
3.Dig holes for your posts at each corner of your raised bed and fill them with concrete (this will allow them to hold up the weight of your raised bed). It’s helpful if someone else does this step so that you can continue building while they are waiting for their concrete to dry.
4.Put up 2x4s along the inside edges of your raised bed as supports for wire mesh fencing (which is what most people use). Make sure that they overlap slightly so that there aren’t any gaps between them when they are attached together with screws or nails (if using screws), or staples (if using staples