So, you’ve just started playing Minecraft, and you’ve tried building a house, but it looks more like a dog… If so, you’ve probably asked yourself: “How do I build a frog in minecraft?”
Can not imagine creating anything extraordinary in Minecraft without a list of the best Minecraft mods available. You can create almost anything you want in this game , and this is where our article comes into play, helping you choose certain mods that will help you build virtually anything, right at your fingertips. LEARN how to build a cute frog in minecraft how to draw a minecraft frog minecraft frog habitat.
How to build a frog in minecraft
Frogs are amphibians that are often found in water. They have long slender bodies, short legs and wide feet with webbed toes. Frogs can be found in most parts of the world, except for Antarctica and the Arctic Circle. There are more than 5,000 different species of frogs. Most of them are green or brown but some have other colors like blue or orange.
Frogs live on land or in water. They breathe through their skin and they eat small insects such as flies and mosquitoes. Some frogs also eat small fish and worms.
How to build a cute frog in minecraft
Minecraft is a sandbox game where you can build anything you want. The world is randomly generated and the game has no specific goal, but it offers a lot of freedom to the player.
There are many animals in Minecraft, but one of the most popular is the frog. Frogs are very easy to build and they can be used for many different purposes.
In this tutorial we will show you how to build a frog in Minecraft using step-by-step instructions and pictures.
How to Build a Frog in Minecraft
If you’re new to building things, the easiest way to start is with the three basic shapes: cube, sphere and cylinder.
Frog Habitat
Step 1: Find yourself some land to build on (or create your own). If you are creating your own, make sure that it has plenty of water and trees.
Step 2: Create a pool of water at least 3 blocks deep and as wide as you want it to be. It doesn’t have to be very big. If you want more than one frog, just make more pools! And if you want them near each other, make sure there’s enough space for both frogs! You can also add rocks or plants around the edges for decoration if you like!
Step 3: Create a block of dirt next to the pool of water so that it rises up above it by about two blocks high. This will become our tree stump!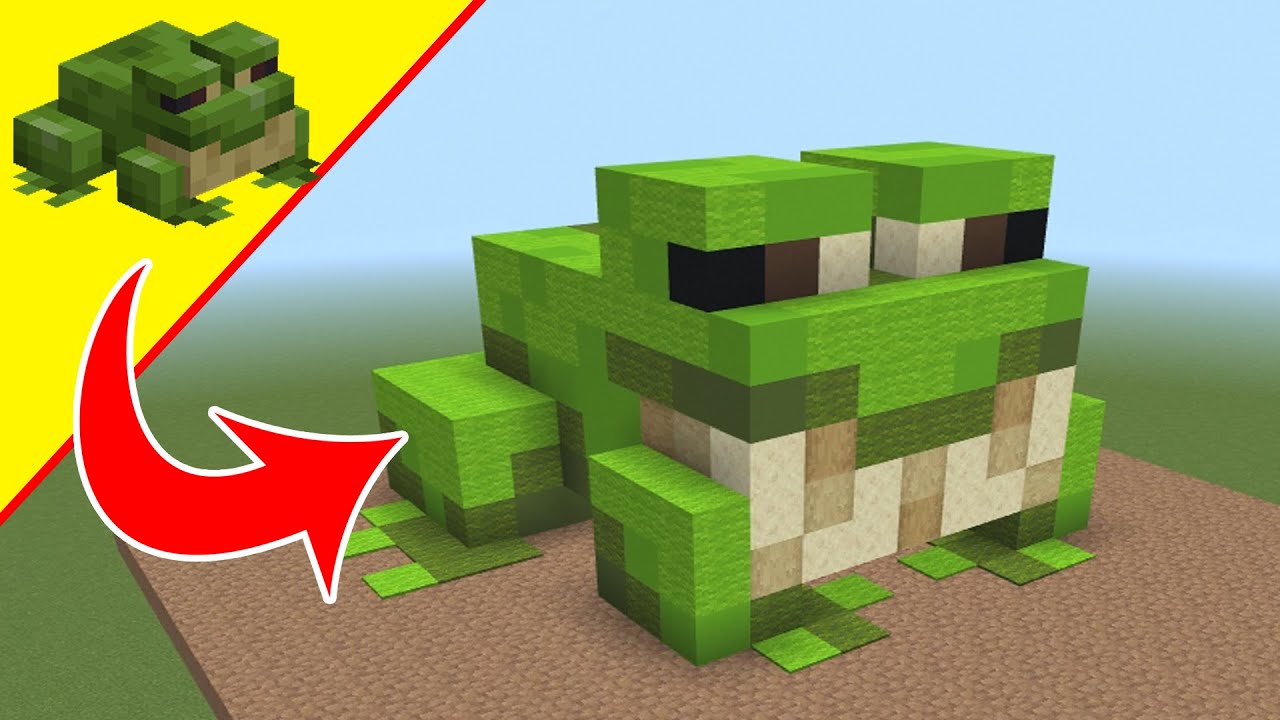
Step 4: Place two blocks of wood on top of each other in front of the tree stump so that when viewed from above they look like an upside down V shape (this is where we’ll hang our leaves).
This Minecraft tutorial explains how to craft a frog with screenshots and step-by-step instructions. In Minecraft, frogs can be tamed by feeding them raw fish.
Frogs are one of the many types of passive mobs that spawn in swamp biomes. They will attempt to flee when attacked, but they can also be picked up by right-clicking on them with an empty hand (or filled bucket).
To craft a frog in Minecraft, you need 2 string, 1 brown mushroom and 1 iron ingot. You should place the 2 strings on top of each other, then put the brown mushroom next to it. Place the iron ingot on top of those 3 items and you will get a frog!
Frogs are amphibians, and they are the most primitive group of amphibians. Their characteristics are based on the fact that they have a short life span, small size, and an aquatic life style. Frogs are cold-blooded and have a translucent skin that allows sunlight to reach their internal organs. Frogs can be found all over the world except for Antarctica, but they cannot survive in extreme temperatures or dry environments.
The most common type of frog is green with yellow stripes or spots. Most frogs have long hind legs for jumping and long arms for catching prey. They also have webbed feet for swimming. The best way to identify a frog is by looking at its mouth. A frog has a wide mouth with sticky saliva that can catch insects easily.
Frogs are nocturnal animals which means they sleep during the day and hunt at night when it is cooler outside but still warm enough for them to live in their natural habitat. Frogs usually lay eggs on land then carry them in their mouths back into water until they hatch, but some species can lay eggs directly into water without carrying them first!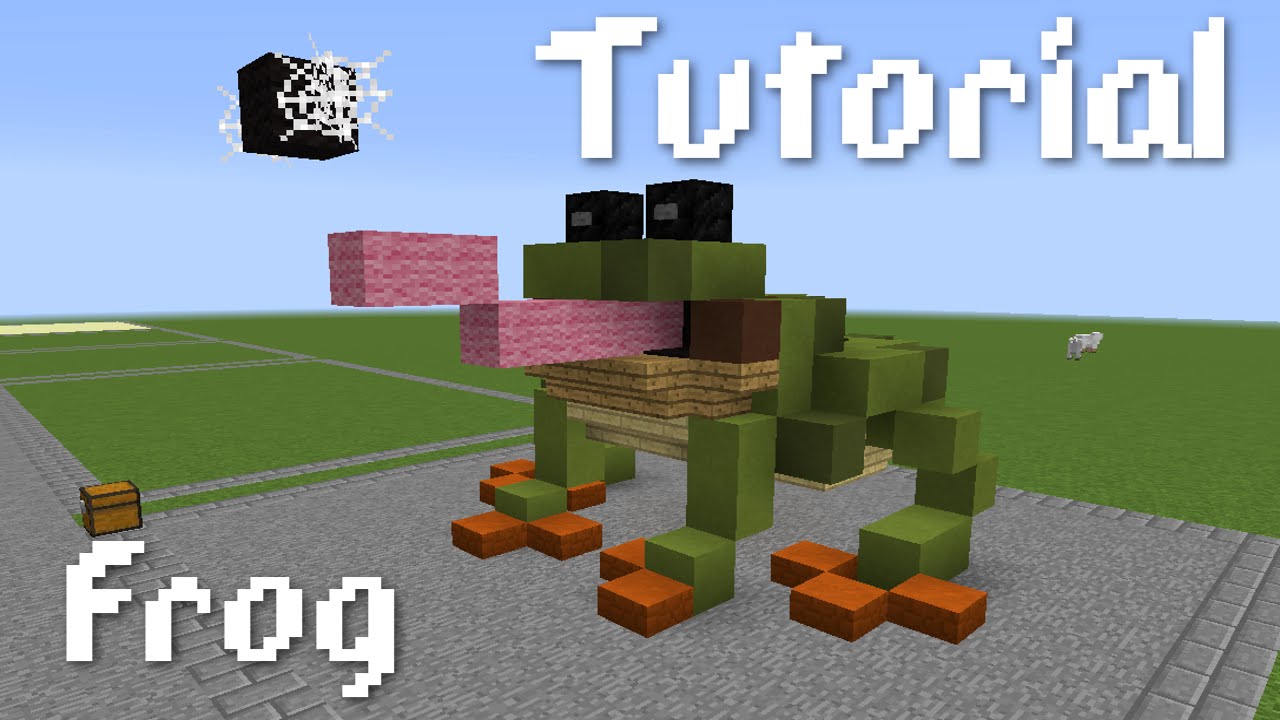
How To Draw A Minecraft Frog: Cute Little Frogs In Crashlanding
Minecraft is one of the most popular games that kids play. So, it is not surprising that kids want to draw their own Minecraft characters. Here is your chance to learn how to draw a Minecraft frog. This cute little creature will be great for your next drawing project.
Step 1: Start by drawing a rounded rectangle for the head and body of the frog. Then add some lines along the top of the shape for extra detail. Next, draw two small circles on either side of the head for eyes, then add another circle inside each eye for pupils (you can make these smaller). Finally, add two curved lines under each eye to create a mouth shape.
Step 2: For this step you will need a ruler and pencil or pen to draw straight lines on either side of the head and body shapes as shown below (these will help us position facial features later on). You can also use these lines as guides when adding facial features like nostrils and eyebrows later on too!
In this tutorial, we will teach you how to draw a minecraft frog. The frog is the most basic animal in Minecraft and the first one that you will encounter.
Before learning how to draw a minecraft frog, you will need to know how to use the art tools in Paint Tool SAI. The program has many settings that are used for drawing, but it is important to know how each of them works before starting your project.
When creating art in Paint Tool SAI, it is important to remember that the lines can be set using different settings. This means that you may want to make your lines thicker or thinner depending on their purpose. For example, if you are drawing a line that runs from left to right across your canvas, then it would make sense for this line to be thin because it needs only one side of each pixel on the screen. On the other hand, if you were making a circle with thick lines around it then it would be better if those lines were thicker so they could fill up more space on screen when drawn out.