Back in May 2012, I built a freestanding arbor in the backyard. It is composed of 6 x 6 cedar. I’ve found it to be a great addition to the yard and it has worked out quite well on a number of levels. It has been used for a table for our outdoor dinner and card playing, as well as places for me to sit when watering and weeding in the garden.
This post will show you how to build a freestanding arborwood arbor kits
how to build an arbour seat how to make a garden arch out of wood , using pressure treated wood and notched, pocket hole joinery.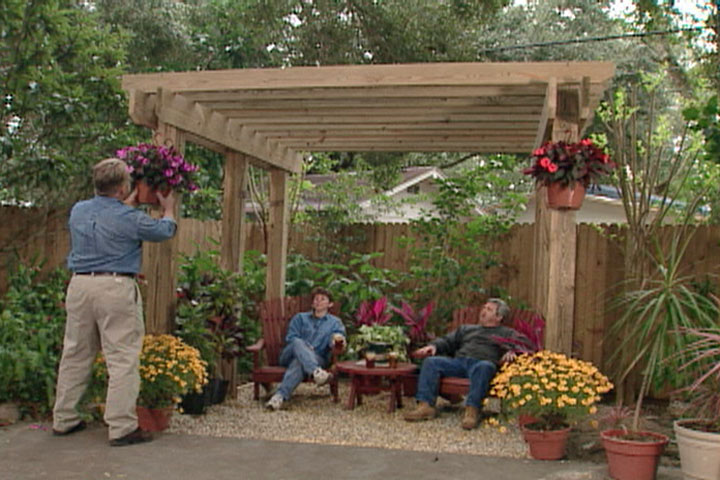
how to build a freestanding arbor
Arbors are a great way to add privacy and a decorative element to your yard. They can provide shade, support climbing plants or simply add architectural interest to your landscape design. Arbors can be made from materials such as wood or stone.
How to Build an Arbor Seat
The most common type of arbor is freestanding and made of wood. The simplest way to build one is with pressure-treated lumber and landscaping timbers. You can also use cedar or redwood if you want something more decorative. This tutorial shows how to build an arbor seat using pressure-treated lumber and landscaping timbers.
Materials Needed:
Pressure-treated lumber (2x4s for frames, 2x6s for slats)
Landscaping timbers (4x4s for frames, 6x6s for slats)
Cordless drill/driver and bits
Circular saw (optional)
Hammer
Building a freestanding arbor is a great way to add a focal point to your yard. Building an arbor from scratch can seem intimidating, but it’s not as difficult as you might think. The key is planning ahead and taking the time to make sure you have everything you need before you start cutting any wood.
Before you begin building your arbor, there are a few things you should consider:
What will the arbor be used for? – You may want to build an arbor that’s accessible from both sides, or one that’s only accessible from one side. If there are children in your family (or neighborhood), it’s best to build a gate so they can’t climb over the sides of the archway.
Where will it go? – In order to ensure your archway fits nicely into your yard, measure the dimensions of your intended location first. Then, take into account how much space you’ll need for attaching posts on either side of the archway — if you make them too short, you’ll have trouble fitting them together properly when everything comes together at the end!
What kind of materials do I need? – Arbor kits are available at most hardware stores and building supply stores these days — however, this option may
A freestanding arbor is a beautiful addition to any garden. They can be used as a focal point, or as a place to sit and relax. It’s also a good way of giving your garden some privacy.
Arbors are best made from wood, but they can be made from other materials such as metal or stone. They are usually built into the ground with posts that support the structure, but you can also build freestanding arbors that don’t require any digging.
The easiest way to build an arbor is with a kit that comes with pre-cut pieces of wood and instructions on how to assemble them together. You can even buy kits that include everything you need, including screws and nails if needed.
Building a freestanding arbor is a great way to add some privacy and shade to any yard. If you’re looking for a simple project that will add value to your home, this guide is for you.
If you’re looking for an attractive addition to your outdoor space, an arbor is an easy way to create a focal point in your garden. This guide will show you how to build a freestanding arbor out of wood with step-by-step instructions and photos.
You’ll need the following materials for this project:
Two 4x4s (10 feet long) – at least 3 inches thick
Two 2x6s (8 feet long) – at least 1 inch thick
One 4×4 (10 feet long) – at least 3 inches thick
1/2 inch plywood sheets – enough for the top and bottom of the arbor, plus enough scraps for bracing pieces
1/2 inch plywood sheet – enough for both sides of the arbor
One box of 4 inch screws
2 boxes of 3 inch screws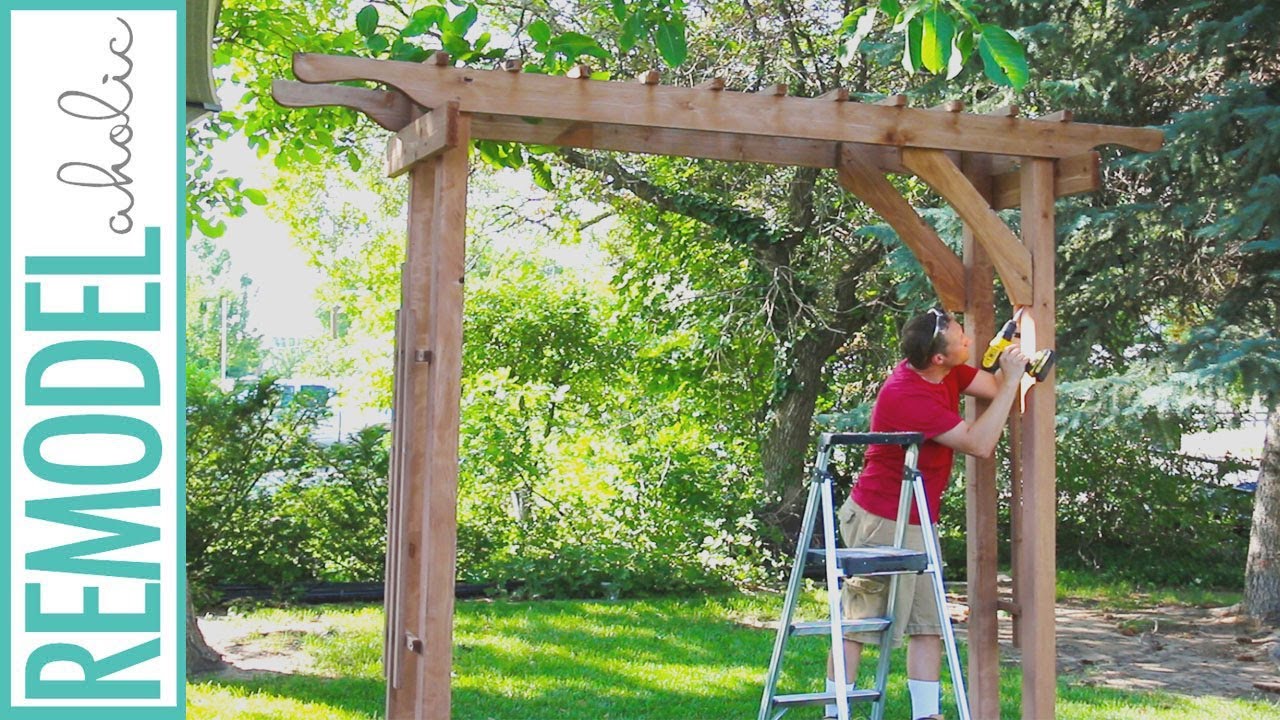
A freestanding arbor is a wonderful addition to any garden. The arbor can be used as a decorative feature, or as a place to perch and enjoy the view.
There are many different ways to build an arbor, depending on your budget and the materials you have available. Here are some instructions on how to build an arbor from scratch:
1) Arrange the posts in the desired position, keeping in mind that you will need space for the seat boards and space for the top railings. You may want to place a post at each end of the structure, so that you can use them as supports for climbing vines if necessary.
2) Place your first row of posts into position using wooden stakes and string lines (or pegs and string lines). Make sure that they are placed evenly around the area, with enough room between each post for your seat boards (or planks).
3) Cut holes in each post about 2 inches deep using an electric drill or handsaw (depending on what kind of material you’re working with). This should be done before attaching any posts together with your screws or nails so that they don’t split apart too easily during installation.
Wood arbor kits are a great way to add an attractive, functional feature to your garden. Wood arbor kits come in a variety of sizes and styles and can be installed by anyone with basic DIY skills. They can be used as a pergola or archway (as in the picture above), or as a seat.
You may want to use an arbor kit as an entrance way into your garden, or as a focal point. The wood used in these kits is pressure treated timber which means that it will last longer and resist rot. The materials used also mean that they will not warp over time like other types of wood, so you can be sure that your arbor will look good for years to come.
Arbor kits come with all the necessary components including posts and beams which are pre-cut and ready to install. They also include brackets which allow you to connect the beams together without using any nails or screws. These brackets make installation quicker and easier than if you were using traditional methods such as nailing or screwing everything together by hand.
You can build an arbour from scratch or buy a kit. If you decide to buy the kit, it will come with all of the pieces and parts. You might also want to add a roof over the arbour to keep out rain, snow and other elements.
If you want to build your own arbour, start by deciding where you want it to go and how large it needs to be. Then you can choose what kind of wood you want for the structure and where you will get it from.:max_bytes(150000):strip_icc()/ana-white-free-pergola-plans-583da8615f9b58d5b1020a0c.jpg)
Once you have all of your materials gathered together, begin building your arbor seat by laying out your framework on the ground first. Make sure that everything is level and square before proceeding with attaching any boards or beams together. Then stain them if desired or leave them unfinished if they are going to be left outside in the elements all year long.
Building an arbor is a great addition to your garden. Not only will it provide shade, but it can also be used as a space for relaxing or enjoying the view. It’s also a good place to grow climbing plants, such as wisteria.
There are many different types of arbors that you can build in your garden, depending on what materials you have available. Here we’ll look at some of the most popular options and how they can be put together.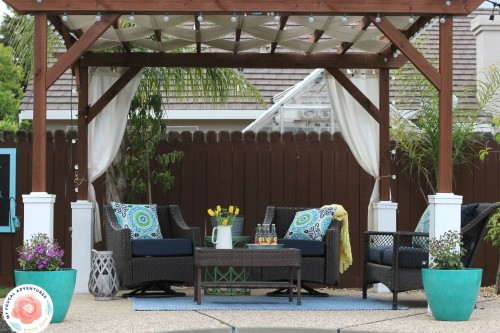
Wood Arbor Kits
If you want something simple and quick then a wood arbor kit may be ideal for you. These kits come with everything you need to build your own arbor – from the posts to the rails and posts, as well as any additional fixings required for attaching them together. You don’t even need any tools!
Arbors are a great way to add some interest and beauty to your garden. They can be used as a focal point, or as a way to divide your garden into different areas.
Arbors can be made from many different materials, including wood, brick and stone. They can be simple or very ornate depending on your taste and budget.
If you want to build an arbor yourself there are plenty of materials available that will help you do this. You can use wood or metal arbor kits which come ready made with all the parts needed for assembly. Alternatively, you could build your own wooden arbor by using wood framing and attaching it with bolts or nails.
If you want something that is more permanent then installing an arbor kit may be a better option than building one yourself from scratch.
How to Build an Arbor Seat
An arbor is a beautiful addition to your garden and can be used as a resting spot or as a way to connect two areas of your garden. You can make your own arbor using simple tools, or you can buy one that’s already made. The most common type of arbor is a freestanding wooden structure with lattice panels on the sides and an open front. If you want to build your own, here are some tips to help you get started!
What You’ll Need:
A saw: A handsaw will work well for this project, but if you have access to one, use a circular saw instead. It makes things much easier!
A drill with bits: You’ll need at least one bit (1/2″ works well), but two or three would be even better.
Wood glue: This is optional, but it will make your project stronger and last longer.
Sandpaper: Fine-grit sandpaper is good for smoothing down rough edges after you cut them so that they’re not sharp enough to hurt anyone.