You may have heard about farmhouse tables and the benefits of owning one. You are on this page for a reason, so you’ve likely thought about building your own farm table in the past. Maybe you already know how to build a simple farm table, but want to know how to build a farmhouse table.
If you love having family and friends over, then a farmhouse table should be on your next DIY to do list. But before you begin this project, there are some things to consider. The first thing is that it’s an ambitious method because of the number of people involved. However, if you have the right tools, a good deck plan, a sense of humor, and a little planning — you can pull it off
How to build a farm table
The first thing to do is to decide on the length of your table. If you want it to be a dining table, then you need to have at least eight feet of space between the table and where people will sit. This will allow for easy access for chairs to pull up and for people to get up from the table easily. If you are going to use the table as a work surface or kitchen island, then six feet should be enough room for most people.
If you are looking for inspiration on how to build a farmhouse style table, then consider using reclaimed wood instead of new wood. Reclaimed wood can be found at most lumber yards or home improvement stores and can give your project an antique look that will fit right in with the rest of your decor.
While it is possible to build a simple farmhouse style table without any tools at all, it is recommended that you use tools such as power drills and circular saws so that you can complete the project quickly and efficiently.
How to build a farmhouse table![19 Stunning DIY Farmhouse Table Plans [List] - MyMyDIY | Inspiring DIY Projects](https://i.imgur.com/wDha8jh.jpg)
If you’re ready to upgrade your kitchen, but don’t want to spend a fortune on a new table, this tutorial will show you how to build an affordable farmhouse table. Here are the materials and tools you’ll need:
Materials:
2x4s (for legs)
1x8s (for tabletop)
1x6s (for tabletop)
Plywood sheet or MDF board (for tabletop)
Two hinges with screws (for tabletop)
A farmhouse table is an essential piece of furniture for any home. This type of table is simple, yet elegant and can be used in many different ways. They are perfect for dining spaces, but they can also be used as desks or crafting tables.
Farmhouse tables have been around for a long time and they have many different variations. You can find them in all shapes and sizes, so it’s easy to find one that will fit into your space. They are usually made from wood or metal and they come in different colors and styles too.
These tables are very popular because they look great with almost any decor style, so you can use them anywhere in your home! They also make great gifts for anyone who has everything because everyone needs at least one farmhouse table in their life!
DIY Farmhouse Table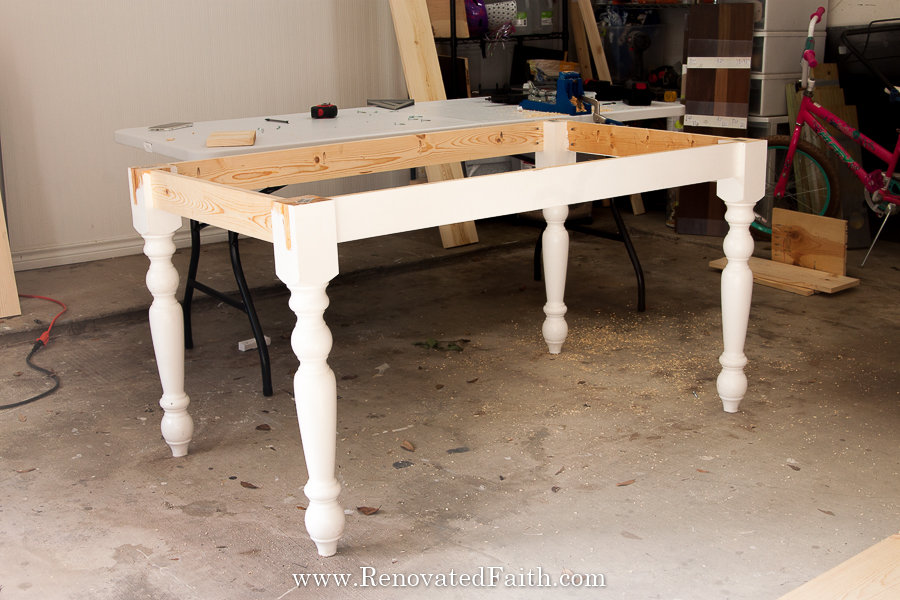
In this video we will show you how to build a farmhouse table. This table is made from 2 x 6 lumber and can be built by anyone with basic tools. The table is big enough to seat 8 people comfortably, but it can also be built in any size that you need it to be.
This is an easy project that anyone can do with minimal tools and skills. This particular table was built for my father-in-law so he could have a nice table for his new home. He wanted something that would last for years and would give him something cool to do on the weekends, so I volunteered my time and skills to make him this table!
I hope you enjoy this build and feel free to ask questions if you have them!
You can build a farmhouse table in your garage or backyard with just a few tools and a couple of weekends. This guide will walk you through the process, from planning to staining and finishing.
The plans are available for free on Ana’s website. She also has a YouTube channel where she shows how to build this table, along with other furniture projects.
What You’ll Need:
6 – 2x4s for the legs (2) and stretchers (4)
2 – 2x12s for the top, cut into two pieces using this simple miter saw jig!
1 – 1×8 for the breadboard ends
How to build a simple farm table
Farmhouse table plans can be used as a base for any size or shape table. It’s easy to customize the size, width and length of your farmhouse table. This post will show you how to build a simple farm table.
If you want to build a farmhouse table with just one leg, then this post will show you how to do that too.
Materials needed: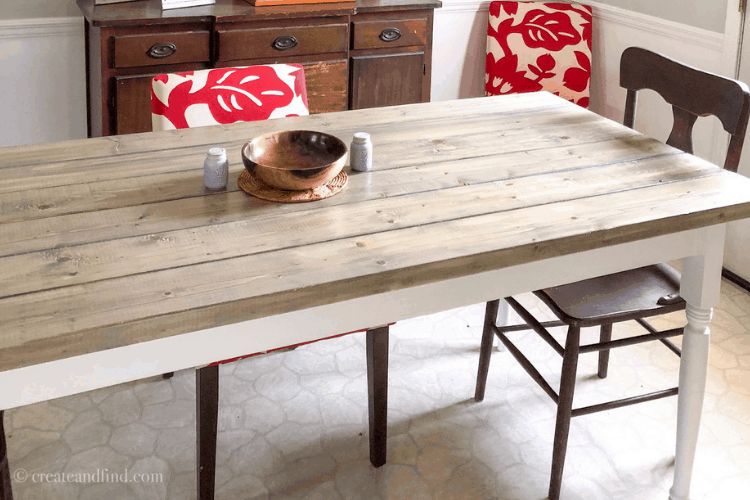
8 – 2×4’s (1 1/2 x 3 1/2) cut into 3’ lengths (#2 pine is best)
8 – 2×6’s (1 1/2 x 5 1/2) cut into 2′ lengths (#2 pine is best)
1 – 4×8 sheet of plywood (I used oak because it was what I had on hand but pine would probably have been fine too.)
Wood glue
1 1/4″ pocket hole screws (You could also use nails if you don’t have a pocket hole jig.)
Farmhouse tables are one of the easiest projects to build with wood. This tutorial will show you how to build a farmhouse table with legs that are mortised and tenoned together. The legs are made from 2×4 lumber, which means this table is a great option for anyone who wants to build furniture on a budget.
The legs are attached to the top with pocket screws, which are very strong and durable.
This table is 36 inches wide and 29 inches deep. It’s also 42 inches tall from the floor to the top of the tabletop; this height makes it ideal for eating at or using as an extra surface for crafts or hobbies.
I built mine out of cedar because it’s easy on my allergies and adds some warmth to our kitchen (which is painted white). But you can easily make this table out of pine or any other type of softwood lumber — just be sure that your lumber isn’t too hard or brittle, because it may crack during cutting or drilling operations (such as when making holes for screws).
A farmhouse table is a great addition to any dining room. It’s all about the style, and this simple build is very easy to do.
1. Start by cutting your boards. You’ll need two lengths of 1×6 for the top and the legs, one length of 1×8 for the skirt, and two lengths of 1×4 for the aprons. The 1x6s should be cut to 36″ long; the 1×8 should be cut to 14″ long; and the aprons should be cut to 16″ long (or however wide you want your table).
2. Lay out all your boards and mark where you will need to cut them down so they all fit together properly (see photo A). If you’re using dimensional lumber like I did, it helps to lay out a few extra pieces just in case one or two gets damaged during construction (see photo B).
3. Using a miter saw or handsaw, start cutting each board down until they fit together properly (see photo C). Leave about a 1/4″ gap between each piece so they don’t glue together too tightly when you apply glue later on.
4. Now that everything fits together properly dry fit all
This table was built using 2x4s, 2x6s and 2x10s. It is constructed with mortise and tenon joinery, dowels and screws. The table is finished with three coats of a clear satin polyurethane. The top is made of 3/4″ plywood which has been edge banded with 1/2″ oak.
The first step in building this project is to cut all the pieces to size. You can download the SketchUp diagram at the bottom of this page if you want to see how everything goes together. If you don’t have access to a table saw or router, you can use the following dimensions for each piece:
Table Top (3/4″ Plywood): 48″ x 64″
Table Top Support (1×6): 4 ft long x 2 1/2″ wide x 1 1/2″ thick**(3rd pic)
Table Base (2×6): 44 1/2″ long x 5 1/2″ wide x 3 5/8″ thick**(1st pic)
This week’s project is a table for our dining room. We had some leftover wood from another project, and it was too nice to throw away. I wanted a simple farmhouse table, so I created this one in just a few hours.
The table top is made of 2x4s (approx 3/4″ thick) and 1x8s (approx 1/2″ thick). The legs are made of 2x4s (approx 3/4″ thick) and 1x8s (approx 1/2″ thick).
I started by cutting all the pieces to length. Then I cut all the notches on the legs. This was done with a jigsaw and took approximately an hour.
Next I attached all the leg pieces together with pocket screws into a rectangle shape. This took another hour since there were many pockets to drill into each piece of wood. It was worth it though because it adds strength to the design.
Then I attached the top rails to the sides using pocket screws as well as attaching them to each other using dowel pins that run through all four pieces of wood at once (these pins will be removed later). This step took about 15 minutes per side because there