Build a Deck Bench with this easy to follow guide. This article will take you step by step through the process of building a deck bench. We recommend that before beginning your construction project that you review our list of safety tips and equipment needed before getting to work
A deck bench provides comfortable, convenient seating when you need it and covers that unsightly deck storage when you don’t. Building one is a simple, do-it-yourself project with basic tools. Follow these steps to build a wood deck bench for your home

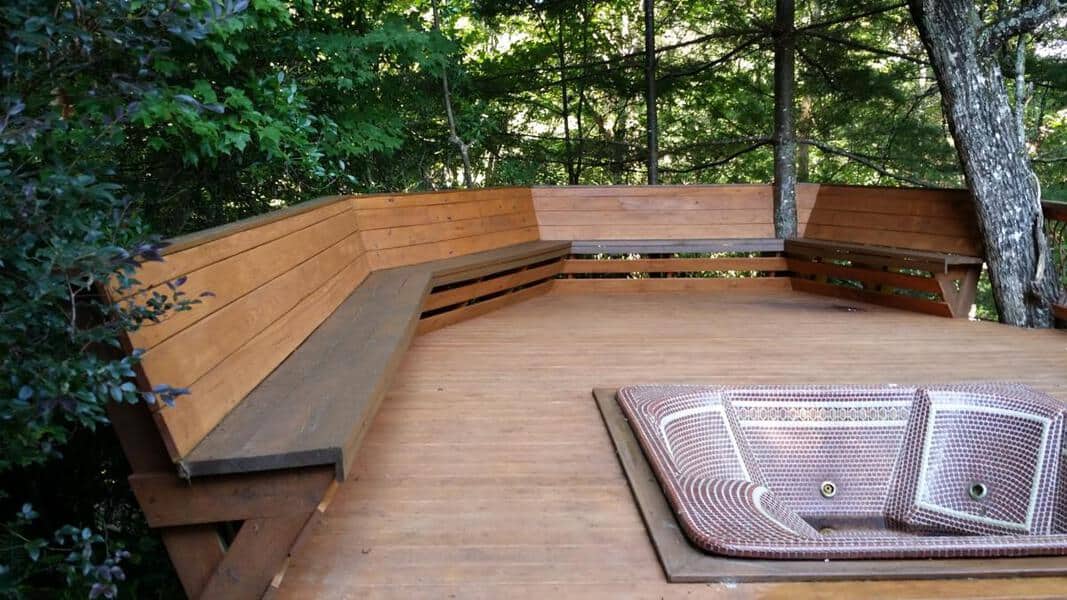
How to build a deck bench
Deck benches are a great addition to any outdoor space. They can provide extra seating, act as a place to store items and add design interest to the landscape. Building your own deck bench is an easy project that can be completed in a weekend.
Depending on the style of bench you want to build, there are several different techniques for constructing this type of seating. The following steps will guide you through the process of building a bench with backrests using pressure-treated lumber and fasteners.
Step 1: Determine Dimensions
Measure the total length and width of your deck or patio area where you want to place your bench. Allow at least 4 feet between each corner post so that there is enough room for people to walk past each end without bumping into them. You can also include space between posts so that they don’t interfere with nearby plants or shrubs. If you plan on using pressure-treated lumber for your project, make sure that it will fit within these dimensions before buying any supplies.
Step 2: Cut Posts
Cut four 2×6 boards into 18-inch lengths and nail them together in pairs using five 16d nails per joint. Then cut two more pairs of 16-inch long 2×
Building a deck bench seat is a cheap and easy way to add extra seating and make your deck more comfortable. The best part is that it can be done in just a weekend, with only basic tools.
Here’s how to build one:
1. Decide where you want to place your bench – the most common locations are between steps or along the edge of a path or walkway. Make sure that there is enough room for you to fit comfortably between the bench and any other structures (fence posts, railing posts, etc.).
2. Mark out the four sides of the bench onto the ground using stakes, string and chalk (or whatever else you have lying around). Use stakes to mark out the corners of each side of the seat and then use string to connect these points together so that you have an outline for your bench seat as shown in this diagram:
3. Dig out any sod within this outline so that it is level with the rest of your yard (use a spade for this). Then fill in any holes left by removing sod with soil from elsewhere on your property (or buy some extra), until there are no gaps anymore in this area.

Building a deck bench is a great way to make your deck more comfortable and attractive. A bench provides a place for you to sit while eating or enjoying the view, and it doubles as an extra seat when the whole family comes over.
The best part about building a deck bench is that it’s easy to do yourself. The only tools required are a hammer, saw and drill. If you’re using pressure-treated lumber, you’ll need to coat the exposed ends with paint or sealant before installing them in the ground.
Step 1
Measure and cut the lumber. Use pressure-treated 2x4s for the frame of the deck bench and 2x6s for the seat supports. Cut two pieces of each size for each side of your bench (four total). Make sure there’s enough room between them so that people can walk through without bumping into them. Lay out two parallel rows of 2x4s on top of one another at least 5 feet apart, which gives you plenty of room for sitting down comfortably.
Step 2
Install stakes into the ground where each piece of lumber will go so that they’re flush with the ground when they’re put in place. Drive stakes in along both sides of
If you have a deck, or even a patio, you can add some extra seating by building a bench. A deck bench is a great way to add seating that doesn’t take up much room, and is a nice spot for hanging out with guests or enjoying your yard. Here’s how to build a deck bench.
Step 1: Measure the area you want to make into a sitting area. This can be as simple as two planks set into the ground for sitting on, or it can be made more permanent with posts and beams supporting it. Measure the length and width so you know how much lumber you’ll need.
Step 2: Cut the lumber according to these dimensions using your circular saw (or other power tool). You don’t need any fancy cuts — just cut each piece straight down the middle of each board.
Step 3: Screw one end of each board into one post of your sitting area using 3″ screws. Make sure they’re flush with the ends of the boards so they don’t stick out past the rest of them when they’re installed. Don’t screw in too deep or else they won’t fit in place later on!
Step 4: Place another board over top of this one so that it’s flush with its counterpart on the
A bench is the perfect addition to any deck or patio, providing comfortable seating for family and friends. While you can buy a premade bench, it’s more cost-effective to make one yourself. The steps involved in building a bench are similar to those for building a deck, but there are some key differences that make this project a little more challenging.
Make sure your wood is treated with preservative or paint before assembling your bench, as untreated wood will rot quickly when exposed to weather conditions.
1 Measure the length of your bench seat and cut four pieces of 2-by-4 lumber to the same length with a handsaw or circular saw (Photo 1).
2 Drill pilot holes through each end of each 2-by-4 with an auger bit. Set up a jig on one end of each 2-by-4 so you can drill all four holes at once (Photo 2). Use 3/8″ bit if you’re using lag screws and 1/2″ if using carriage bolts with washers and nuts.
3 Turn over all four 2-by-4s so they’re lying flat on their edges. Position two 2-by-4s parallel to each other so there’s about 4 in. between them, then set
How to Build a Deck Bench Seat
A bench built from 2x4s is one of the easiest projects you can do on your own. Here, we show you how to build a bench seat for your deck, patio or even in your backyard. We have three different plans you can choose from depending on your needs.
The first plan is for building a simple bench that has no back support and is made of 2x4s. The second plan is for building a simple bench with back support that is made of 2x4s. The third plan is for building a cushioned deck bench seat with backrest and arms made of 2x6s.
Building a deck bench with backrest is a relatively simple project. It will take you less than one day to get the job done and it will look great when it’s done.
To build a deck bench seat, you’ll need these materials:
– 2x4s for the legs
– 1x8s for the slats
– 2x6s for the seat frame
– Wood glue and screws
– 2″x4″ furring strips (optional)
Build a deck bench with backrest
You can build a bench seat for your backyard deck using standard lumber and basic tools. The best place to start is with the dimensions of the lumber you have available, as well as the dimensions of the space you want to fill.
If you’re building a bench for your patio or porch, then you’ll need a 4×4 post to secure one end of the bench. Posts are typically made from pressure-treated wood or treated pine. You can also use cedar if you prefer that look or have access to it at a reasonable price.
The other end of the bench will be attached to your home’s decking material and should be secured by nails or screws into joist hangers, which are metal brackets that support floor joists. The hangers should be installed every 16 inches on center (OC).
Build a Deck Bench
Building a deck bench is a great way to add extra seating and storage space to your deck. The process is simple enough for a beginner, but you will need some basic carpentry skills. You can use any type of wood for this project, but cedar and redwood are especially good for outdoor use because they’re naturally resistant to rot and insects.
Materials
To build your own deck bench, you’ll need the following materials:
Wood glue and nails or screws (nails are easier)
Two 4×4 posts (one each end)
Two 2x6s (for the back)
One 2×6 (for the seat)
One 1/2″ plywood sheet (for the seat bottom)
Building a wooden bench is a project that can be completed in a weekend. The bench can be customized with your favorite color and design scheme. You can even add storage to your deck bench by adding a seat back storage compartment.
The main component for building this bench is the 2x4s that will support the frame of the project. You’ll also need some 1x4s for the seat slats, screws and an exterior finish.
The 2x4s should be cut to length for each piece of your deck bench frame. For example, if you want a 7-foot long frame, cut three 7-foot pieces of 2X4. If you want an 8-foot long frame, cut four 8-foot pieces of 2X4 (two per side). If you’re using a circular saw, take care not to go past where the blade ends so it doesn’t damage your workpiece or get caught on something while cutting through it. It’s best to use a miter saw or table saw since they’re more accurate than circular saws when making angled cuts like these that require less than 90 degrees of incline to make sure they fit together properly and