
To build a cubby you will want to create frames and then cut out your pieces. You can use these 2x4s, but I don’t like the way they curve on the corners. Plywood works best and you can find it at most home improvement stores. Start by creating two frames. You can make all of your cuts first to keep them straight because this is how your frames should fit together. I also cut out two pieces for the “shelves” for the cubby part of the bench and have those ready to put in place when I’m building my frame.
One of the essential steps to building a quality cubby bench is measuring and cutting the boards. The purpose of this step is to get all of the sizes right before assembling anything. This will save time since you won’t have to make any late patch-ups or changes later on.
How to build a cubby
Build the frame. Cut the 2x4s to length, then screw them together to create two identical frames. Make sure the corners are square, and drill pilot holes before driving in screws.
Finish the cubby bench. Attach a 1/2-inch plywood top to each frame with glue and nails or screws. Then cut 1-1/4 inch plywood bottoms for both frames and attach with glue and nails or screws.
Build the cubby shelf. Cut 2x4s to length for the back legs, then attach them to the frame using glue and nails or screws. You can also mark off where each leg will be placed on top of your plywood top before attaching them so that there is uniformity between all four legs and no wiggle room when locked into place.
Attach 2×4 side rails between each back leg using glue and nails or screws; leave about 1/4 inch between each rail for ventilation purposes so that moisture doesn’t build up underneath the bench during rainy weather (which could lead to rot).
Measure how high you want your bench to be off of the ground, then mark this measurement on one end of your front rail under your seat; measure
How to Build a Cubby Bench
Build a cubby bench to hide toys, books and other items. A cubby bench works well in any room of the house as a place to store toys, books and games. It can also be used as a seat or footstool. This project is designed for kids but will also appeal to adults who like the look of it.
Materials: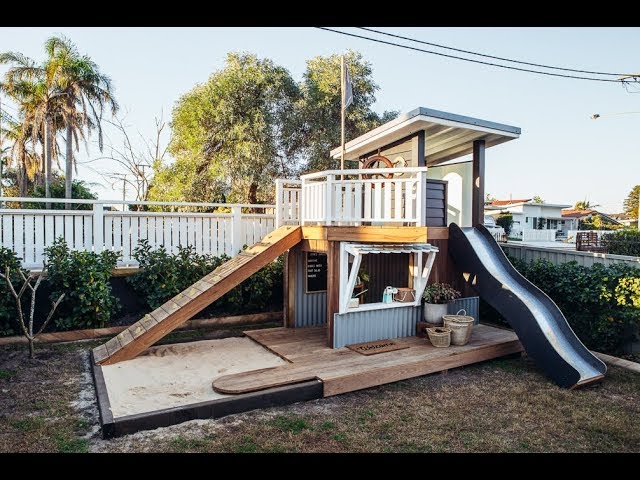
2 sheets of plywood (1/4″ thick) cut into 30″ x 24″ rectangles (or size desired)
Wood glue
Sandpaper or electric sander
Paintable sealer (optional)
One set of hinges and one latch bolt
The first step in building a cubby bench is to cut the pieces of wood to the correct length. You can use any type of wood for this project, but I recommend using pine because it’s easy to work with and cheap. Cut all of your pieces as follows:
2x4s: 2 pieces at 7 ft long; 2 pieces at 5 ft long; and 4 pieces at 5 in long (for attaching the top)
1x6s: 1 piece at 7.5 in long (for attaching the top); 1 piece at 5 ft long (for attaching the bottom); 1 piece at 3 ft long (for attaching the back)
Building a cubby can be a fun and rewarding experience for both the kids and adults. Kids love the idea of hiding away in their own little world. Parents love the idea of having a place for their kids to play that is safe and secure, yet accessible at all times.
Building a cubby is not only easy but also inexpensive. Here are some tips on how to build a cubby bench:
The first step in building a cubby is planning it out. You will need to decide where you want your cubby to be located in your home and how big it should be. You may want more than one cubby so you can have one for each child or have one large enough for multiple children at once.
If you need help figuring out how much space is needed, use this formula: Square Feet = (Length x Width) / 144
If you’re going to put two or more cubbies together, add up the total square footage needed first then divide by 144 to get the number of squares per cubbie that will fit into your space
Building a cubby is not difficult. If you have the right tools and materials, it can be done in a day.
Build your frame first. You’ll need 2x4s or 2x6s for this project. Cut them to size, then secure them to the wall studs using appropriate brackets. Use screws or nails to fasten your plywood or particleboard panels together.
Next, install the doors on the front of your cubby so that they are aligned with one another and open in unison when you pull on either handle.
To make sure your cubby cabinet is secure, attach it directly to the wall studs using lag bolts and washers through holes drilled into the frame from both sides of each panel.
How to build a cubby bench. This simple storage solution is perfect for kids and adults alike. Use it in the playroom or living room to keep toys and books organized and easy to reach.
Create a functional seating area in any space with this easy DIY project!
You’ll need:
Two 2x4s cut into 3′ lengths (these will be your base support)
Four 2x4s cut into 4′ lengths (these will be your shelf supports)
Twenty-four 1-1/2″ wood screws (you could also use nails if you prefer)
A cubby shelf is a great way to add storage to your home. This project is fairly simple and can be completed with only a few tools.
Have you ever seen a cubby bench? They are so fun! I have been wanting one for our living room but didn’t want to spend the money on one. So I figured out how to build my own! It took me about 5 hours total (2-3 hours for the cutting and 2-3 for the assembly).
This post contains affiliate links at no cost to you. If you choose to purchase through these links, thank you for supporting this site!
This post contains affiliate links at no cost to you. If you choose to purchase through these links, thank you for supporting this site!
Materials:
Cedar 1x4s or 2x4s – the thickness of your boards will be determined by the amount of space between the shelves that you want. I used 1x4s because they were cheaper than 2x4s but they were also harder to work with since they were thinner and more flexible than 2x4s would have been. If you’re going with 1x4s, make sure that they are straight before purchasing them so that they fit together nicely when building
How to Build a Cubby Shelf
What You’ll Need:
2x4s, pressure treated lumber or other outdoor wood
Sandpaper
Finishing nails or screws (1 1/4″)
Nail gun or screws for woodworking projects
Wood glue (optional)
Outdoor paint or stain in your desired color (optional)
A saw, such as a circular saw, table saw or hand saw depending on the size of the project.
Create a unique and functional cubby bench with this step by step tutorial.
This is a project that can be made in just a few hours, and once it’s done you’ll love having the extra storage space for toys, games and books. The cubbies in the bench are perfect for organizing kid’s stuff, or even grown up stuff if you want to get rid of some clutter!
You can build this cubby shelf out of any type of wood that you like, but using pine or another softwood will make it easier for you to screw in the hardware without having to pre-drill holes. If you have kids that might be rough on this project, I recommend using plywood instead of solid wood because it can easily be replaced if necessary (although they will probably still destroy the plywood!).
Materials needed:
1 sheet of 3/4″ plywood (or whatever thickness you want)
1-1/2″ pocket hole screws (you will need around 24)
Wood glue
So you want to build a cubby shelf.
Introduction
This is a basic guide on how to build a cubby shelf. It’s not intended to be an exhaustive resource, but rather a starting point for those who are interested in learning more about this craft.
A cubby shelf is basically just a box with doors and/or drawers that opens up and has room for storage inside. There are many different types of woodworking projects out there but this one is my favorite because it’s easy, fast and inexpensive. You can make one for about 20 bucks with some plywood and pine boards from your local hardware store.