There are several ways to build a custom bar table, but one of the most creative ways I’ve seen is by using an old foam mattress. This was a brilliant idea because your guests can lean over and put their heads on the back of the ‘bar’ for full relaxation.
It’s a simple answer for how to build a bar table out of wood. I will start with the basics, it does not require much knowledge, materials are easy to find and all tools can be purchased from your local hardware store. Building a bar table is great for beginners that want to try their hands on something, but might be a little discouraged by complex projects.

How to build a bar table out of wood
How to build a bar table out of wood
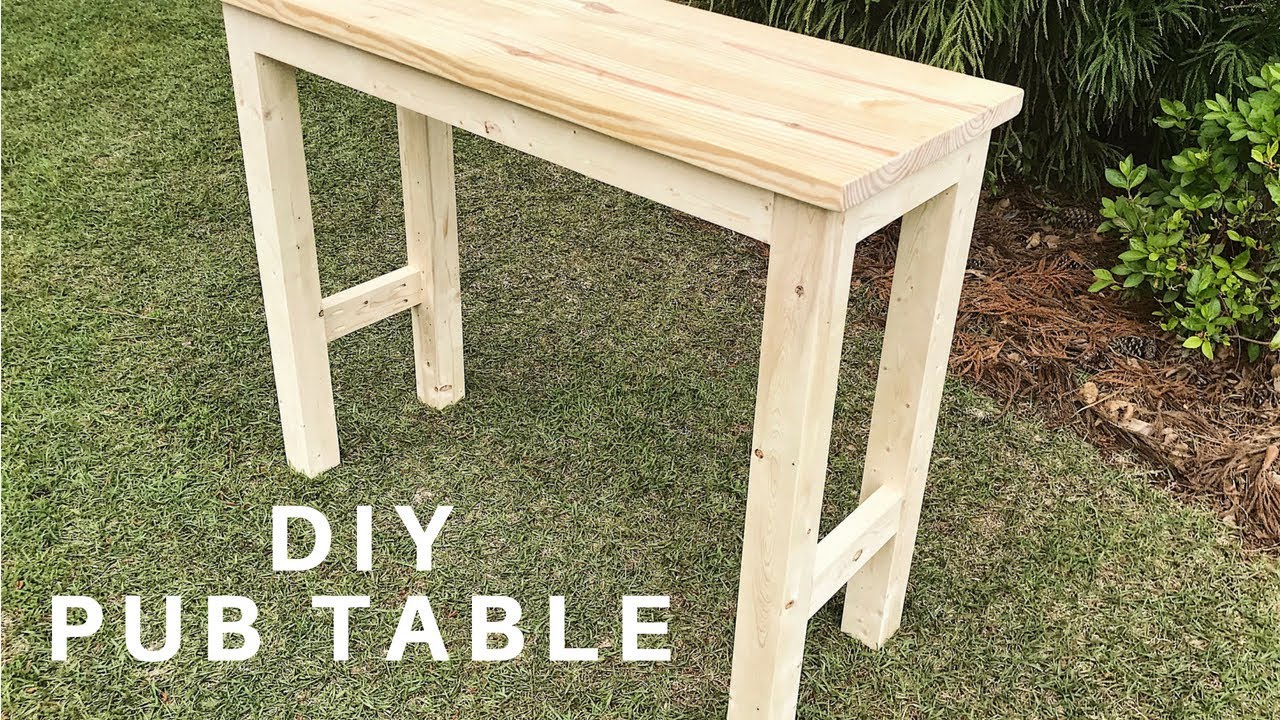
Building a bar height patio table is not only easy, but it can be done in just a few hours. Here are the steps for building a bar height patio table:
Step 1: Make a frame for the top. Cut two pieces of 2×4 lumber at 3 feet long and screw them together with four wood screws on each side of the joint. You should now have a rectangle that is 3 feet by 2 feet. Next, cut two pieces of 2×4 lumber at 21 inches long and place them on top of the frame you just made. Place one end flush with the bottom of the frame, then screw into place using four wood screws on each side of the joint. Now you should have a rectangle that is 3 feet by 21 inches tall.
Step 2: Build the legs by cutting four pieces of 2×4 lumber at 24 inches long (if you want an 18 inch high table) or 30 inches long (if you want a 24 inch high table). Make sure your cuts are square! Then attach one piece to each corner of your frame using two wood screws on each side of the joint (four screws per leg). Finally, attach two more legs on top of those legs using
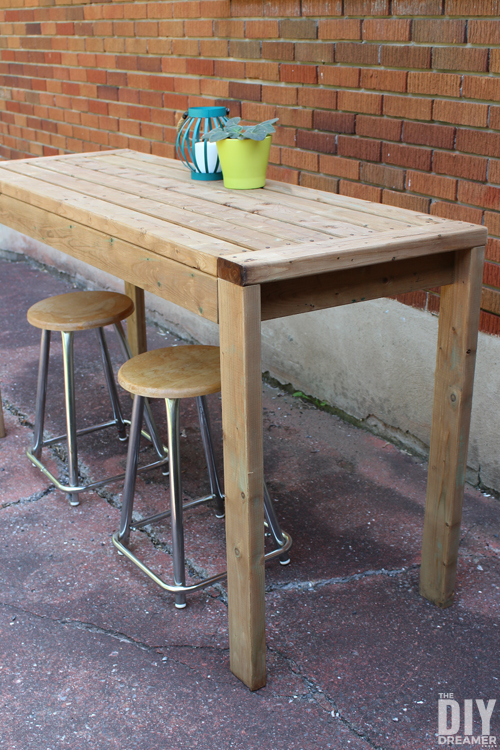
Building a bar table is a great way to save money on patio furniture. The design is simple and the build itself is not difficult. In fact, if you have basic woodworking skills and tools, you should be able to complete this project in an afternoon.
Step 1: Cut the Wood
The first thing you need to do is cut all of your wood pieces according to the dimensions listed in the materials list at the end of this article. You can use any type of saw that you have available for this step, but it’s best if you use a table saw or circular saw with a guide fence so that all of your cuts are nice and straight.
Step 2: Assemble the Frame
Once all of your pieces are cut, lay them out on a flat surface in order from smallest (the top) to largest (the bottom). Then start attaching them together using glue and nails or screws as directed by the directions provided by whichever type of joint you’re using (Pocket Screws or Glued Joints). The only piece that doesn’t require any assembly is the bottom – just set it aside until later when we’ll attach it to our base boards.
In this article, I will show you how to build a bar table out of wood. The process is very simple and easy to do at home. So let’s get started!
This table can be made by anyone who has basic carpentry skills. The most important thing is that you have the right tools and materials to build it.
Materials needed:
Wooden board (15 mm thick) – 4 pc (each piece should be long enough to make one leg)
Wooden dowel or brass pipes – 2 pc (one for each leg)
Screws – 4 pc (for attaching the legs)
Bar tables are a great addition to any home. They are very practical and can be used for everyday purposes. A bar table is a great way to create more space in your kitchen or dining room, as well as a place to sit and relax after a long day at work.
Bar tables can be made from many different materials, such as wood, metal or plastic. The best material for making your bar table is wood. Wood is easy to work with and it can be stained or painted any color you want. It’s also durable and will last for years if it’s taken care of properly.
There are many different types of bar tables available on the market today. You can find ones that fold up into themselves when they’re not being used, which makes them easy to store away when not in use. Others come with storage drawers underneath them where you can store anything from kitchen utensils to magazines and newspapers while others even have shelves built into them so that you don’t have to worry about losing anything while you’re cooking or eating at your bar table!
If you’re looking for something different than what everyone else has then you should consider building your own bar table! It’s easy to do and it allows you to personalize it however
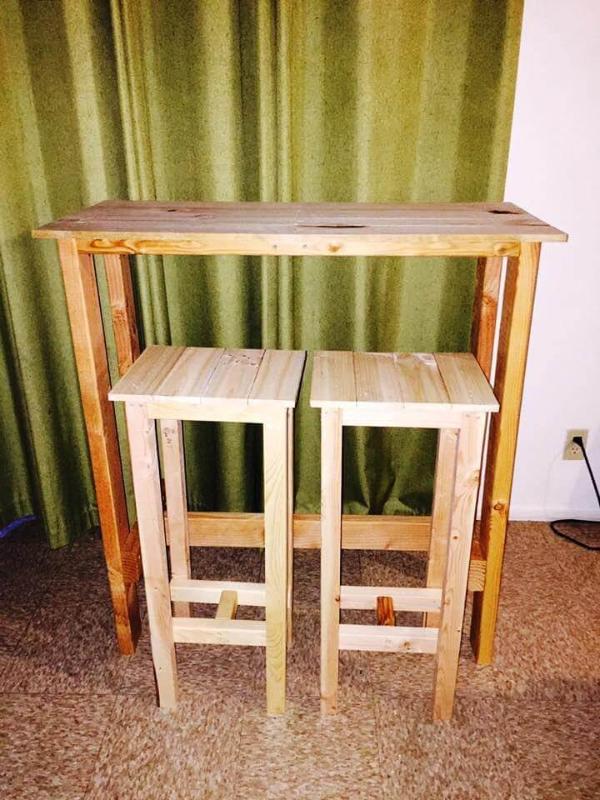
A bar table is a great addition to any home. They are functional, stylish, and can be used for many purposes. These are also very popular in restaurants and bars because of their versatility.
A bar table is essentially a countertop height table with stools attached to it. The stools allow people to sit at the bar in the same way that they would sit at a counter. This creates an informal atmosphere that makes people feel comfortable and relaxed.
There are many different types of bar tables, but they all have one thing in common: they feature stools that are attached to the table itself. There are also some other features that are common among bar tables such as a large surface area, adjustable height and storage space underneath.
Bar Tables Features:
– Adjustable Height – Most bar tables come with adjustable height settings so you can set it up just right for your needs whether you want to serve food or just drink beer while watching TV
– Storage Space – Many bar tables have storage space underneath them so you can keep all sorts of things like books, toys, tools, etc…
– Large Surface Area – Bar tables typically have large surface areas so you can easily place drinks or food on them
If you want to create a bar chart in Tableau, the first step is to add a measure to the rows shelf and a dimension to the columns shelf. For example, if you have sales data, you could add Sales to rows and Region to columns.
You can then drag Sales onto Columns as a continuous or discrete value and Region onto Color. You’ll notice that Tableau has automatically created bars for each region and they’re all stacked on top of each other.
If we want our bars to be separate, we need to select them and right-click on one of them. Select “Split Rows” from the menu that appears and select “Split Rows” again for each of the other bars that appear when you do this with your first bar.
Now that we have split up our rows into separate items, let’s change how they look by adding a new calculated field:
Right-click on any cell and select New Calculated Field from the menu that appears – call this field “Bar Height” and set it equal to SUM([Sales])/SUM([Row Number]). This will create vertical bars where each bar represents a total divided by its row number – so smaller numbers will be shorter
The Bar Chart is a very simple form of visual representation of data. It consists of a rectangular plot area and a vertical axis. The horizontal axis is represented by the category labels that are displayed at the top of the plot area.
The bar chart has been around for over 100 years, but it still remains one of the most popular and versatile charts in use today.
In this article, we will show you how to build a basic bar chart in Tableau using a sample data set from The World Bank on Education Statistics and Expenditure in 2016 (see below).
Bar charts are a type of chart that are used to show the distribution of information. Bar charts can be used to show simple data such as the number of employees in each department, or more complicated information such as the amount of sales for each product.
Bar chart types include horizontal bar charts and vertical bar charts. Horizontal bar charts are used when you want to compare each item in a category side by side, whereas vertical bar charts are used when you want to compare items in one category against another category.
A stacked bar chart is a variation on traditional bar charts which allows you to see how one group compares against another group. For example, if we had sales figures broken down by region, then we could use a stacked bar chart to see how each region’s sales compared against each other region’s sales.