So you’re thinking about building your own gas fire pit. It’s a great idea — one that will have everyone talking. But don’t let the idea of building a gas fire pit overwhelm you. Building a gas fire pit can be broken down into 5 simple steps you can take to ensure you are successful.
It used to be that if you wanted a fire in your backyard, you made it yourself with wood and kindling. Now it has become quite common for families to build gas fire pits into their backyards, bringing the warmth and coziness of an open flame without the hassle of having to chop wood or maintain an actual pit.
How to build a gas fire pit
Fire pits are a great way to add ambiance and warmth to your backyard. If you’re looking for a DIY project, building your own gas fire pit is not only easy but also affordable.
Here are the steps to follow:
Choose a gas fire pit kit that suits your needs. There are many options available, from small to large, with different features such as accessories and styles. A basic one should be enough if you don’t want to spend too much money on this project.
Dig out the right size hole in your yard where you want to place your new fire pit. Make sure it’s level and at least 18 inches deep so that you can bury the tank inside safely below ground level.
Install the metal ring around the base of the container using screws or nails so that it won’t move when you fill it with dirt later on.
Set up all of your materials inside the pit so that they are easy to reach while working on them (propane tank included).
Assemble your burner assembly by following instructions provided by the manufacturer of the kit for best results. Once assembled, place it on top of the metal ring with an attached hose leading into an opening in
Gas fire pit kits are easy to install and a great way to enjoy your backyard more during the cooler months. They are available in a variety of styles, sizes and colors.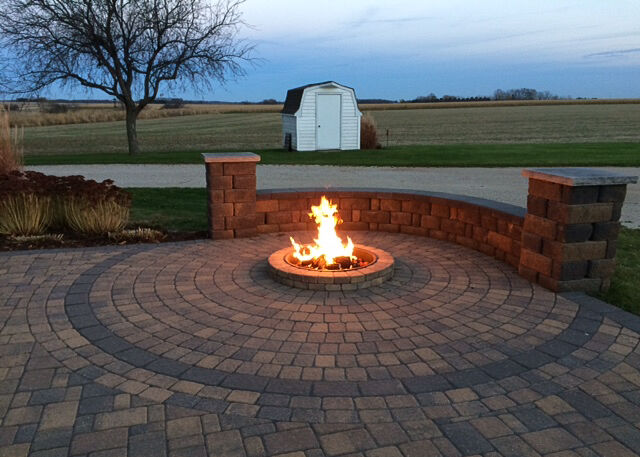
Here are the steps to take to build your own gas fire pit:
Choose a site for your gas fire pit, either on or off the ground, depending on your preference. Make sure there is at least 1 foot between the fire pit and any combustible objects such as plants or wooden decking. Also be aware of any overhead wires or pipes that could be damaged by heat from the fire.
If you’re building a freestanding gas fire pit, use treated lumber for the frame and base. If you’re using an above-ground model, make sure it has been tested for safety by a certified labratory.
Install the liner according to manufacturer guidelines. Some liners come with anchors that attach directly onto concrete or stucco surfaces; others require anchors that must be screwed into masonry walls before installing liner on top of them.
Place sand or gravel around bottom of liner; add water until level with top lip of liner (this helps prevent rocks from falling into liner during use).
The gas fire pit is a great addition to any backyard. It’s not just a nice place to sit and relax; it’s also a good way to entertain guests.
In this article, we will discuss the steps to building your own gas fire pit.
Step 1: Measure the Area of Your Fire Pit
The first thing you need to do is measure the area where you want your fire pit. This will help you determine how large of a kit you need. If you don’t have enough space for an outdoor fireplace, consider using an electric one instead! They are less expensive and easier to install than gas or wood burning fireplaces.
Step 2: Find a Location for Your Fire Pit
Once you know exactly how big of a space you need, it’s time to start looking for a location for your new outdoor fireplace. Ideally, this should be an area where there is plenty of room for seating around it (about 5 feet away). Make sure that there isn’t anything flammable nearby such as trees or grass that could catch on fire if your fireplace were to get too close! Also make sure that there isn’t any electrical wiring nearby because this could cause problems as well when installing
How to build your own gas fire pit:
1. Get all the materials you need together.
2. Lay out the base of your fire pit, then place the burner on top of it.
3. Make sure that the propane line goes through the hole in the center of your burner (make sure the burner is turned off).
4. Put in the tank, and connect it to the line leading out of it (make sure this is turned off).
5. Place rocks around the outside edge of your base so that they are level with one another and cover any gaps between them. This will give your fire pit some added stability as well as make it look more attractive than just having an open hole where you can see your burner underneath it all!
6. Once everything is set up and ready to go, turn on both switches for your burner and tank, light a match or lighter at one end of your rocks, then walk away!
How to Build a Gas Fire Pit
Gas fire pits offer the same ambiance and outdoor appeal of wood-burning fire pits, but without all the mess and fuss. Building a gas fire pit is an easy DIY project that can be completed in a weekend with just a few basic tools. In most cases, you don’t need any experience in carpentry or masonry, either.
The main component of a gas fire pit is the burner unit. A burner unit consists of a burner tube and base plate that are connected by means of an adjustable regulator to allow you to control the height of your flames. You can buy these parts separately or as part of a kit that includes everything you’ll need to assemble your gas fire pit.
The other main part of any gas fire pit is the tank — this is where fuel is stored and pressurized before it’s delivered through hoses to the burner unit. In most cases, this tank will be installed under ground so it’s out of sight but still accessible if it needs to be refilled or repaired later on down the road. Some preassembled gas fire pits come with a built-in tank already installed inside the outer ring, but others require you to install your own tank separately from scratch