
As an Amazon Partner I procure from qualifying buys. Peruse complete story here.
This Do-It-Yourself curve lattice is an optimal size for any nursery. Besides it’s exceptionally simple to fabricate, and looks astonishing as well. Here, I’ll tell you the very best way to make your own, bit by bit.
How to build a garden arch trellis
At this point you realize that upward cultivating is a colossal space saver. The greatest aspect of utilizing a little curve lattice like this is that you can establish more limited crops under it, giving you two times how much room.
The metal pieces make the curve areas of strength for extremely, it will have no issue supporting the heaviness of a plant brimming with experienced and weighty organic products.
Do-It-Yourself curve lattice in my nursery
Buy into Get Going Cultivating!
Get refreshes on the most recent posts and more from Get Going Cultivating directly to your inbox.
I agree to getting messages and customized advertisements.
One more advantage of this little curve lattice is that the vegetables will hang down, making them simple to see. The curve is additionally sufficiently tall so you will not need to twist around too far to even consider gathering.
When the fencing has been gotten onto the casing, the curve is versatile as well. Basically haul the pieces out of the ground, move the curve to the new spot, and push them back into the ground.
Do-It-Yourself Curve Lattice FAQS
In this part I’ll respond to probably the most usually posed inquiries about my Do-It-Yourself curve lattice plan. In the event that you don’t see yours here, ask it in the remarks beneath.
DO YOU Establish Within THE Lattice OR Outwardly?
I will generally establish outwardly of the lattice so I have a lot of room for more limited crops under. Yet, you can do it within in the event that you like, it doesn’t make any difference.
DO YOU Establish ON The two Finishes OF THE Curve, OR Only ONE SIDE?
I plant on the two closures of the curve so the plants/branches will meet at the top and fill it totally. You could establish longer plants just on one side, however the opposite side could turn out to be uncovered for the greater part of the late spring.
WHAT Kinds OF PLANTS Might I at any point Utilize THIS Curve FOR?
This curve is ideal for more modest vining crops like cucumbers, peas, beans, tomatoes, and cucamelons, however you could involve it for blossoms as well in the event that you’d like. It’s actual solid and will keep going for a long time.
Instructions to Construct A Do-It-Yourself Curve Lattice
The following are the bit by bit directions for how to make a Do-It-Yourself curve lattice, including photographs. It’s truly simple, and doesn’t require a lot of investment. You can make only one, or rehash these moves toward work as the need might arise.
SAVE
This Do-It-Yourself curve lattice is easy to make, and extremely solid. You can introduce it in any measured veggie garden plot, or even in your raised beds.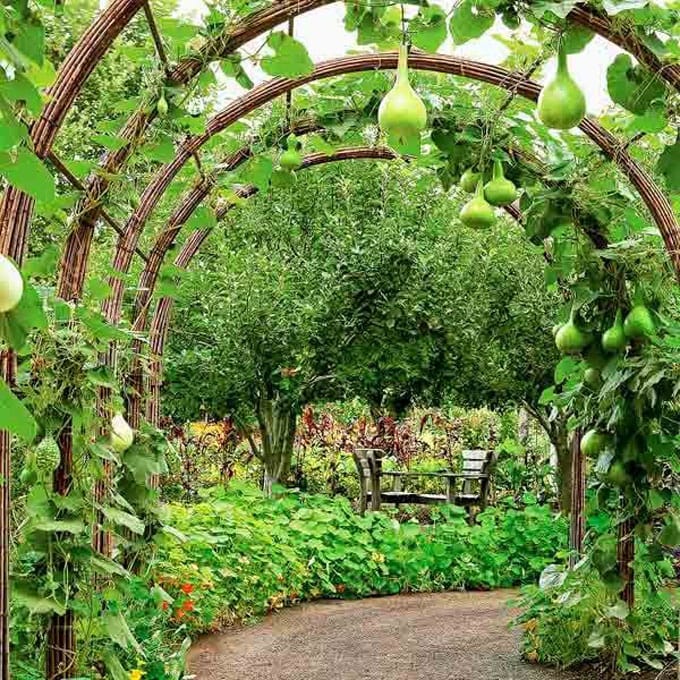
MATERIALS
10′ 3/8″ bits of rebar (2)
28″ 14 check metal nursery fencing
8″ link zip ties (12)
Instruments
Wire cutters
Gloves
Scissors
Eye insurance
Directions
Twist the rebar into curves – Cautiously twist every one of the 3/8″ rebar pieces into curves. The rebar will twist quite without any problem. Be that as it may, take as much time as is needed since, in such a case that you drive it, the rebar might kink.Bending the lattice at some point outline pieces into a curve
Introduce the curve pieces – Introduce every one of the curves in the nursery by driving the closures of the rebar into the ground. Space the closures of each curve 4′ separated, and the actual curves 28″ apart.Installing the curves for the lattice
Measure the fencing – Lay the nursery fencing over the curve to gauge how long the piece ought to be cut. Use wire cutters to slice the fencing to size.Measuring the fencing to cover the curve
Join fencing to the two curves – Secure the fencing onto the rebar curves utilizing the zip ties, dispersing them each 6-10″ along the whole length of the rebar.Attaching the fencing to get the lattice
Eliminate the additional tabs – Cut the additional tabs off the zip ties utilizing scissors, assuming desired.Extra tabs on the zip ties
Rebar is chaotic to work with, so I suggest wearing gloves while you’re taking care of it
It is hard to get the two rebar curve pieces into precisely the same shape, so get them as close as possible. They needn’t bother with to be the very same, since they will be dispersed separated in the nursery.
This simple Do-It-Yourself curve lattice project rushes to make, and exceptionally useful. It will twofold how much space you have, and is ideally suited for any size garden.
This is an incomplete portion from my book Vertical Vegetables. For more imaginative bit by bit Do-It-Yourself projects, and to realize everything to be familiar with developing vegetables in an upward direction, request your duplicate at this point.