It is always a great idea to develop and test your website locally before introducing it to the world. This saves you from creating any unwanted mess and speeds up the whole development process.
We can safely assume you have a Joomla site running on your localhost, and now you are ready to take the next big move, that is to go live! But how? Even though it sounds tough, you will be surprised to know how easily you can get it done.
In today’s guide, we will cover everything you need to know to transfer a Joomla website from local to live. Without further ado, let’s get started!
Get a Reliable Web Hosting
First things first. Did you sign up with a hosting provider? If not, that is the first thing you need to do to introduce your site to the world.
Before choosing a hosting provider, make sure to do extensive research to get reliable web hosting and prevent downtime. Slow server and excessive downtime can frustrate your site visitors and have a detrimental impact on your business. You can search for web hosting services based on your location, but our general recommendations would be DigitalOcean, SiteGround, or HostGator.
You will also need a domain name to give your website a shareable address. Once you have a brandable domain name and a robust hosting provider, you can take the load off your mind. Because things are just going to get easier from here!
Methods to Move Your Joomla Site
There are two ways to move an exact copy of your Joomla site from localhost to a remote server. They are:
- Manually
- Or, using a backup extension like Akeeba Backup
You can either move your Joomla site manually or through a backup extension like Akeeba Backup. We will be covering both of the methods in detail. It is up to you to decide which method you are most comfortable with. Let’s get started.
Method 1: Move Joomla Site to the Live Server Manually
While this method is a bit trickier than the other, it is still a good practice to learn how to transfer your Joomla site manually. With a few tweaks, you can also use the method to move a Joomla site from one server to another. Let’s have a detailed look at each of the steps, make sure to pay attention to avoid making a mess!
Step 1: Transfer Your Root Files
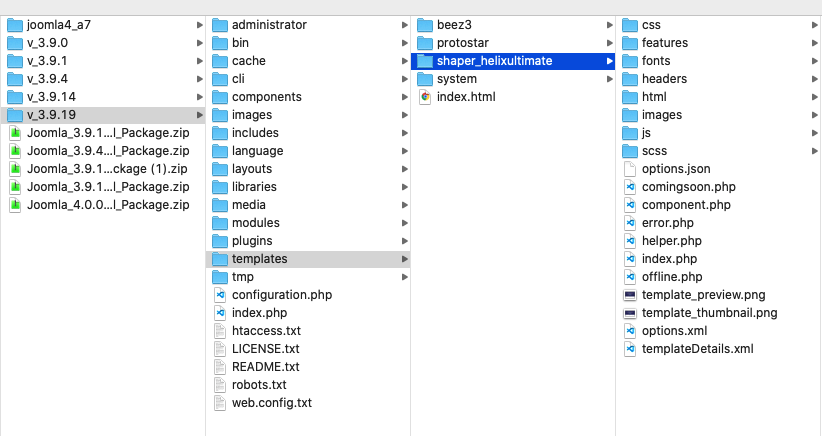
The first step is to copy the files from the root folder of the localhost to the live server. And then, open your FTP client and connect to your web hosting account. Browse the web root directory (www or public_html or so on) of your live server. Upload all the files in the destination directory.
Let’s have a look at the procedure step by step:
- Go to the htdocs folder (or counterpart one) of whatever local web server software you are using
- Find the folder that has all the Joomla files of the site you wish to move
- Add your files to a ZIP archive
- Head over to the hosting server’s web root directory (www or public_html) using an FTP client if needed
- Select the destination directory
- Upload the zipped file
- Extract to unzip your local installation files on the server
Step 2: Get the Contents of the MySQL Database
The next step is to export and import the database. Please bear in mind, most configuration and data of Joomla extensions are stored in the database. Make sure to carefully follow along in order to avoid creating a mess.
Export the localhost database
- Go to http://localhost/phpMyAdmin
- Select the particular database of your site in the upper right-hand side
- Click on the Export tab at the top – then select Custom
- Click on Go at the bottom to download the .sql file
Import the exported database on the hosting company’s server
- If you use cPanel, open the MySQL Database Wizard and create a new database
- Or, if you’re using a VPS, create a new database from the command line (do a research)
- Or, check your hosting dashboard to find the database manager
Then:
- Create a new database for the live site
- Select the newly created database and find its import option
- Import the downloaded .sql file
And that’s it! Your Joomla database has been imported.
Step 3: Joomla configuration.php File Adjustment
Finally, you need to make some changes in the configuration.php file of Joomla to reflect the new server settings.
- Navigate to your live server’s Joomla installation folder
- Find the configuration.php file
- Edit/check the following lines:
public $host = 'localhost'; usually, it remains the same
public $user = 'root'; change it to your new database username
public $password = ' '; enter your new database password
public $db = 'joomla' database’; change it to your live server database name- Edit the path for logs and tmp directory by finding the following lines:
public $log_path = 'C:\\MAMP\\htdocs\\joomla\\administrator/logs';
public $tmp_path = 'C:\\MAMP\\htdocs\\joomla/tmp';
Replace the path with the path of the log and tmp directories of your live server.
Save changes and you are almost done!
Step 4: Fix Missing Images and Broken Links
Do not panic if some of the images or links are broken! It is quite normal to experience broken links and missing images when you migrate your site from one server to another. To solve the issue, just make sure the roots of your links are pointing to the new server instead of the old one. And, you are good to go.
Congratulations on successfully migrating your Joomla site to a live server!
Method 2: Use Akeeba Backup to Move the Joomla Site
Alternatively, you can backup and restore your Joomla site using Akeeba Backup. To do this, you will be using the Akeeba Backup Joomla extension first to take a backup of your website (root files and database) and then Akeeba Kickstart to restore the backup to the live server. The transfer process consists of the following steps.
Step 1: Download and Install Akeeba Backup
First of all, you need to download the Akeeba Backup extension. Once you have downloaded the latest version in .zip format, login to your Joomla site administrator dashboard. From the dashboard, click on Extensions > Manage > Install. Here, under the Upload Package File option, browse and select the downloaded file. This will upload and install Akeeba Backup on your site.
Step 2: Backup Your Files
After the successful installation of Akeeba Backup, the next step is to take a backup of your site. Simply do this by:
- On top of the dashboard, select Components and then Akeeba Backup
- Click Backup Now. The backup can take anywhere between 1 minute to 10+ to complete depending on the size of your website
- Once the backup is completed successfully, go to Manage Backups and then click on the Download button
- This will download a .jpa file to your computer
Step 3: Download Akeeba Kickstart
This step is pretty simple and straightforward. All you have to do is download Akeeba Kickstart to your computer. Do keep this in mind, from the downloaded folder the only file we need is the kickstart.php file.
Step 4: Upload the Files to Your New Server
From your hosting control panel or FTP client, select the destination web root directory and upload the .jpa file from step 2 and kickstart.php from step 3 to the new server.
Step 5: Create a Database on Your Hosting Company’s Server
From your cPanel or server’s database management system, create a new database for your live site. Do not get confused here, we need a new database to store the data that is already present in your downloaded .jpa file.
Step 6: Run the Kickstart Installer to Install Your Site on the New Server
We are almost done! All you have to do now is from the browser go to (URL of your live site)/kickstart.php. Something like example.com/kickstart.php. You will be presented with a screen like below.
Select your archive file from Step 2 and the extraction method, then hit Start. If your Akeeba Kickstart starts but does not extract the archive file, please visit here and solve the issue accordingly. Once the extraction is complete, you will see a page that says ‘Run the Installer’.
Run the installer and do the following:
- The first page will check your server configuration. If you see any red ‘No’s, fix the issues accordingly before proceeding further. If not, then hit on Next.
- The next screen will show you the database information from the original Joomla backup. Replace this with the new database information from step 5.
- Click Next on the top and you will see a progress bar.
- Once it is done, all that remains is to remove the installation folder just like the usual Joomla installation by clicking on “Clean Up”
After the restoration and clean up, you will be able to access your site’s frontend and backend.
That’s it. You have successfully migrated your Joomla website to a remote server!


