
In this tutorial, we will show you how to set up a web server on Ubuntu 18.04 LTS with Apache and PHP support.
The steps below will guide you through the process of installing Apache, PHP, and MySQL on Ubuntu 18.04 LTS. You will also learn how to configure these three components so that they work together correctly.
Set Up A Web Server On Ubuntu
In this article, we will see how to configure Apache web server in Ubuntu. We will also see how to secure Apache web server with SSL certificates.
To start with, let’s understand what Apache is and how it can be used for web hosting.
What is Apache Web Server?
Apache is a free, open source web server software that allows you to host your website on the Internet. It uses the Hypertext Transfer Protocol (HTTP) to send files over the internet between your computer and the visitor’s browser. It is available for Windows, Linux, Unix and Mac OS X operating systems. The latest version of Apache is 2.2 which was released in February 2009.
How To Install Apache Web Server On Ubuntu?
The following steps will help you install apache on your ubuntu machine:
Step 1: Update Your System
Step 2: Install Apache Web Server Package
Step 3: Configure And Activate The Apache Web Server Service
Apache is the most popular Web Server in the world. It is used by more than half of all websites on the internet.
It’s a powerful and flexible server that can be configured to meet almost any need.
In this tutorial, we will explain how to install and configure Apache2 webserver in Ubuntu 18.04 LTS.
The Apache HTTP Server, often referred to as Apache, is an open source web server software 2 (LAMP) stack solution composed of the Apache HTTP Server, MySQL database server and PHP scripting language to create dynamic web pages.
Ubuntu 18.04 comes with PHP7 installed by default, but if you want the latest version of PHP available or if your application requires a specific version of PHP you can easily install it using PPA (Personal Package Archive).
Apache is a free, open-source web server that runs on Linux, Windows and Unix. It’s the most popular web server in the world and is used to power more than half of all websites.
Apache’s popularity is due to its performance, stability and security — but it can also be a bit complex. If you’re new to Linux or Apache, configuring it can be tricky.
In this guide, we’ll show you how to set up Apache on Ubuntu 18.04 LTS using nginx as a reverse proxy for HTTP requests.
Before You Begin
In this tutorial, we assume that you have a basic understanding of how websites work. If you’re new to this concept, please check out our introduction to web servers article before proceeding with this guide.
You will need root access in order for this guide to work properly. You can obtain root access by following our sudo user guide or by using sudo directly from the command line when prompted (replace “username” with your actual username).
Apache is the most common web server software in use today. It’s one of the most popular free and open source software projects on the Internet. It powers well over half of all websites on the Internet, including this one.
In this tutorial, we will learn how to install Apache on Ubuntu 18.04 and configure it to host our website(s). We’ll also learn how to install MySQL or MariaDB database server that can be used with Apache to store data for your website.
We’ll also see how we can secure our web server by enabling HTTPS (SSL) support.
Apache is the most popular web server on the internet. It’s a very reliable, flexible, and secure web server.
In this tutorial, we will learn how to install Apache web server on Ubuntu 18.04LTS (Bionic Beaver).
How To Install Apache Web Server In Ubuntu 18.04 LTS Bionic Beaver
Step 1: Update The Repository
First, we need to make sure that our system is up-to-date. Run the following command in terminal:
sudo apt update && sudo apt upgrade -y
Apache is the most popular web server software in the world. It is open source and free to use. It is also maintained by a community of volunteers and developers.
Apache has been around since 1995 and is currently at version 2.4. The latest stable release of Apache is 2.4.23, which was released on May 13, 2019.
In this guide, we will show you how to install Apache web server in Ubuntu 20 using a graphical user interface (GUI). We’ll also provide some information about how to configure Apache with PHP support so that you can run WordPress on your Ubuntu 20 desktop or server computer.
How To Configure Apache Server In Ubuntu?
First of all, we need to install Apache Web Server by using this command:
sudo apt-get install apache2
Apache is a free, open-source web server application. It is the most widely used web server on the Internet.
Apache is written in the programming language C and runs on Unix, Linux and Windows systems. It has been the most popular web server since 1996 when it replaced the NCSA HTTPd server.
This article will show you how to configure Apache2 on Ubuntu 20.04 LTS (Bionic Beaver).
Configure Apache2 Web Server in Ubuntu 20
First update your apt package manager:
apt update
Install Apache2 Web Server:
apt install apache2
Enable Apache2 to start at boot time:
systemctl enable apache2
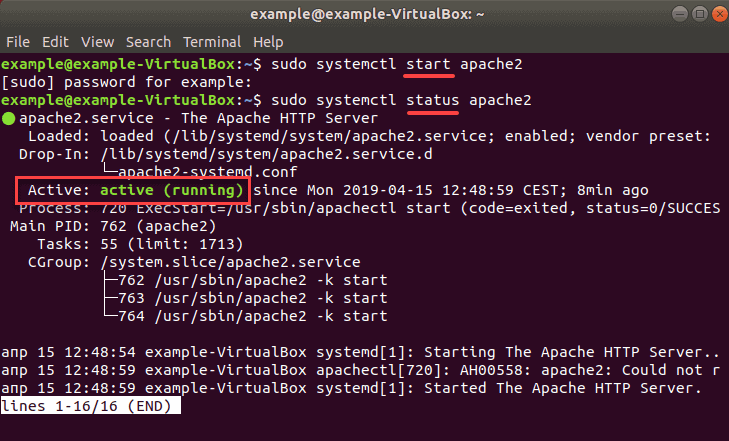
Start Apache2 Web Server:
systemctl start apache2
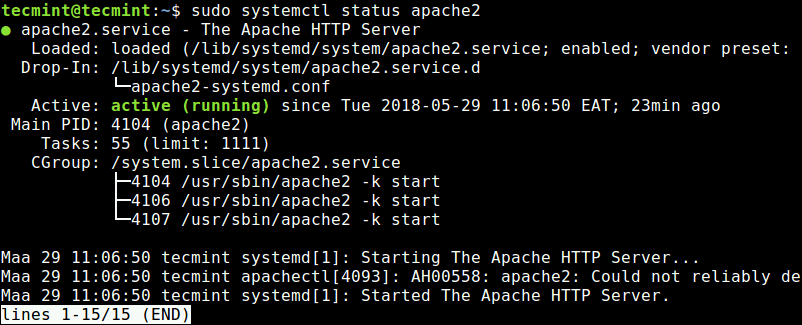
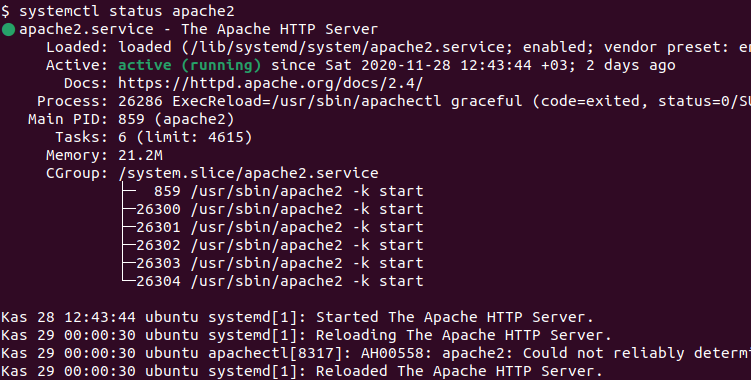
Verify that Apache2 is running:
systemctl status apache2
Apache is the most popular web server in the world. It is used by more than half of all websites on the internet.
Apache has been around for a long time (since 1995) and has a large community of developers behind it, making it very stable and secure.
Apache runs on Linux, Unix and Windows operating systems. It’s also available on other platforms such as NetWare, OpenVMS and OS/2.
Ubuntu uses the Apache web server by default and enables it during installation. If you want to use another web server instead, you can install it through the package manager too:
$ sudo apt-get install nginx
To install Apache on Ubuntu, run the following command.
sudo apt-get install apache2
Once installed, Apache will be running on port 80. To verify this, go to your browser and type http://localhost in the address bar. You should be able to see “It works!” displayed on your screen.
Installing Apache Web Server in Ubuntu 20
Before we begin installing Apache web server on Ubuntu 20, let’s first make sure that our system meets all the requirements needed for running Apache:
Ubuntu 20 Desktop or Server Computer – You can install Ubuntu directly from their website or use our guide on installing Ubuntu Linux 19 LTS from USB drive if you don’t have access to a desktop computer with internet connection;
512MB RAM – This will work for most basic websites but if you plan on running more complex websites then you should upgrade your memory;
Apache is a free and open-source cross-platform web server. It is the most popular web server on the Internet and it runs on Linux and Windows.
In this tutorial we will learn how to configure Apache web server in Ubuntu.