It is not a snowman if it [[does not have a carrot for a nose]] You are right there, but you are not quite finished yet. There are some other pieces we need to complete your snowman, so let’s roll our sleeves and get to work.
Winter has always been a favorite time of year for kids and adults alike. Snow is cool to play with, and makes you feel like you’re in a winter wonderland. To build some excitement this winter, check out these tips on how kids can build a snowman with only a few simple supplies that you probably already have around the house!

How to build a snow man
The first step in building a snowman is to make sure you have enough snow to work with. You need to be able to roll the ball fairly easily, so if it’s too wet or fluffy, it will be hard to get started. If you’re going for something more realistic, it can be helpful to find some twigs or branches that are about the same size as your thumb.
Note: if you’re making a snowman out of straws or paper strips, skip this step.
Rolling Your Snowball
The next step is rolling your snowball around in your hands until it forms a nice round shape. This is the most important step because it gives your snowman its basic shape and lets you determine what kind of features he will have (a crooked nose or big ears). Remember that since this is a kid’s craft project, you don’t have to get too detailed with these details; they’re just there for decoration! Once you’ve rolled your snowball into a nice round shape, pack it down gently into place with one hand while holding onto the end of one arm with the other hand. You’ll need both hands free when we start shaping
Learn how to build a snowman step by step. Make your own snowman this winter with these instructions on how to make a snowman.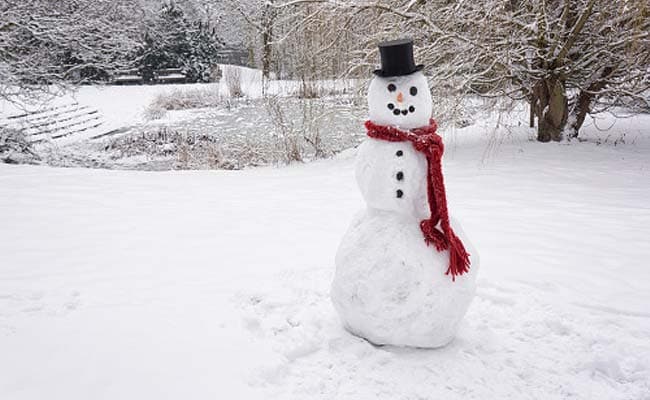
Here are the supplies you’ll need to make the perfect snowman:
A large pail of water (or snow)
Four large rocks for the base
Two sticks for arms and two sticks for legs (these will be cut short later, so don’t be afraid to use whatever is handy)
A large carrot for the nose
Two large black buttons for eyes
Two pieces of coal for the mouth
A snowman is a classic wintertime craft project. It’s fun to make, and it makes a great decoration for your yard or front porch. You can use any kind of snow to make a snowman, but the best type of snow is fluffy and light. Wet, heavy snow will make your snowman too heavy and watery.
Step 1: Gather Your Materials
For this project you need some basic materials:
Fluffy Snow
1. Start with a ball of snow.
2. Make two eyes out of coal, buttons or stones.
3. Stick two twigs into the bottom of the head for arms.
4. Make two triangles out of cardboard or paper for ears and glue them on top of the head.
5. Cut a carrot in half, and stick it in the snowman’s mouth to make the tongue.
6. Make a scarf out of yarn or string and glue it around the neck of your snowman!
It’s almost winter and the kids are ready to build a snowman. Here’s how you can help them out.
Step 1: Gather material
The most important element of building a snowman is having enough snow! You’ll need about 8-10 large snowball, but don’t make them too big or they won’t fit on top of each other. If you’re using real snowballs, look for ones that are rounded on both sides and not too big, so they don’t fall apart when you squeeze them together. If you’re using styrofoam balls (which are easier to find), make sure they’re all roughly the same size.
You’ll also need a carrot, which can be made from a piece of paper towel tube or carved out of foam board; green construction paper or pipe cleaner for the nose; buttons or stones for eyes; and twigs or sticks for arms if your snowman doesn’t have two real hands (or just use your hands if he does).
How to Build a Snowman Step by Step
1. Gather the supplies: A carrot, two sticks (2-3 feet long), a scarf, and two small balls of snow.
2. Place the carrot on top of the head and push it down into the snow about 2 inches.
3. Place one stick behind his head for support and then place another stick on top of the head for support. This will give him a neck!
4. To make his arms, take two small balls of snow and press them into each side of his body where you want his arms to be placed. Then place another 2 foot stick on top of each ball of snow so that they are standing up straight in front of your snowman’s body (one at a time).
How to Build a Snowman
You’ll need:
A big pile of snow, the biggest you can find.
A snow shovel. (If you’re feeling particularly ambitious, you might want to make your own.)
A carrot for the nose. (Don’t forget about your carrot!)
Two buttons for eyes. (They can be found at most craft stores.)
A scarf or hat for the neck. (Find something that suits your taste.)
The steps:
1. Make sure there is enough snow to build a snowman in your yard or neighborhood park. The bigger the pile of snow, the bigger your snowman will be! If you don’t have any snow where you live, go out and make some! You can do this by throwing handfuls of flour into the air as hard as you can and letting them fall onto each other on the ground. The wind will blow away all but a few flakes of powdery flour that will stick together to make a little snowball when they hit the ground again! Once you have enough flour in one place, roll it around with your hands until it starts to stick together into one big ball! Keep rolling until there are no more loose pieces sticking out from
Step 1
1. Get a bucket, shovel, and gloves.
2. Draw a circle on the ground where you want to build your snowman.
3. Use the shovel to dig out an area inside the circle that is about one foot deep and two feet wide.
4. Pile up the snow inside this area into a big mound so that it looks like a snowman head about two feet tall.
5. Use your bucket to fill in around this mound so that it’s level with the ground, leaving just enough room for his body (about three feet tall).
Step 1: Build a snowman, step by step
What you need:
One large ball of snow (the body)
Two medium-sized balls of snow (the head)
A carrot-shaped object for the nose
Two small balls of snow for the eyes
Two small pieces of coal for the mouth and buttons.
Instructions:
Make your snowman. The best way to do this is to roll a large ball of snow into a cylinder shape, then stick it on top of another larger cylinder shape that you’ve made from two medium-sized balls of snow. Put your carrot nose in between the two mounds; add coal eyes and buttons. Then give your little guy a big hug!
1. Build a body for the snowman by stacking three snowballs.
2. Use a twig or branch to make arms for the snowman, and stick them in place with a little snow.
3. Make a carrot nose by rolling a small ball of snow between your hands until it is flat on both sides and then molding it into the shape of a carrot.
4. Make two eyes by rolling two more balls of snow between your hands until they are flat on both sides and then molding them into circles with slightly flattened centers (it will look like two balls stuck together). Stick these on top of the carrot nose after smoothing them down with your fingers (or use pinecones if you don’t have any extra balls of snow).
5. Make lips by pressing two half-circles together and sticking them onto the bottom of the nose (they should be slightly smaller than the eyes).