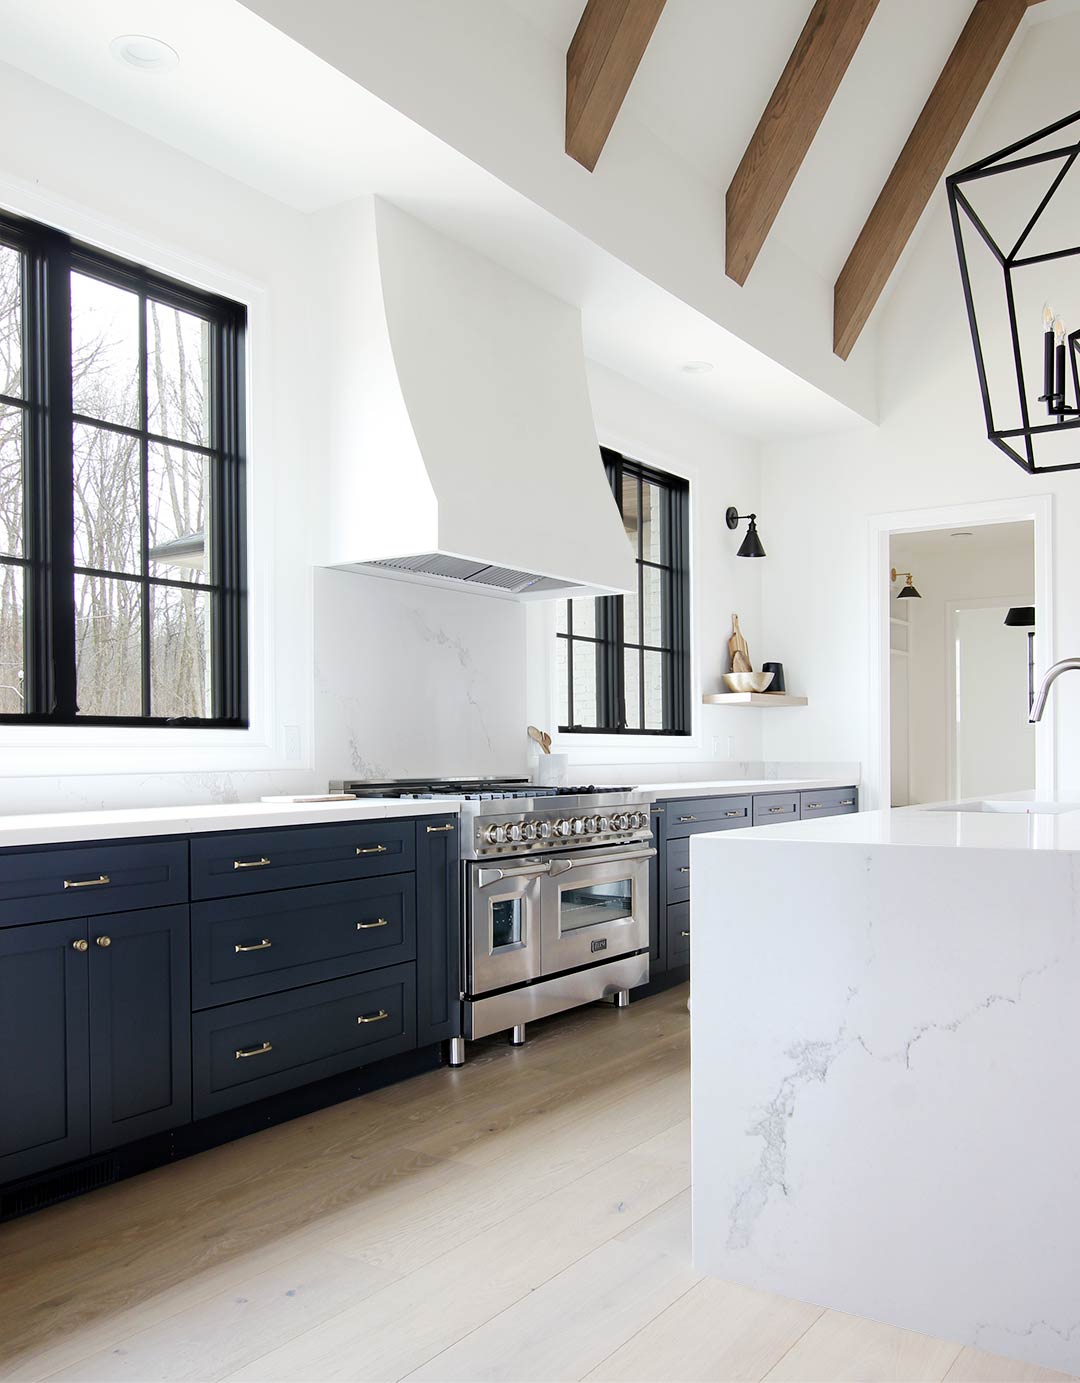
A range hood is widely used in several homes because it is considered to be an important feature of any kitchen. A range hood is a utilitarian ventilation device that covers a space for preparing, cooking and cleaning the stove. The purpose of a range hood is to keep gas and heat from escaping from the kitchen. The unique design and size suits the need of each home, depending on the amount of people living there, the number of incidents of cooking, and many other factors.
A range hood is a kitchen ventilation device designed to remove smoke, heat, fumes, odor, and moisture from the kitchen during cooking. It is also worth noting that cooking equipment release grease into the air at high temperature as well.

How to build a range hood
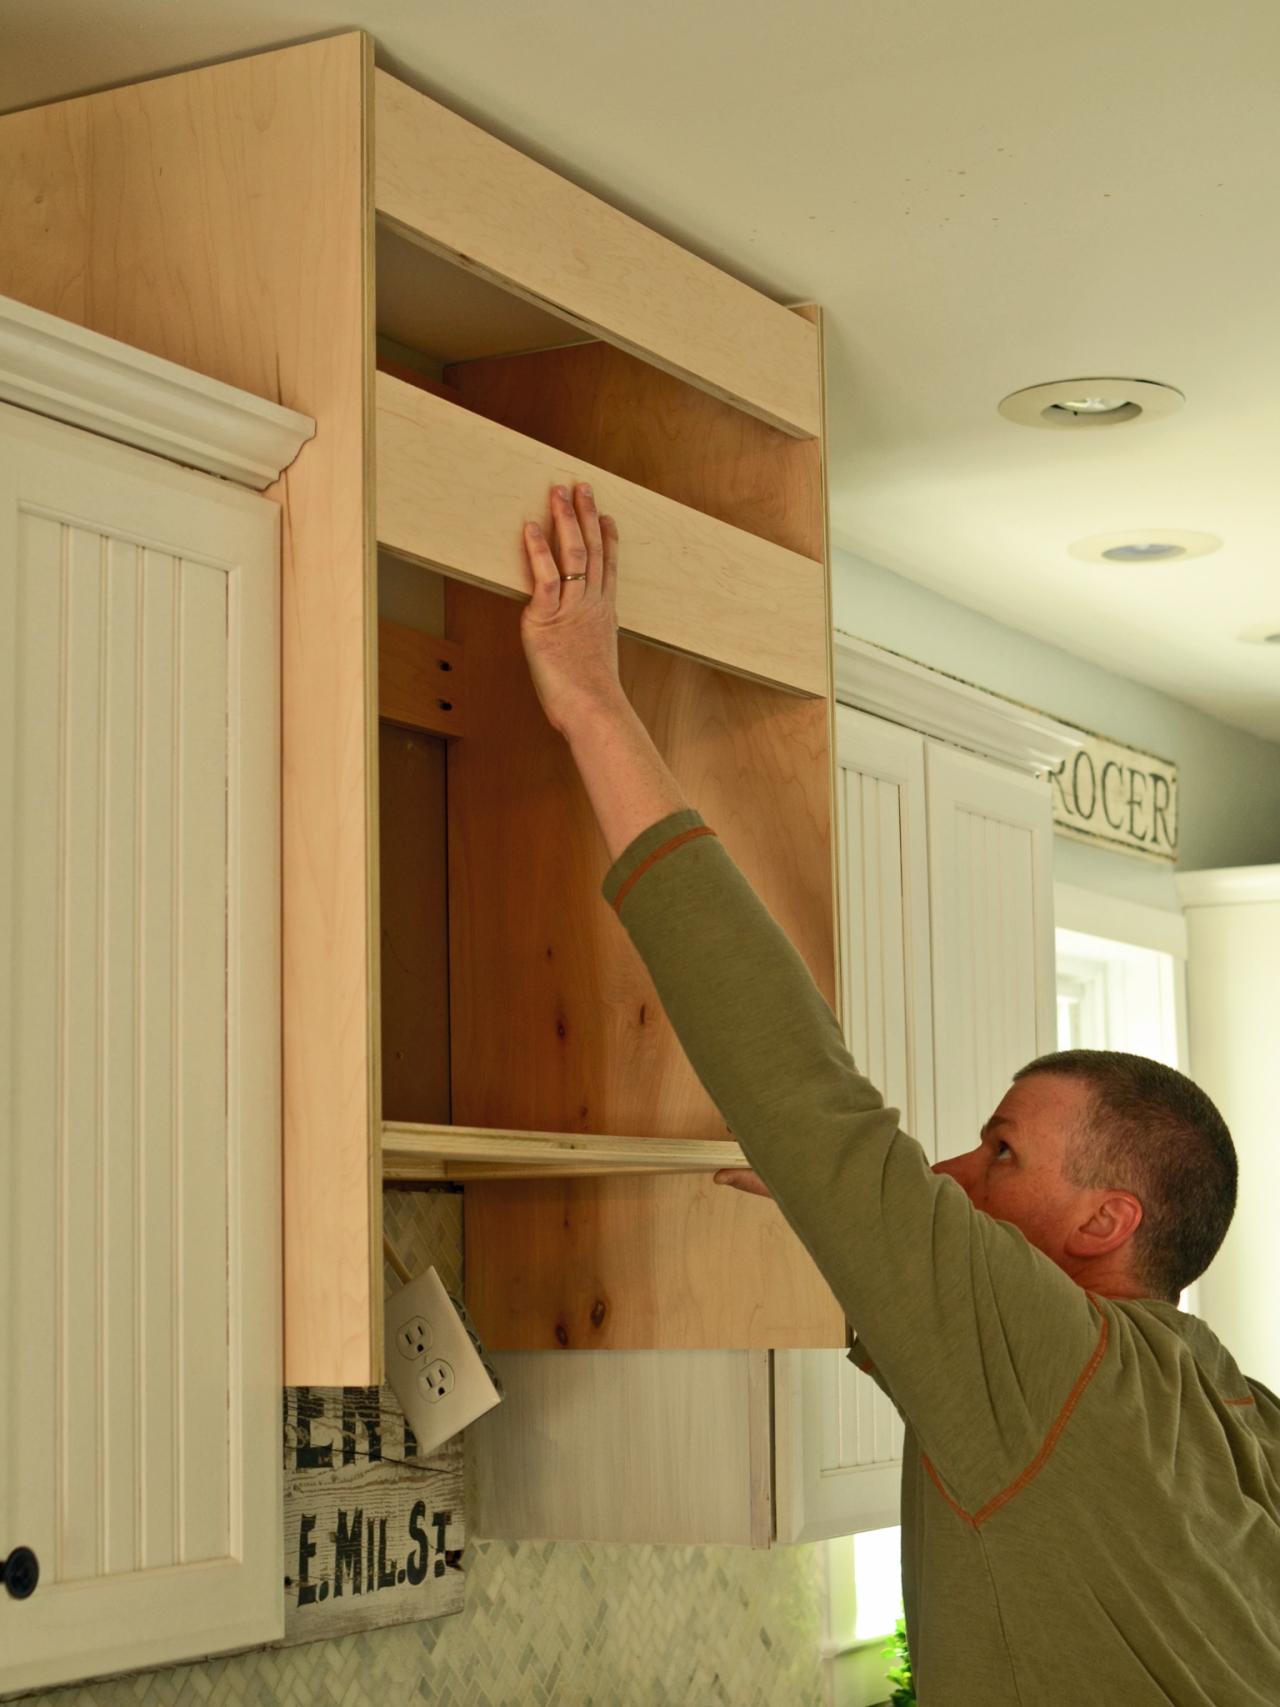
Building a range hood is not difficult. It just takes a little time and patience. The first step is to remove the existing range hood. This can be done by removing the screws that hold it in place. Once the old one is removed, clean up any dust or dirt left behind by vacuuming and wiping with a damp cloth.
Once your range hood has been taken down, you can begin constructing your new one using the following steps:
Step 1: Measure the dimensions of your range and make sure they will fit into the space you have available for it. If not, adjust your plans accordingly.
Step 2: Cut out pieces of plywood for each side of the cabinet box based on your measurements from Step 1 above. Make sure all of these sides are equal in size so that when they are put together, they will form a rectangular box shape with straight sides and no gaps between them where dirt or steam could get trapped inside if there were any gaps between them (which there shouldn’t be).
Step 3: Now, use wood screws or nails to assemble these pieces together into one solid unit so that they form one long rectangle box shape that measures at least 24 inches wide by 12 inches deep by 12 inches high (or whatever measurement suits.
how to build a range hood cover
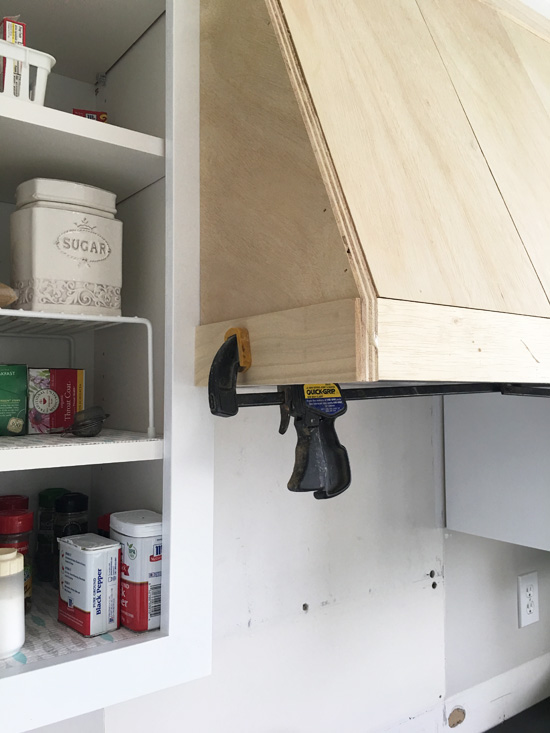
A range hood cover is an essential part of your kitchen. It helps to conceal the mechanism of your range hood and prevent heat from escaping into the room. There are many different types of covers available, but if you want to make one yourself for a custom look, there are several steps you can follow.
Step 1: Measure Your Range Hood
Measure the outside dimensions of your existing range hood, and then add 6 inches in height and width to each side. This will give you enough room to fit the frame and allow for insulation around it.
Step 2: Cut the Frame Pieces
Use 2×4 lumber or any other kind that is readily available at your local home improvement store; this will ensure that they are sturdy enough to support your new range hood cover. To make sure your new frame fits properly, build it according to the measurements taken earlier in Step 1. Attach each piece with nails or screws along its edges and trim away any extra material if necessary.
Step 3: Attach Insulation Board
Use fiberglass insulation board as a backing for your new range hood cover; it’s affordable and easy to find at most hardware stores or home improvement centers.
how to build a range hood box
If you are an experienced DIYer and are looking to add a bit of style and elegance to your kitchen, you might want to build your own range hood box. A range hood is an essential appliance in the kitchen that helps remove smoke and grease from the air. It can also help increase the life of your stove top by protecting it from grease splatter.
A range hood cover is a simple project that will add a touch of elegance and style to any kitchen. Building one yourself will save you money on costly repairs or replacement costs as well as give you a sense of accomplishment for completing such a project on your own!
The first step in building your own range hood cover is deciding what type of material you want to use for the exterior of your new project. Most people choose wood because it looks good, but it can also be prone to rotting if not properly treated with sealants or finishes. Metal is another popular choice because it’s durable and resists rusting, but it doesn’t look quite as good as wood. If cost is an issue, consider using aluminum or PVC pipe instead; these materials are much less expensive than either wood or metal but still retain some durability once they’re painted or stained with paint.
how to build a range hood surround
A range hood is a key component of any kitchen, and it can make a big difference in how well your kitchen functions. A range hood is used to pull smoke and grease from the stove or oven out of the home. It can help prevent fires, improve air quality, and make cooking easier by removing smoke from the stove top.
The most basic type of range hood is made from sheet metal. This type of range hood is easy to build yourself, but you may want to consider hiring a professional for larger jobs. If you decide to hire someone else, make sure that they have experience with this type of project and ask for past examples of their work if possible.
Things You Will Need:
1) Sheet metal (aluminum or steel)
2) Joist hangers (for heavier materials)
3) Hanging brackets (for lighter materials)
4) Screws and nails
DIY: How to Build a Range Hood
A range hood is a must-have for any home, but not all pre-fabricated models are created equal. Here’s how to build a custom range hood so you can get the perfect look and performance for your kitchen.
When it comes to cooking in the kitchen, one of the most essential elements is having good ventilation. Without it, your home will be filled with smoke, grease and odors that could make you sick over time. A range hood is an important tool for making sure this doesn’t happen.
There are many different designs available but if you want something unique or customized then you’ll want to build it yourself. The good news is that this isn’t difficult at all thanks to the following guide!