The woodworking plans provided in this article will show you how to build a pocket door frame from scratch. I’ll explain the tools and materials needed, and also give step by step instructions.The savings aren’t as great with this project as some of the others on here, but if you want to build a custom size door frame, and the options available in stock sizes don’t fit your needs, this is the way to go.
Building a pocket door frame is a great way to customize your shed or garage into a warm, comfortable family space. This video guide will show you how to build a pocket door frame from scratch.
How to build a pocket door frame from scratch
A pocket door is a door that slides into and out of a wall cavity. When the door is closed, it disappears into the wall, and there are no hinges or handles on the outside of the wall. The most common type of pocket door is one that opens into a hallway or small bedroom. It’s called a “pocket” door because it fits into an alcove in the wall to save space when not in use.
Pocket doors are usually installed in new construction, but they can also be retrofitted into existing homes. You can buy ready-made kits or build one from scratch.
Building Your Own Pocket Door Frame
To build your own pocket door frame, you’ll need a few tools and materials:
Pocket Door Frame Kit
Pocket Door Hardware
Wood Glue or Construction Adhesive (optional)
Most pocket doors are installed in new construction, but if you’re remodeling an existing room, you can install a pocket door. The most common type of pocket door is called a reveal-style frame and has two side rails that fit between flooring and the bottom of the wall. You can buy a kit or build your own from scratch.
Building a reveal-style frame from scratch requires some carpentry skills. You’ll need to cut wood blocks to fit inside the wall cavities at each end of the opening and fasten them to the framing with screws. The blocks serve as stops for the sides of the door when it closes. Next, cut plywood sides for each rail and fasten them to the blocks with screws or nails. Finally, build casings for each side rail so they cover up gaps between them and the wallboard or plaster around them when they are closed.
When installing a pocket door into an existing opening, always test out its operation before fully assembling it; this way you can make any necessary adjustments before permanently securing everything together
Pocket doors are a wonderful way to add space to your home and create a feeling of openness. There are many styles and sizes of sliding pocket doors available, but the most popular by far is the full-view style. This type of pocket door has no frame on either side and can be installed with standard hinges and hardware.
Pocket doors are ideal for rooms that have limited space because they can be removed if necessary. They can also be installed in existing walls, which means you don’t have to worry about making any cuts or adding additional holes in your walls.
Installing a Pocket Door Frame
When installing a pocket door frame, you will need to first build a wooden track for the door to slide into. This can be made using 2x4s or 2x6s depending on how wide you want your door to be. You should use pressure-treated wood for this project since it will be exposed to moisture from the outside environment. You can use tongue-and-groove pine boards for this project as well if you prefer an easier installation process over durability.
Once you have built your track, install it into the opening where you want your pocket door to go using hinges or track hangers (for metal tracks). Then mark where each
How to build a pocket door frame from scratch
Pocket doors can be used as an alternative to conventional swinging doors. They are often found in closets and pantries, but they can also be used as room dividers. A good example would be using the door to close off half of the living room from the rest of the home.
Building your own pocket door frame is not that difficult and it definitely saves you money. However, there are some things you need to keep in mind when you want to build one for yourself.
The first thing you need to do is measure the width of your door opening. There are different types of pocket door frames available in the market today, so make sure that you choose one that fits perfectly in your opening. If possible, try looking for a pre-hung kit that comes with all its parts already assembled and ready for installation. This will save you time and effort since all you have to do is install it into place without having any problems along the way.
When building your own custom frame, make sure that all its parts fit together properly so that they don’t fall apart while using them or even worse break down after some time has passed by
Pocket doors are a great way to add extra space to your home. They are also useful when the room you want to open up is small, such as a closet or bathroom. Installing a pocket door can be easier than you think. With the help of a few friends and some tools, you can install your own pocket door in just one weekend.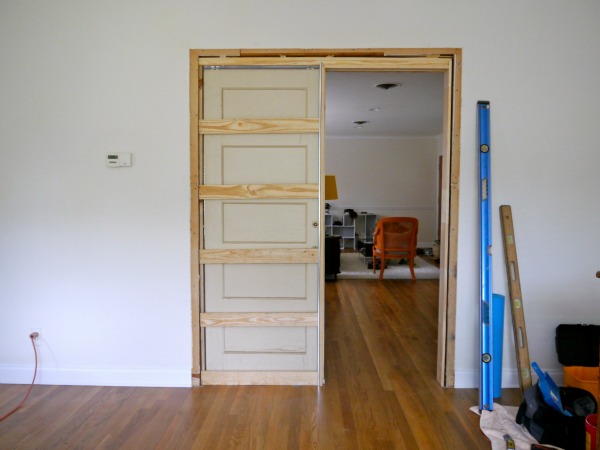
Use these instructions to help you build your own frame from scratch:
Cutting and measuring lumber for the frame
Assemble frame with pocket door hardware
Install your new pocket door!