Even though it’s been a few hours since Frankie left for college, I can still hear him singing in the shower. Somehow, you and I have procreated. The patio cover attached to house we built for him is for your enjoyment and my sanity.
Patio covers attached to the house are versatile—they allow you to use them no matter what the weather is doing. The outdoor patio cover provides protection against rain, snow, dirt and wind, withstanding summer heat, too. While the patio cover may look like a part of your house, there are several differences that help define it as an extension of your house.
How to build a patio cover attached to house
This guide will show you how to build a patio cover attached to the house. The patio roof is perfect for providing shade, but also for protecting your patio furniture and other items that you have stored out there.
If you have no idea how to build a patio cover, don’t worry. This article will teach you everything you need to know about building a patio roof at home.
The first step is to choose a suitable location for your patio roof. It’s important that this location is flat and level so that it will be possible to install the frame without any problems.
The next step is to decide on what type of material you want to use. If you’re looking for something that won’t cost too much money, then wood may be the best option for you. However, if you want something more durable and long-lasting then steel would be better suited for your needs.
Finally, when building a covered patio attached to your house make sure that there are no obstructions in the way such as trees or poles etc…
A patio cover is a roof that covers your patio. It can be an extension of your home or separate from it. A covered patio is an excellent way to expand the living space in your home and provide you with additional shade and protection from rain, wind and other elements. Patio covers come in various designs, sizes and materials.
There are many advantages to having a patio cover attached to the house. The most obvious advantage is that it provides extra space for you to use as an extension of your living area. You can also enjoy some privacy by using it as an enclosed patio that is separate from your main living area. If you have children at home, then having a covered patio means they can play outside without getting wet when it rains or snows.
The first step in building a patio cover attached to your house is determining whether you want it to be freestanding or part of the house itself. If you choose freestanding construction, then you need to decide whether you want it covered with vinyl or aluminum panels or some other material like wood planks or brickwork.
If you want it attached directly onto your house, then there are several ways this can be done:
A patio cover is a great addition to any home. It will provide you with a place to relax outside, even in the rain or snow. A patio cover is also a good way to increase the value of your home.
It is easier than you might think to build a patio cover attached to your house. There are many different types of patio covers, so you can choose the one that best fits your needs and budget.
To build your own patio cover, follow these steps:
1) Decide what type of patio cover will work best for you and your budget. There are many different styles and designs available today. You can choose from arched or straight tops, or even curved tops if you want something more unique.
2) Build the structure that will support your new patio cover. You may need professional help with this step if it is not something you have done before or if it involves complex engineering calculations.
3) Install any plumbing or electrical wiring needed for your new patio cover before adding roofing materials or finishing touches such as trim boards around windows and doors.
The patio cover is attached to the house. The cover is constructed from a combination of lumber and plywood. The dimensions are 20 feet wide by 12 feet deep. The roof overhang on all sides will be 8 feet. The roof pitch will be 6 inches for 12 feet, then 12 inches for 36 feet and finally 18 inches for the remaining length of 24 feet.
Build a Frame
The first step in building a patio cover is to build a frame that will support it. You can use pressure-treated lumber or cedar if you want to keep it simple, but I would recommend using structural insulated panels (SIPs) if you have access to them. These panels are made of foam insulation sandwiched between two layers of OSB (Oriented Strand Board) and come with their own clips that allow you to snap them together quickly without the need for screws or nails. They also provide better insulation than wood and last longer than most other building materials available today.
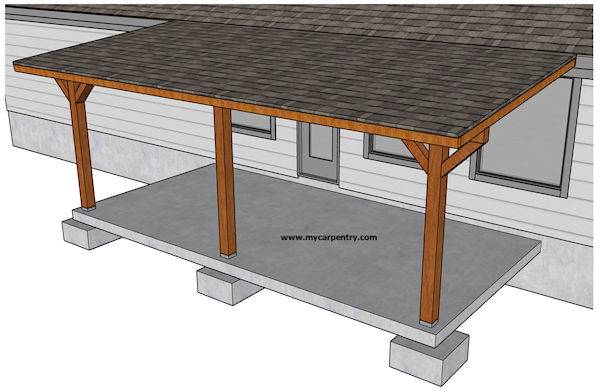
Put on the Roofing
Once you have your frame ready, attach your roofing material over top of it using screws or nails as needed (nails are preferable). Your finished product should look like this:
There are two main types of patio covers: attached and detached. Each has its own advantages and disadvantages, so it’s important to understand how each one works before deciding which type is right for you.
An attached patio cover is built directly on top of the house. This type of cover may or may not be part of the building envelope, depending on where it’s placed on the structure. If it’s attached to the roof, it should be properly insulated to prevent heat loss through the roof decking. If it’s attached to the exterior wall, make sure there’s enough space between the wall and cover to allow for ventilation.
A detached patio cover is not attached to the building at all — it sits off to one side or another, away from the structure itself. This is typically done with an open-air patio enclosure that offers little protection from wind and rain but looks great in any backyard setting!