Arbors are versatile additions to the garden. No matter the function, arbors should be built with the utmost attention to detail and craftsmanship. The build of your wooden arbor should take as long as it needs to ensure that it looks great and is stable for many years to come. It might be tempting to rush through it, but if you do, you’ll regret it later.
It’s hard to believe that it’s already mid-November, and Christmas is just around the corner. As your family and friends are getting in the spirit of the holiday season, what are you doing? How to build a simple wooden arbor? How to build a wooden arbour? Are you planning your strategy to bring a unique touch to this year’s festivities?

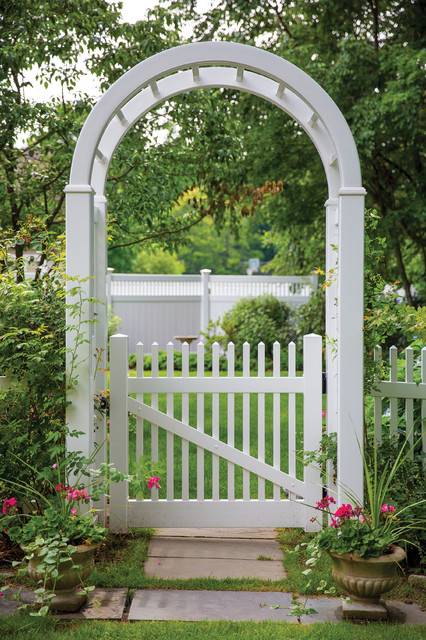
How to build a wooden arbor
A wooden arbor is a great addition to your garden. They offer shade, privacy and they can be used as a place to sit and relax. Here are some tips on how to build a simple arbor.
Materials needed:
1x4s or 2x2s (for the frame)
8ft long 1x4s or 2x2s (for the cross braces)
3/4 inch decking boards (for the decking)
If you want to build an arbor, you can use the following guide to help you proceed. The process of building an arbor is not difficult, but it requires some patience and a willingness to put in the time. You will need some basic tools and skill sets in order to build a wooden arbor that looks professional.
You can build your own wooden arbor with these simple steps:
1. Choose a location for your arbor. You need to find a place where there is enough space for it, with good drainage and sunlight. The soil should also be well-drained so that water does not pool on top of the ground near your arbor.
2. Lay out a plan for your arbor first before starting construction. Get yourself some paper and pencils and make a rough sketch of what you want your arbor to look like before starting construction work on site itself. This will help you visualize how much material you will need for each stage of building so that there are no surprises later on during construction work itself .
Arbors are a beautiful addition to any garden. They can create a special place for you to sit and relax, or they can be used as a decorative feature. The great thing about building an arbor is that it’s a project that you can do yourself!
We’ve put together this step-by-step guide to show you how to build a simple wooden arbor. You can use this guide for any sized arbor, but we built ours for a six foot wide opening. The size of your arbor will depend on the size of the opening in your fence or wall.
Materials needed for this project:
2x4s (quantity depends on size of your arbor)
1x4s (quantity depends on size of your arbor)
3/4″ plywood (quantity depends on size of your arbor)

A wooden arbor is a beautiful addition to any garden, but it can also be a functional one. An arbor can be used to support climbing vines or even as a pergola that provides shade.
An arbor can be built from many different types of wood, such as cedar or redwood. You can build one with just a few simple tools and some basic building skills. Here’s how:
Step 1: Choose your location for the arbor and measure out the area for it. Mark where you want the top of the arbor to be so it will be level with your eye when you look up at it from ground level. Make sure there is enough room around this area so that you will be able to work comfortably while building it.
Step 2: Dig out an area around where you want your arbor built so that its base will sit about 12 inches below ground level. This will make digging easier later on when you install your posts into concrete footings.
Build an arbor for your garden or backyard. Make it a focal point or use it as an entranceway. It’s easy to build and you can customize it with different wood types and stain colors.
A simple arbor is a great addition to any garden or landscape design. Whether you want to make a statement, add visual interest, or simply provide shade, this project will help you create just the right look for your space.
How to build a simple wooden arbor
A wooden arbor is a great addition to your yard, garden or patio. A wooden arbor is perfect for adding shade and privacy to your outdoor space. An arbor can also be used as a focal point in your yard. Some people even use them as entryways into their gardens or small parks. These structures are also known as trellises, pergolas and gazebos.
A wooden arbor can be built with very little carpentry experience or knowledge. You will need some basic tools like a hammer and saw, along with some nails and screws to complete the project. The main things you need to know are how to measure and cut wood properly, along with how to assemble the pieces together properly so that they fit together tightly without any gaps between them when assembled properly.
If you would like to learn how to build a simple arbor or trellis then read on below!
How to Build a Simple Wooden Arbor
This arbor is a great addition to any yard or garden. It’s simple enough for beginners, but looks great with flowers and vines. The arbor can be built in just a few hours, and the materials are easily available at any home center or lumberyard.
This tutorial shows you how to build a simple wooden arbor to decorate your garden or patio. It is easy to build and requires only basic tools.
/cdn.vox-cdn.com/uploads/chorus_asset/file/19496316/arched_yard_arbor_x.jpg)
In this project, I am going to show you how to build a simple wooden arbor. This type of structure can be used in many different ways and is easy to build. I am going to show you how I built mine, so that you can get ideas on how to make yours look different or add more details.
I have always wanted to have some kind of outdoor structure like this in my backyard, but never really found the right time or place for it until now. Now that we have our own little garden area in the backyard, it seemed like the perfect opportunity to finally make something like this.
It’s not very expensive either! I spent about $50 on all of my materials, some of which were recycled from other projects around the house (like leftover 2x4s from building my deck). So if you are looking for an inexpensive project that will give your yard some character, then read on!
Arbors are perfect for adding landscaping to your backyard. They can be used to grow vines or as a simple walkway through your garden. They can be made out of wood or stone, but they are generally quite expensive if you purchase them at a garden center or home improvement store. You can make your own arbor with the right materials and a little bit of time.
Step 1
Measure the length and width of the area where you want to put the arbor. Measure the height of your arbor too, if you are going to have one that is tall enough for people to walk through. Different types of arbors require different measurements, but this will give you an idea of how much space your project will take up and whether it will fit in your yard or not.
A trellis is a structure of wood or metal used to support climbing plants. Trellises are often used as decorative features and can be freestanding or attached to a wall or fence. This article shows how to build a simple wooden arbor.
If you want to build a trellis for climbing roses, for example, follow these steps:
Mark out the shape and size of the arbor on the ground with stakes and string. Use stakes made of bamboo or plastic so they don’t rot in the ground.
Dig holes around each stake, making sure they’re deep enough so they won’t move when you pound them into place.
Fill each hole with a bag of cement (or use concrete), then tamp it down firmly with your foot until it’s level with the surface of the ground.