how to build a cabinet with doors how to build a small storage cabinet shed how to build a storage shed how to build an outdoor built in cabinet how to build a basement bar how to built an entertainment center
It gives me immense pleasure to share with you this detailed tutorial on how to build a storage cabinet. This article will be helpful for those who want to design their own garden storage cabinet.

How to build a storage cabinet with doors
How to Build a Small Storage Cabinet
Building a small storage cabinet is an easy weekend project. Here’s how to do it.
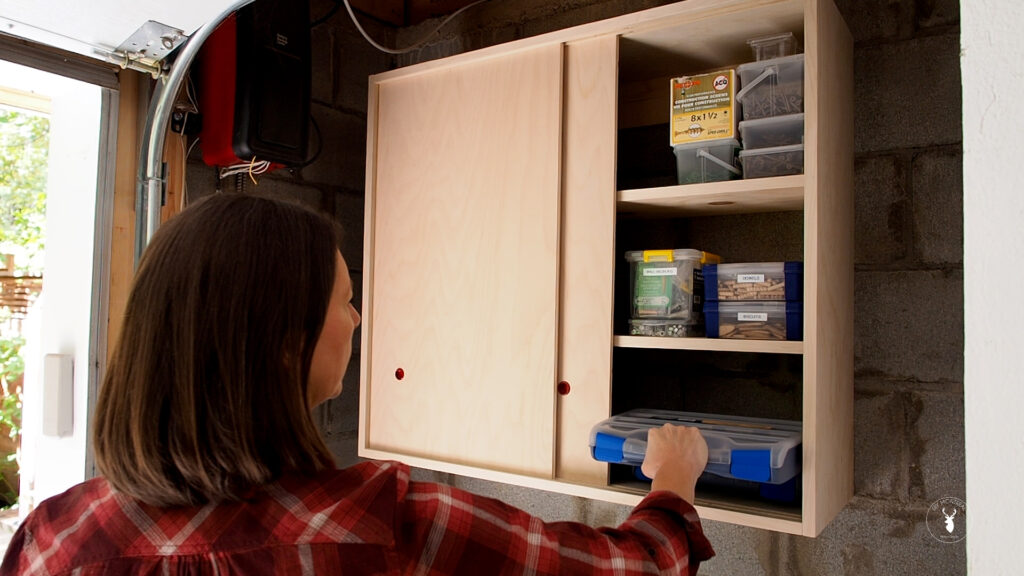
Step 1: Plan the size and shape of your storage cabinet. The plans for this cabinet are for a 2-ft.-wide by 3-ft.-tall unit; you can easily modify them to fit your space.
Step 2: Build up the sides of the cabinet with two sheets of plywood on the top and bottom, and one sheet on each side panel. Use pocket screws or nails to attach each piece at its corners and then glue and screw them together.
Step 3: Cut out the doors from 1/2-in.-thick plywood using a jigsaw or circular saw with a fine blade (photo 1). Attach hinges to the back of each door so they open in opposite directions, then screw them into place on drawer fronts that you’ve cut from 3/4-in.-thick plywood (photo 2). Apply wood filler over any nail holes or gaps in joints before painting or staining all surfaces of your storage cabinet with an exterior oil-based primer/sealer followed by an exterior latex paint (photo 3).
How to Build a Storage Cabinet With Doors
By: DIY Ready
If you have a lot of stuff that you want to put away, but don’t want to spend a lot of money, this is the tutorial for you. You can make this storage cabinet in less than an hour and it will be ready to use in no time at all. This storage cabinet with doors is small, but it has enough space for all of your smaller items. The beauty of this design is that it can be placed anywhere in your home and it will look great. You won’t need any special tools or equipment to build this project either; just some basic tools from your toolbox and some wood from the hardware store. This project is ideal for beginners who are looking to learn how to build their own furniture without breaking the bank. When you are finished with this project, you will have a unique piece of furniture that will add character and functionality to any room in your home.
Materials Needed:
Four Pieces of Wood (Each Piece Should Be 11 x 22 Inches)
Wood Glue
Sandpaper (150 Grit)
Paint (If Desired)
How to Build a Storage Cabinet
A storage cabinet is a great way to keep your home organized. You can build a storage cabinet from scratch or purchase one pre-made. If you’re building one yourself, you’ll need to get your hands on some wood and tools before you begin.
Step 1: Measure Your Space
The first thing you want to do is measure the space where you want the storage cabinet to go. If the space is too small for it, then it won’t fit. The next step is deciding how tall and wide you want it to be. Make sure that there is enough room for items such as pots and pans inside if possible.
Step 2: Cut Wood Pieces
You will need two pieces of wood for each side of the cabinet plus two pieces for each door panel (if applicable). Cut them all with a saw or use a power tool such as a table saw so that they are all identical in size with no gaps between them when joined together again later on in Step 6 below.
Step 3: Sand All Surfaces Smoothly
After cutting all of the wood pieces in Step 2 above, now sand off any rough edges or splinters so that everything looks smooth instead of sharp and possibly dangerous when touching them during use
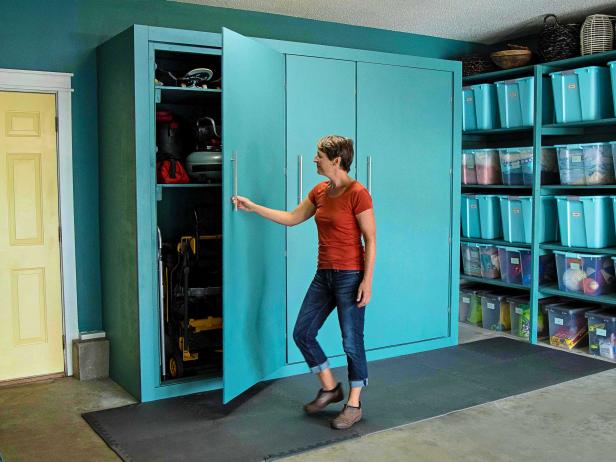
A storage cabinet is a great way to organize your garage or shed. The best way to build one is with plywood and a few basic tools. Here’s how to build a storage cabinet with doors that you can customize to fit your space.
1. Cut the plywood
Cut the plywood into two pieces for the sides (each 2 feet by 8 feet long) and one piece for the top (2 feet by 6 feet). You’ll want to cut the sides so they are just slightly longer than the depth of your base cabinet. Cut the top piece so that it’s about 1/4 inch less than the combined width of both sides. Then cut out some small triangles from each corner of all three pieces with a jigsaw or circular saw so that they fit together flush when assembled.
2. Assemble the base cabinet frame
The base cabinet frame is made up of two sides, two ends, and two tops — all joined together with pocket screws and glue. Lay one side flat on your work surface and attach it to an end panel using pocket screws along the bottom edge only (use at least four screws per joint). Attach another end panel on top of this first section using pocket screws along
These easy-to-construct storage cabinets are perfect for a variety of projects.
The following instructions will lead you through the process of building a simple wooden storage cabinet with doors. This project is intended for the beginner woodworker, but don’t be afraid to try your hand at it if you have some experience with other types of woodworking projects. It’s an excellent way to get more comfortable with using power tools and working with wood. In this case, you’ll be using pocket screws to attach the panels and door frames together, rather than traditional woodworking joints like mortise-and-tenon or dovetails. The pocket hole jig shown here makes it easy to drill accurate holes for the screws that hold everything together, but if you don’t have one, don’t worry — we’ll show you how to make one from scrap pieces of 2×4 lumber in step 3 below.
2 sheets 3/4″-thick plywood*
Pocket hole jig (or 1/2″ dowel) with drill bit*
Wood glue*
Sandpaper*
How to Build a Small Storage Cabinet
If you’re in the market for a small storage cabinet, here’s how to build one.
Step 1: Assemble the Frame
Start by assembling the frame of your cabinet. Cut two 2x4s to 39 inches long and two more 2x4s to 33 inches long. Attach them together with 3-inch deck screws (Image 1). Drill pilot holes first, then countersink the holes so the heads won’t show on the outside of the cabinet. Add another piece of plywood or particle board (1/2-inch) on top of this frame and attach it as well (Image 2). Make sure everything is square before moving on to the next step!
Step 2: Cut Your Doors and Top Panel
Measure out what size doors you want for your outdoor storage cabinet, then cut them out using a jigsaw or circular saw (Image 3). Sand down rough edges and round over any corners that could cut into hands or fingers when opening doors. Once you’ve got all four sides cut, use a router or sander to round over all four edges on each door (Image 4). This will make them smooth enough so they don’t snag clothing or scratch skin when opened.
When you’re building an outdoor storage cabinet, it’s important to keep in mind that the materials you use will be exposed to the elements.
The best option for your outdoor storage cabinet is cedar or redwood. Both of these woods are extremely durable and are resistant to insects and rot.
To build a small storage cabinet, you’ll need:
Two 2x4s cut into two pieces each (you can use scrap lumber)
Four 2x4s cut into four pieces each (you can use scrap lumber)
A storage cabinet is a great addition to any home. They can be used for many purposes, such as holding books, toys or kitchen items. You can also use them for storage in the garage or on the patio. By building your own storage cabinet, you can customize it to fit your needs and materials are inexpensive.
Step 1
Measure the dimensions of your storage area and determine how much space you need for each shelf. Plan to have at least 12 inches of space between each shelf so that items do not fall off during transport. Use this dimension as an overall width for your cabinet.
Step 2
Use the same measurement to determine how deep the cabinet should be and add one-half inch to each side of the depth measurement. This will allow you enough room to install hinges on the front doors so that they can open easily over rough terrain if necessary. Also include room for any shelves inside of your cabinet and add another two inches to each side of those measurements so that they are strong enough to hold heavy objects without bending under pressure. For example, if you want three shelves inside of your cabinet, use 14 inches as an overall height measurement including extra room on both sides for hinges and other hardware needed in construction
How to Build an Outdoor Storage Cabinet
1. Determine how big you want your cabinet to be, and mark it out on the wall. You can use a tape measure and a pencil, or if you want something more precise, use a speed square (or another tool) to mark out the lines on the wall.
2. Get your materials together. You’ll need plywood for the sides of the cabinet, 1x4s for the shelves, 2x4s for the top and bottom frames, corner brackets to hold all of this together and plywood sheets for the doors.
3. Cut your plywood sheets into smaller pieces that will fit inside your cabinet frame. The easiest way to do this is with a circular saw fitted with a straightedge guide or an angle guide if you want a 45-degree cut (this will make it easier to assemble). If you don’t have access to either of those tools, measure carefully so that each piece fits within the frame without hanging over any edges or being too small to fit in altogether (if there are gaps between pieces).
4. Cut all of your other pieces as well — two sides per panel plus two shelves per panel (plus one extra side panel since you’ll need
A storage cabinet is a great addition to any home, especially if you have a lot of stuff to store. You can buy them ready-made at many stores, but it’s much more satisfying to build your own. The skills you learn from building a cabinet will also come in handy when you want to make other furniture items around your house.
A basic storage cabinet has two doors and three drawers that are about 18 inches wide by 24 inches high and 12 inches deep. Here’s how to build one yourself:
1. Cut the sides, top and bottom from 3/4-inch plywood using a circular or table saw (or use pre-cut pieces). The corners should be mitered 45 degrees on each piece so they fit together nicely at the corner joints
2. Attach the sides to the top with screws through predrilled holes in the top edge of each side (use wood glue first)
3. Attach the remaining four sides to form a box with right angles on all corners
4. Cut out an opening for the front door using a jigsaw or saber saw; make sure it’s big enough so you can open it easily without hitting your knees against the sides of