Building a bench with a lid is fairly similar to building any bench. You need two slats, two supports and one back piece of wood. This can be built by hand or with power tools. It is best to use wood that is at least ½” thick. The side pieces and the other long piece will be called the center rails or stiles in this project.
Your days of hauling in and out storage boxes are over. Your search for the shop storage bench is over. This outdoor bench is outdoor storage at its finest./cdn.vox-cdn.com/uploads/chorus_asset/file/19496699/storage_bench_overview1_x.jpg "How to build a storage bench with a hinged top")
How to build a storage bench with a hinged top
Storage benches are perfect for adding extra seating to your deck or patio. This project will show you how to build a storage bench with lid that can be used for storing items at the end of the day.
Step 1: Cut the Wood
Cut all of the wood pieces using a circular saw or jigsaw. There are two sizes of boards: The long sides are cut from 2x4s, and the shorter sides are cut from 2x2s. The width of all of these pieces will be 5 inches (127 mm).
Step 2: Assemble the Legs
Lay out two pairs of legs on your work surface, then place one pair on top of the other so they’re parallel to each other. Attach them by screwing them together through their center holes using 3-inch wood screws.[2] Repeat this step until all four pairs are connected together in this way. If you want to make sure everything is square, use a framing square.[3]
After you’ve assembled all four pairs of legs, flip them over so they’re upside down and attach a 1×2 top rail between each pair using 3-inch wood screws.[4]

You can build a storage bench with lid to use as a place to sit or as a place to store things. This outdoor storage bench is made from cedar and has a hinged lid.
If you have an outdoor setting that needs some extra seating, you can make an outdoor storage bench that doubles as a place to sit and store things. This outdoor storage bench has a hinged top and is made from cedar planks.
The construction of this outdoor storage bench uses pocket screws for the joints, making it easy for any skill level to make it.
Materials:
1/2″ plywood for seat and back
4 – 1×4 x 10′ cedar boards (for legs)
1 – 2×6 x 8′ cedar board (for seat frame)
2 – 1×4 x 8′ cedar boards (for seat frame)
8 – 1-1/2″ pocket hole screws (to attach legs)
How to Build a Storage Bench with Lid: 14 Steps (with Pictures)
This tutorial is great for those who want to make a storage bench for their backyard but don’t want to spend a lot of money. You’ll need basic tools, such as a saw, hammer and nails.
You can use any kind of wood you like for this project, but I recommend using pressure-treated lumber if you’re building it outdoors. It will last longer outdoors in the elements.
Step 1: Measure and mark the sides of your box on the plywood sheet. For this project, we used two pieces of plywood measuring 4 feet by 2 feet each. The bottom piece was cut into four equal pieces that measured 4 feet by 2 feet by 1 inch each, and the top piece was cut into two equal pieces that measured 4 feet by 2 feet by 1 inch each.
Step 2: Cut out all four sides using your circular saw or jigsaw with a blade designed for cutting plywood (such as an oscillating multi-tool). Also cut out two small notches out from both ends of each side piece so when they’re assembled into a box there’s a small gap between them where you can fit your fingers in and lift up
This is a simple step by step tutorial for building an outdoor storage bench with lid. It can be used for storing garden tools, toys, cushions, and other items. The bench features a hinged lid that makes it easy to access the contents of your storage unit.
The design of this bench allows you to customize its size and shape, so it can fit into any corner of your garden or backyard area.
Materials needed:
4 x 2-inch x 8-foot wood planks (for the legs)
6 x 2-inch x 8-foot wood planks (for the sides)
1 x 4-inch x 8-foot plywood sheet (for the top)
2 x 4-inch x 8-foot plywood sheet (for the bottom)
This outdoor storage bench is made from cedar and features a hinged lid that makes it easy to access your tools, gloves and other gear. It’s also a great way to take care of those garden tools that tend to get left in the rain or snow.
The project is simple enough for any beginner and will look great in any yard. The key to the design is the use of pocket screws instead of traditional joinery.
This bench has a beautiful finish that will stand up to weathering and abuse. The plan includes cutting diagrams for two sizes of bench; one with a single seat and an optional second seat on the opposite end. Both benches have lids that hinge open at the front to expose storage space beneath them.
A storage bench is a great way to add storage space to your patio or porch. It can also be used as extra seating when you have guests over. Follow these steps to build an outdoor storage bench with lid that will last for years.
Step 1: Mark the Seat Slats
Measure the width of the seat and mark it on all four sides of each slat. The distance between each mark should be equal, but not more than 5/8″. Cut the slats to length using a circular saw with a guide rail or table saw.
Step 2: Assemble the Seat Frame
Lay out two parallel lines of screws along both long edges of one end piece and one short edge. Place one line ½” from each edge and another line ¾” from each edge, leaving ¼” between them. Attach two pieces together using two screws on each side and repeat this process until all four pieces are connected together in a frame shape (Image 1).
How to build an outdoor storage bench
Build a storage bench with a lid. This DIY outdoor bench is easy to make, and it will look great in your backyard or patio. The lid keeps rain, snow and debris off your items that you store there.
You can build this bench from any type of wood you like, but we used cedar because it’s naturally rot resistant and has a nice smell.
This article was adapted from “Build the Perfect Patio Bench” by Christopher Schwarz, published in FWW #207 (April/May 2006).
How to build an outdoor storage bench
1. Cut the wood and assemble the box.
2. Fasten the lid to the bench using hinges.
3. Attach casters to the bottom of the bench if desired.
Building a storage bench is a great way to add extra seating and storage space to your patio or deck. The construction process is fairly simple, but the design and materials can be customized depending on your needs. The best part about building your own outdoor storage bench is that you can personalize it with colors, designs and materials that fit your style.
Build a Storage Bench from Found Wood
The first step in building an outdoor storage bench is choosing what type of wood you want for the frame. You can use any type of lumber for this project, but some woods are better than others when it comes to outdoor conditions. Cedar or redwood are good choices because they are naturally rot-resistant and weather well outdoors. If you don’t have access to these types of woods, you can use pressure-treated pine lumber instead. Just make sure that all joints are sealed with waterproof glue before applying any stain or sealant so that moisture doesn’t get in through the joints and cause problems later on down the road.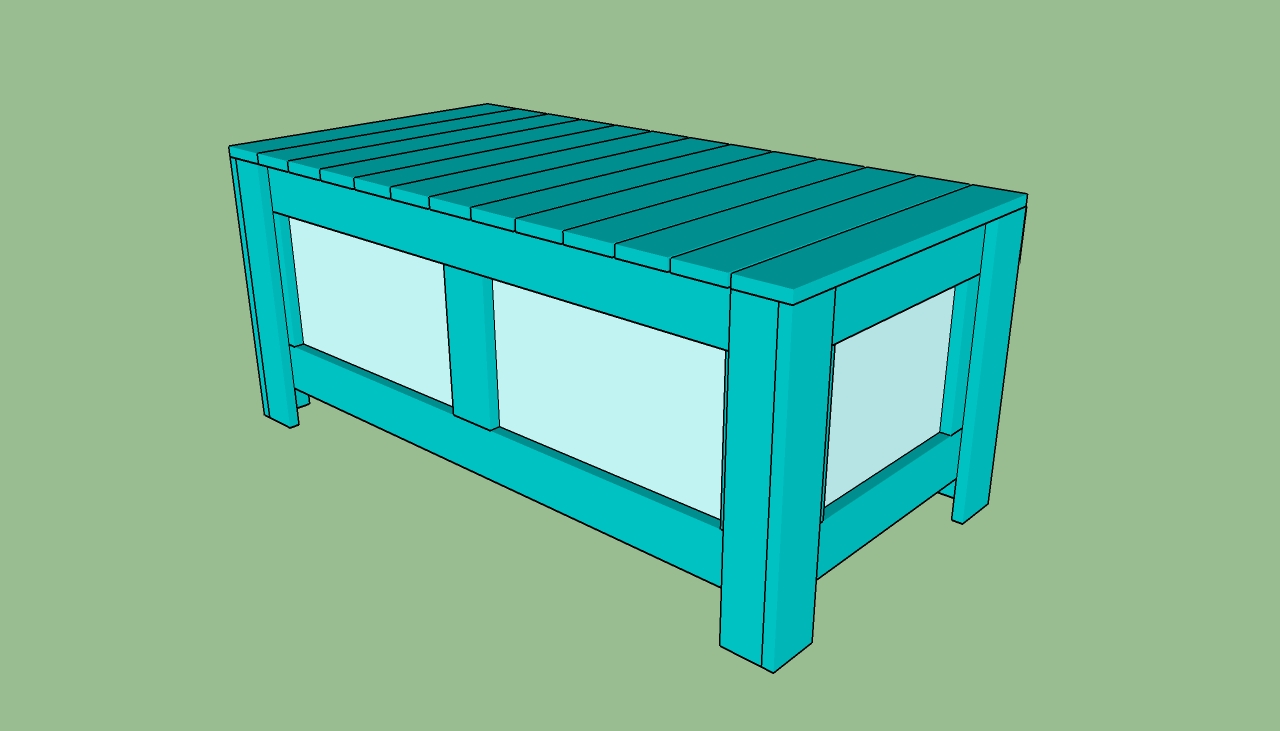
Once you’ve chosen your materials, cut them into pieces according to the diagram above (or follow our measurement guide below). Use nails or screws to secure all parts together tightly before moving on
This outdoor storage bench is the perfect addition to any patio or porch. It features a durable, weather-resistant cedar top and base, and a handy hinged lid for extra storage.
The lid can be opened from either side for easy access.
The design of this bench is simple and functional — as you can see in the plans below.
You can build this project in just a few hours using basic tools and materials that are readily available at your local home center or lumberyard.
This bench is designed to last for years — so you won’t have to worry about repairs or maintenance.