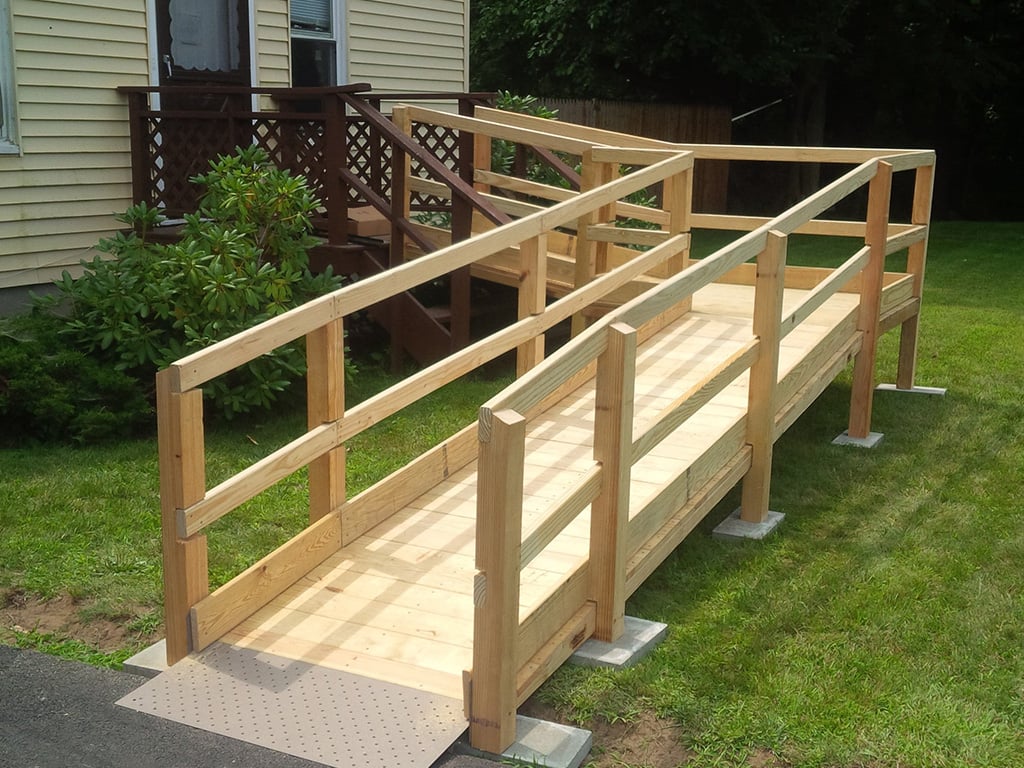
How to build a small wheelchair ramp. Building a wheelchair ramp for a home is not hard at all. It’s just important to make sure it is safe and serves its purpose. Building a simple or portable wheelchair ramp is pretty easy and can be cheaper than you might think.
A wheelchair ramp can provide access to your house, a level spot for your wheelchair, and help make it possible for you to enter and exit your home as easily as possible. Building a wheelchair ramp kit can be both rewarding and expensive.
How to build a small wheelchair ramp
Building a wheelchair ramp is a great way to help people with disabilities and other mobility issues get around. In addition, ramps are useful for pets, children and others in your family who need assistance getting up or down stairs. Building a ramp is not difficult, but it does require some skill with tools.
Materials needed:
Two pieces of 2×4 lumber measuring about 10 feet long; one piece of 2×4 lumber measuring about 5 feet long; two pieces of 2×4 lumber measuring about 7 feet 6 inches long; eight screws about 1 1/2 inches long; four screws about 3 1/2 inches long; four hinges (these will be used on the landing side); two T-hinges (these will be used on the wall side); two door stoppers (for use as stops at the bottom of the ramp); five metal brackets (for use as stops at the top of the ramp); four metal brackets (for use as stops at each end of the ramp).
A wheelchair ramp is a structure that allows people who use wheelchairs to access areas from which they would otherwise be excluded. A wheelchair ramp can be permanent or temporary, with the latter being more common.
Wheelchair ramps are often built by people who have limited access themselves, but there are also companies that specialize in building ramps and selling them. The type of ramp you need depends on your personal needs and preferences, as well as the type of terrain you will be using it on.
A portable wheelchair ramp is a great option for those who need to move their ramps frequently or who live in an area where snow and ice may be present during certain seasons. If you’re looking for something more permanent, concrete is usually the best choice because it lasts longer than other materials like wood and metal.
Building a wheelchair ramp can be a daunting task for the DIYer. But if you know where to start and what materials to use, it’s not as difficult as it might seem. The best thing about building your own wheelchair ramp is that it gives you tons of flexibility when it comes to size and design. You can make one that fits into the space you have available or build one that meets your needs perfectly.
Ramps come in many different sizes and styles, but they all have one thing in common: they are made with wood, aluminum or other materials. Building a wheelchair ramp yourself means you will probably be using wood or aluminum because these materials are easy to work with and inexpensive compared with other options like concrete or steel.
Wooden ramps are lightweight and easy to move around if necessary, but they tend to get slippery when wet or icy. Aluminum ramps are more expensive than wooden ramps but last longer and are easier to clean. They also provide excellent traction even when wet or icy because there is no texture on the top surface of an aluminum ramp that would otherwise cause trouble for wheelchairs rolling over them
If you need to build a wheelchair ramp for your home, there are a few things you should consider before starting. You will want to make sure that the ramp is safe and secure, that it meets ADA requirements and that it can support the weight of your wheelchair and its occupant.
Building a wheelchair ramp is not as hard as it might seem. With a few simple tools and materials, you can have a ramp built in just a few hours. Here are some tips to help you get started:
Choose the right location for your ramp. Make sure that you choose an area that is level with no obstacles such as steps or rocks in the way. Also, check with local building codes before starting construction so that you can be sure that your project meets ADA standards and all necessary regulations.
Measure out where each piece of wood will go so that everything will fit together correctly once it has been installed. Once you have determined how long each piece is going to be, mark off where each piece goes on the ground so that there is no confusion when installing them later on.
Build up from one side of the driveway or sidewalk until it reaches the other side where it meets up with another set of boards leading up from another part of your property or house (this
If you are looking for a quick and easy way to build a wheelchair ramp, this guide will show you how. You can build a wheelchair ramp for about $100 in materials.
The most important thing to keep in mind when building your own wheelchair ramp is safety. Failure to properly construct or install your ramp could lead to injury or death.
Building a ramp is not difficult if you follow these steps:
1) Get the measurements for the slope of your driveway or walkway by measuring from one end of the incline to the other. The slope should be no more than 1:12 (5 percent). If it’s too steep, then someone who uses a wheelchair won’t be able to roll up it without assistance.
2) Purchase two pieces of pressure-treated lumber that are long enough and wide enough to accommodate the width of your driveway or walkway and any other obstructions that might be present, such as trees or bushes. Pressure-treated wood lasts longer than regular wood and resists rot better than untreated wood does
One of the most common questions we get from our readers is how to build a portable wheelchair ramp. The good news is that it’s not as hard as you might think!
Here are some tips for building a portable wheelchair ramp:
Buy wood – Use 2×4 or 2×6 lumber to build the frame. Make sure you use pressure treated wood so it lasts longer, especially if you live in an area where it rains a lot. Pressure treated wood is more expensive than regular lumber, but it will last longer and will not rot like untreated lumber will. If you want to save money, use regular lumber and cover it with an outdoor paint or stain that is made for decks and fences.
Measure the distance – Measure from your vehicle door or trunk to where your wheelchair needs to go (this should be at least 4ft). Add about 6 inches onto this measurement for safety reasons (so if your door is 32 inches wide, make sure your ramp is 38 inches wide). Build two sides at this length and then attach them together with hinges on one end so that they can fold up when not in use. Make sure each side is no less than 36 inches long (or else they may be too short).
The first thing you need to do is figure out how much space you will need for your portable ramp. The minimum width of the ramp should be at least 36 inches, and it should be at least 15 inches deep. The maximum length for the ramp is limited by the length of your wheelchair or scooter. The maximum height of the ramp should be at least 8 inches above the ground where you are building it.
The next step in building your portable ramp is to make sure that you have all of your supplies ready before you start construction. You will need a saw or a hammer if you plan on cutting wood yourself, but if not then you can buy pieces that are already cut from local hardware stores or lumber yards. You will also need wood screws and nails to attach everything together properly. If you have any tools that are electric then they are very useful in this situation because they will make things go faster and easier than using just hand tools alone!
How to Build a Portable Ramp
A portable ramp is a great way to provide access to those in wheelchairs, on crutches or with walkers. Ramps are also beneficial for those with mobility issues who are unable to navigate stairs. If you have a space that needs a portable ramp and don’t want to spend money on one, this article will show you how to build one yourself.
Materials
You’ll need the following materials:
Two 2x12s (24 feet) – These will form the sides of the ramp. The length of these boards will determine how long your ramp is and how steep it is. The longer they are, the steeper your ramp will be. You can choose any width you want but it should be at least 4 inches wider than the wheel or walker you’re using it for. You should also choose wood that’s as straight as possible so there aren’t any bumps or dips along its length. If you’re building a permanent ramp, use pressure-treated wood if possible since it’s more resistant to rot and insect damage than pine or fir. For temporary ramps, regular pine or fir will work just fine since they’ll only last a few years before needing replacement anyway.
4×4 post (8 feet)
A portable ramp is a great tool for helping your loved ones get in and out of their houses. A portable ramp adds a lot of convenience to the lives of people with mobility issues. It can be used by people in wheelchairs, scooters, walkers and even children learning how to walk.
Portable ramps are an affordable way to help someone who needs extra assistance getting in and out of their home. They are also easy to use, which means that anyone can use them without worrying about being too strong or too weak.
Some people may not know how to build a portable ramp, but it is actually very simple if you follow these steps:
Measure the distance that needs to be covered by the ramp (this will help you determine how long it should be).
Cut four pieces of wood to the right length using a miter saw or circular saw (make sure you sand down any splinters or sharp edges).
Nail one piece of wood onto one end of each board (using nails or screws)
To create a portable ramp, you’ll need the following materials:
1. Plywood sheets that are 24 inches wide and 32 feet long.
2. Wood glue
3. Nails or screws
4. A hammer and nails or screwdriver
5. A power saw (circular or table saw) or skill saw with an adjustable blade width to cut the plywood sheet into 2-foot sections (for a total of 36 sections). You will also need to cut one more section for each section that is 8 feet long and 2 feet wide. This extra piece will be used as the top decking area of your ramp and must be cut into 2-foot lengths, as well.
6. Two 2x4s (one for each end) that are 12 feet long